2. Getting started with VRM
To connect your system to the VRM Portal, there are two separate steps that need to be taken. First, you need to create a VRM user account and then secondly, the installation needs to be paired with that user account.
It is possible to pair one installation to multiple user accounts. And also it's possible to have multiple users connected to the same installation.
2.1. Requirements
A computer, or mobile device, that can access the Internet.
The VRM Portal ID, which uniquely identifies your system. Depending on the communication device (GX device or GlobalLink 520), the VRM ID can be determined in the following way:
GX devices in general: go to Settings → VRM online portal menu and type down the number shown under VRM Portal ID. The VRM ID consists of a 12-digit combination of letters and numbers. Example: be300d83ff04
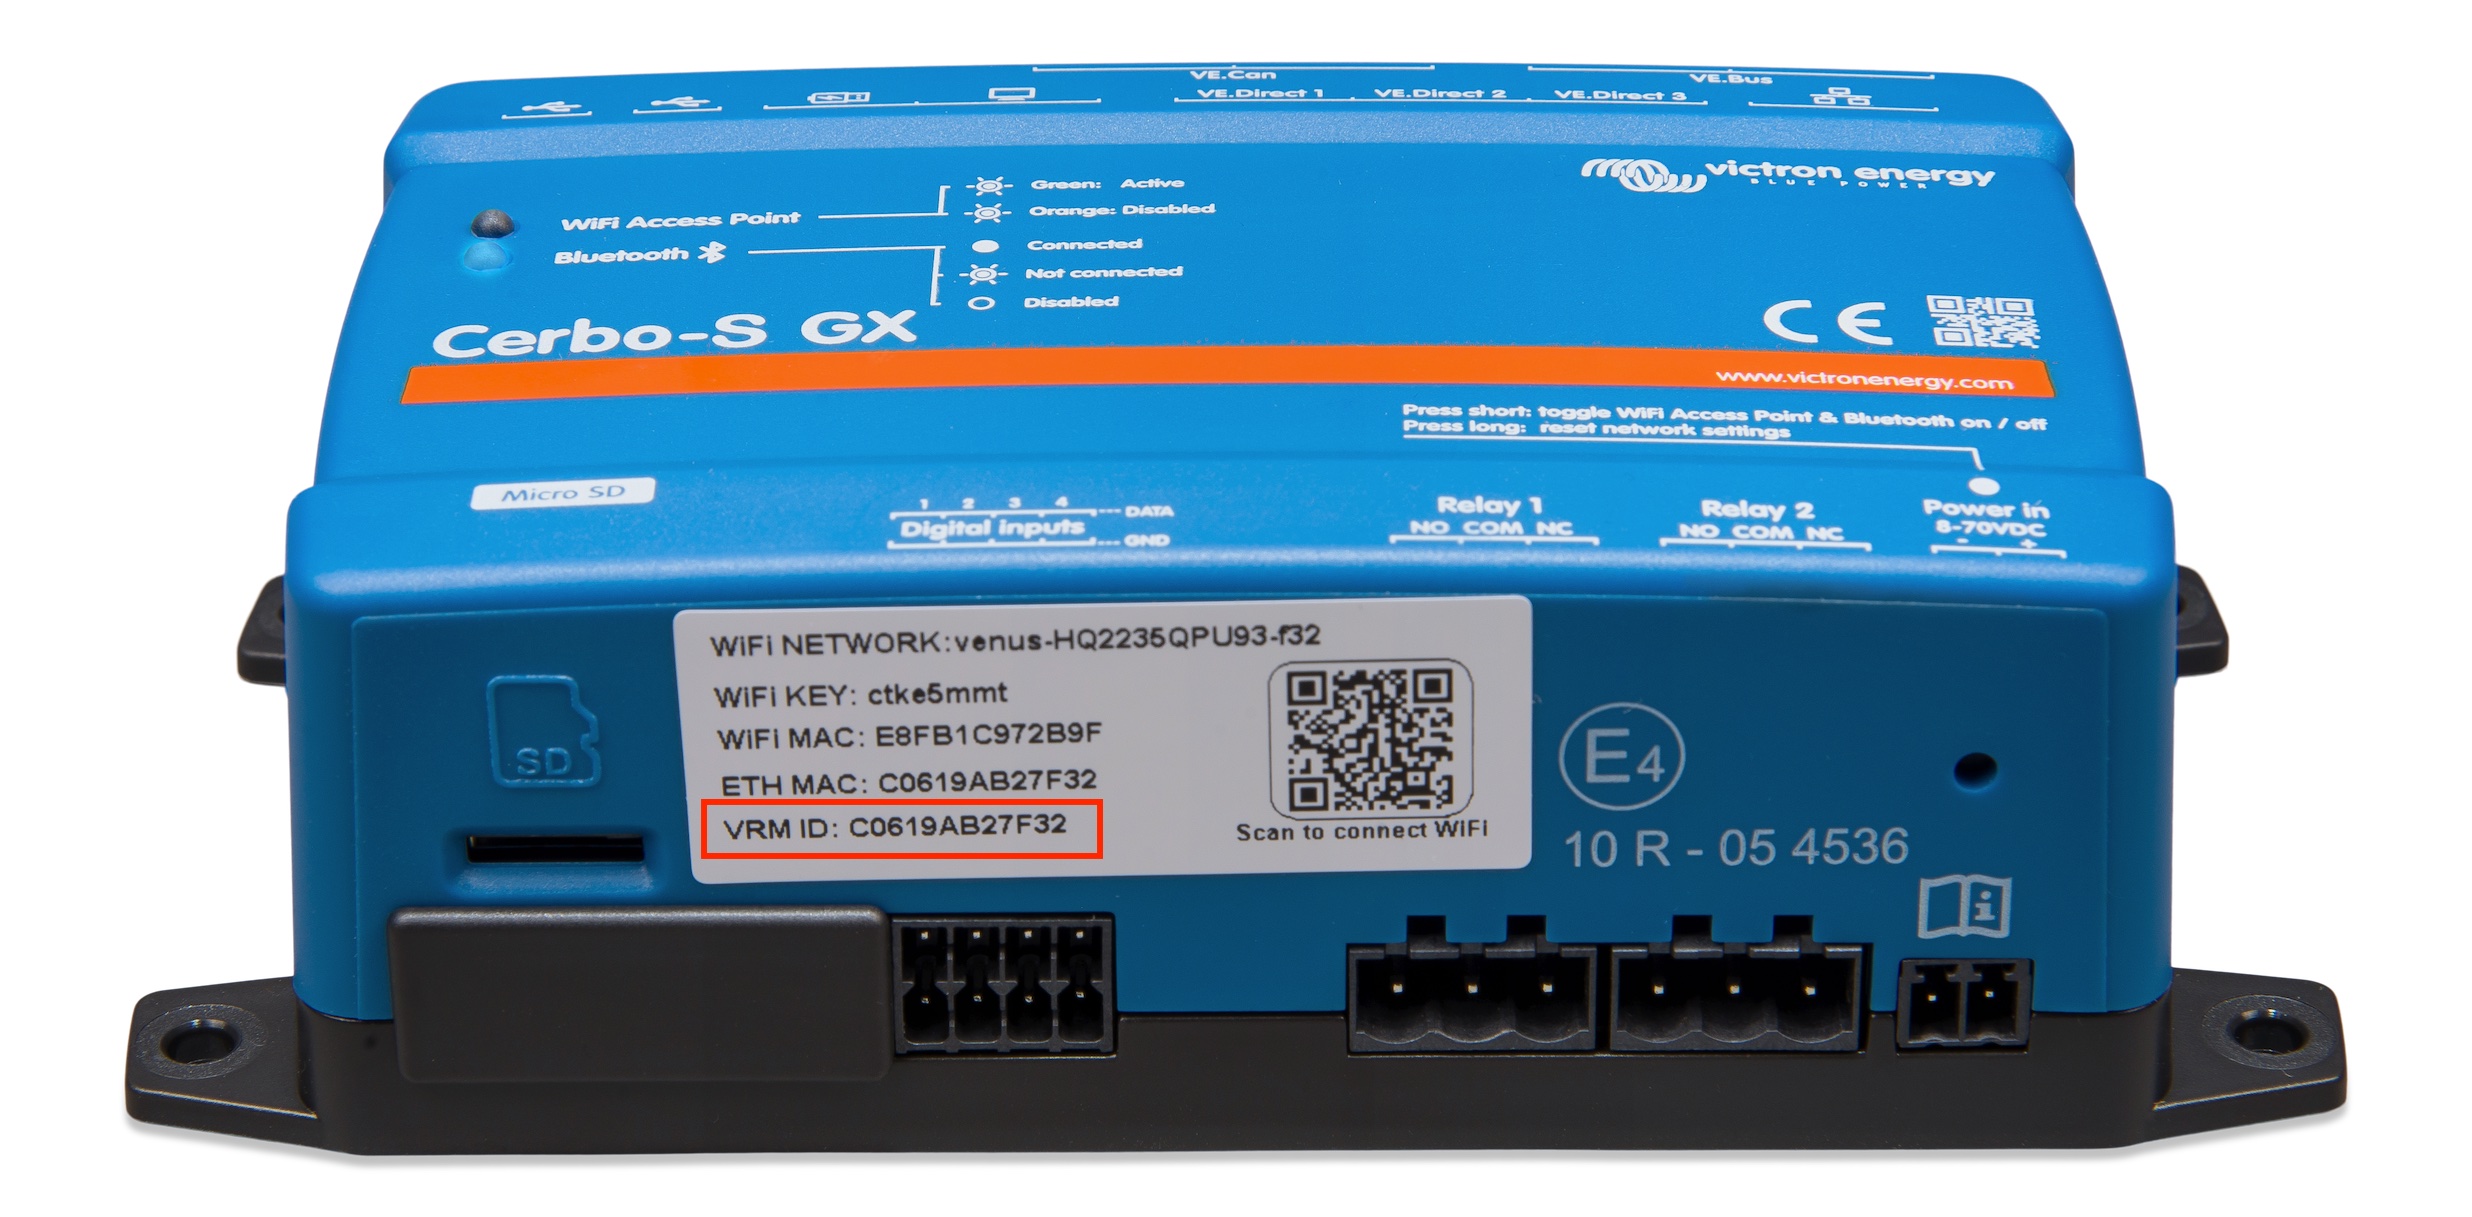
Venus GX & Cerbo GX only: the VRM Portal ID is printed on a label on the side of the GX device.
GlobalLink 520: the VRM Portal ID is printed on a label on the back of the device.
A GX device or a GlobalLink 520 that is connected to the internet.
In order for the installation to register on VRM the GX device or GlobalLink 520 needs to have had at least one successful connection to the internet. Only once the GX has connected to the internet is the unique VRM Portal ID able to added to the user account on the VRM Portal.
VRM Portal mode is set to either Full (default), or Read-only on the GX device → Settings → VRM Online Portal → VRM Portal.
Note
It is recommended, especially when working with SIM cards, to first configure and test the internet connection in your office, before installing it on location. It is not necessary to connect any equipment, such as a MultiPlus or BMV battery monitor: applying power to a standalone GX device or Victron Global Remote will do, as they also connect to the VRM Portal when there are no products connected.
2.2. Step 1 - Create a user account
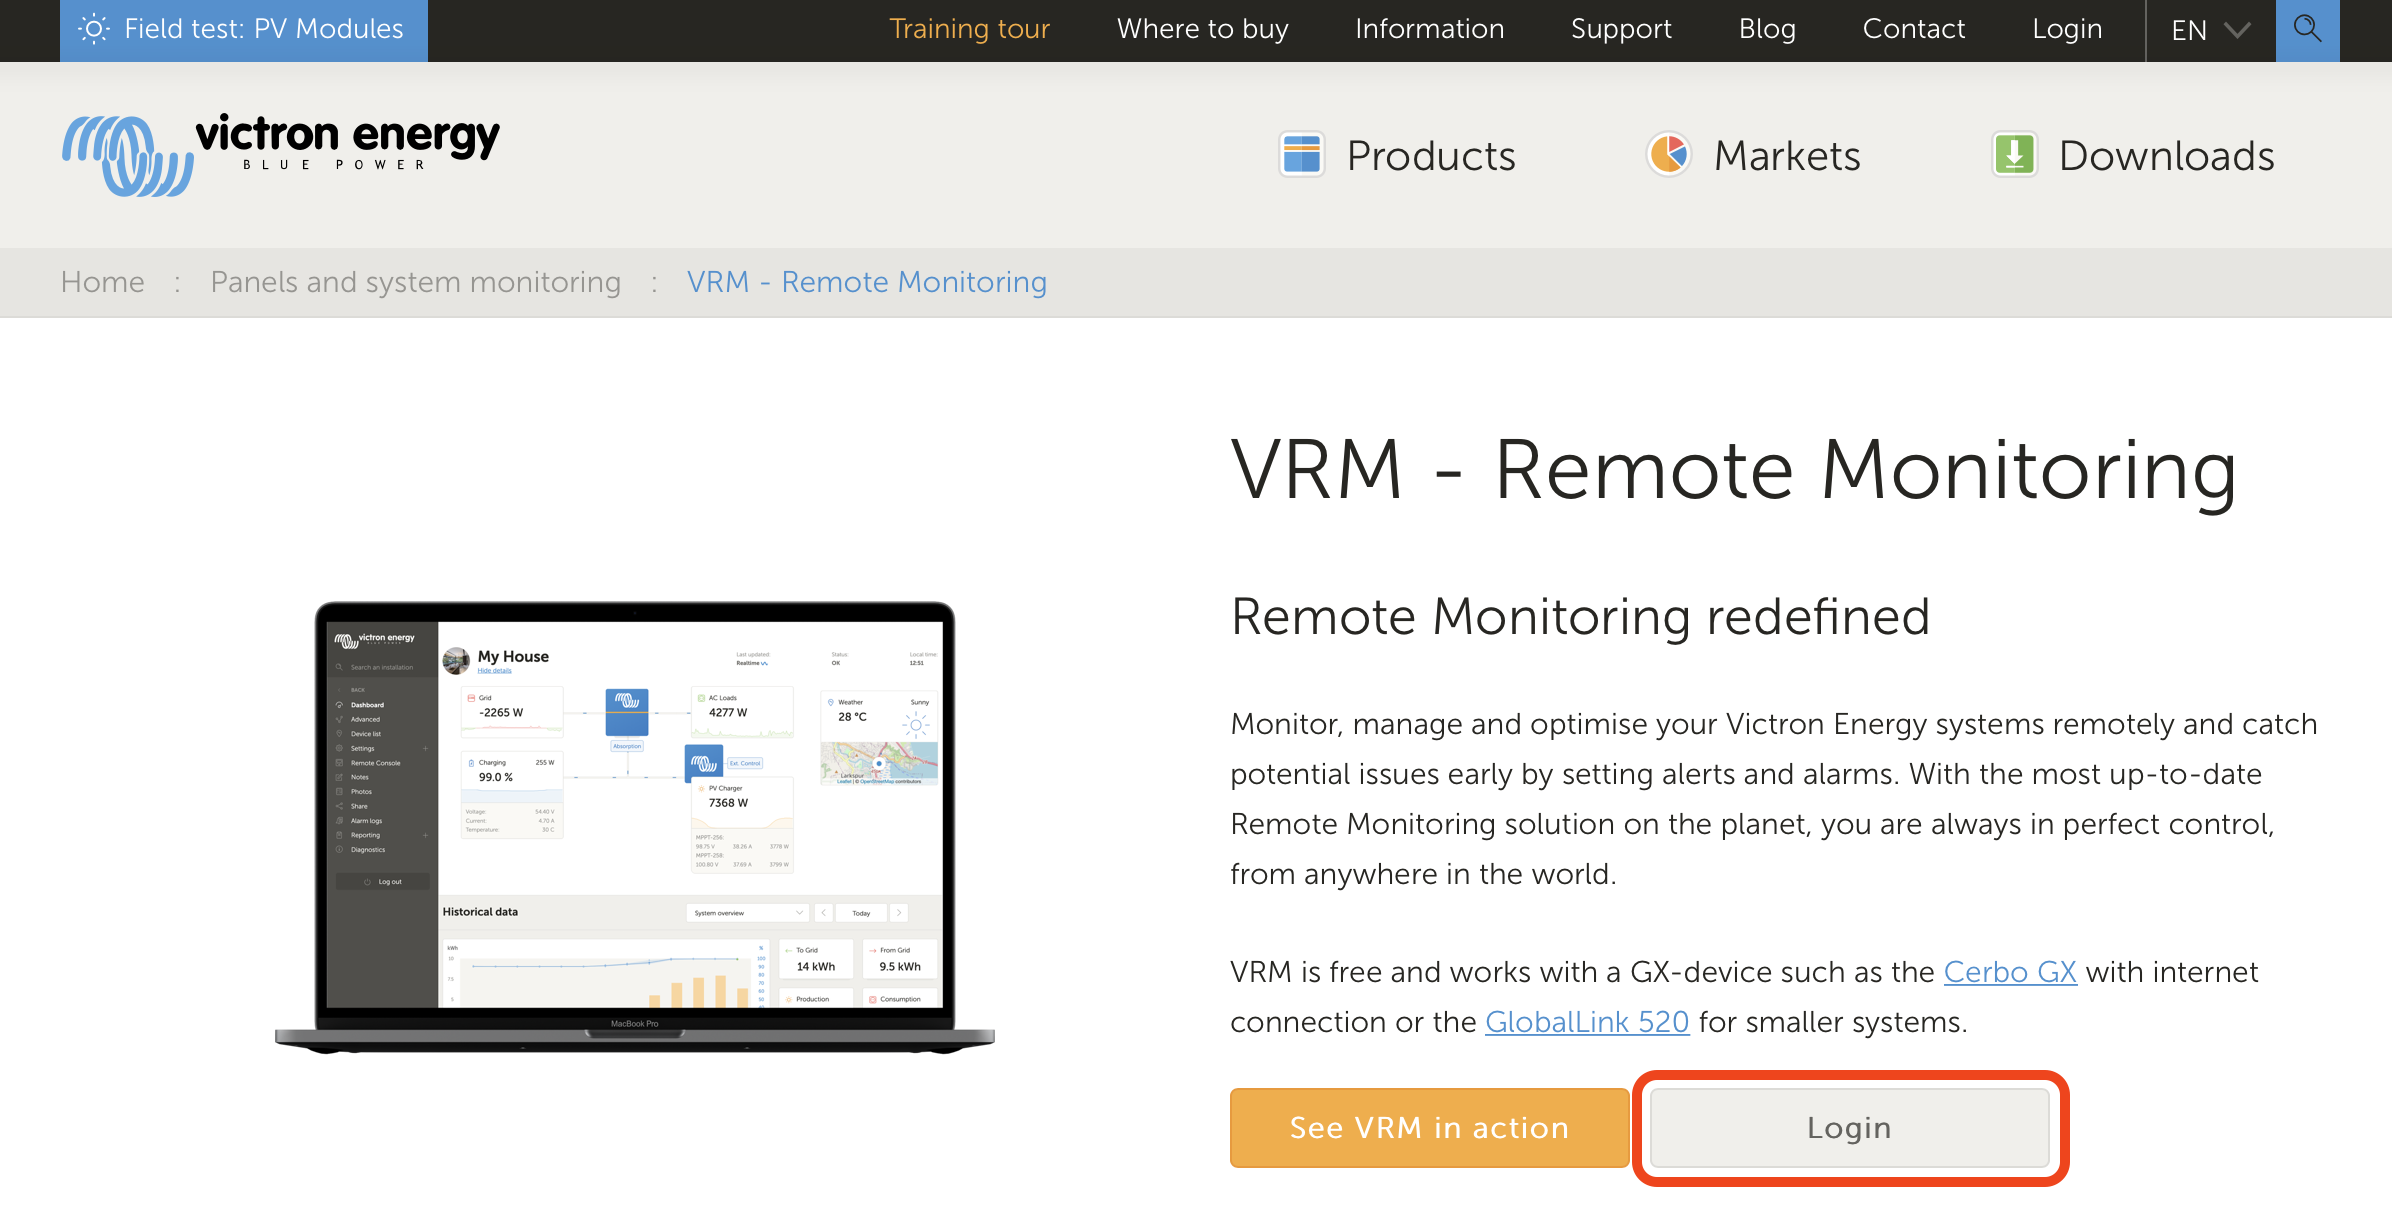
Open a browser window on your computer and go to https://vrm.victronenergy.com.
Click on 'Login'.
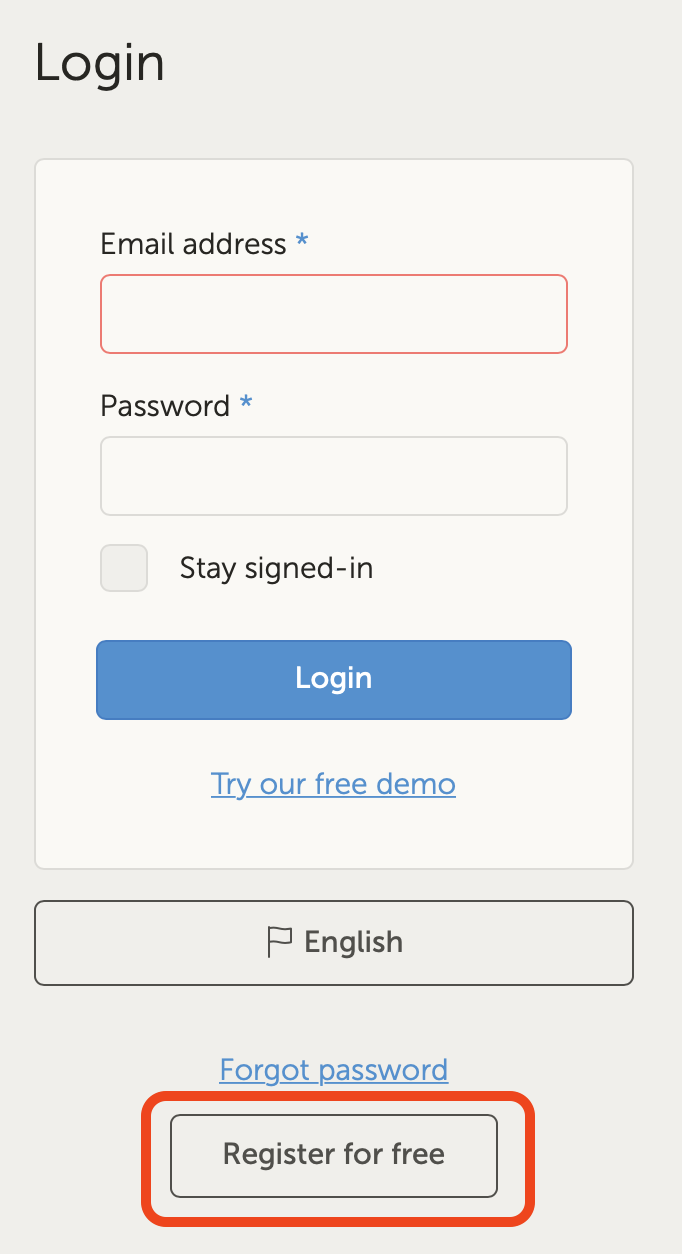
On the next screen scroll down to 'Register for free' and click on it.
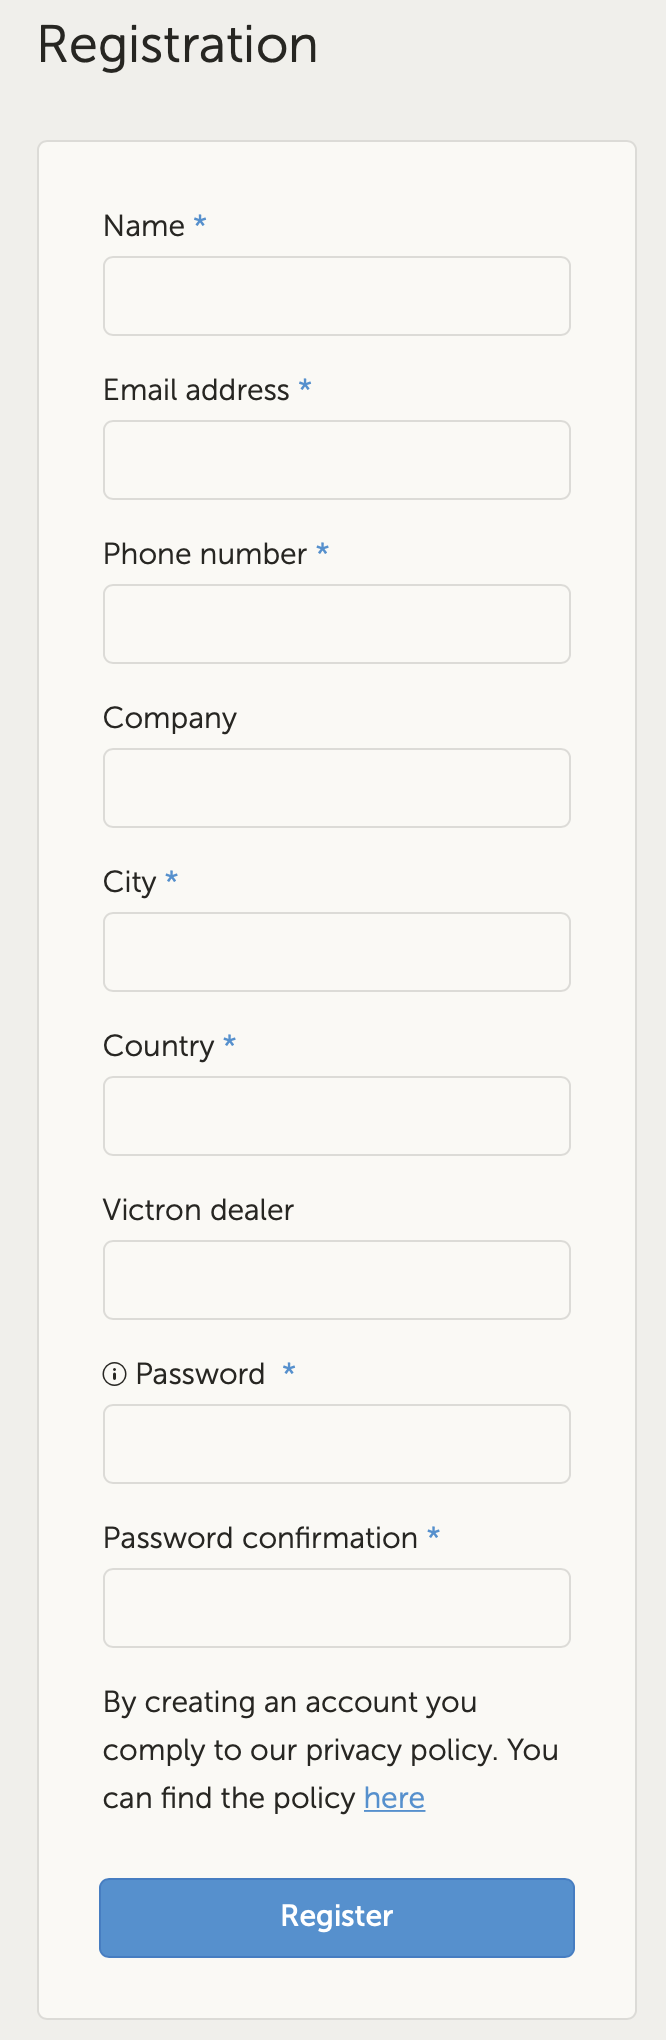
Complete all the requested information and then click on 'Register'.
You will now receive a confirmation email with a link to activate your account.
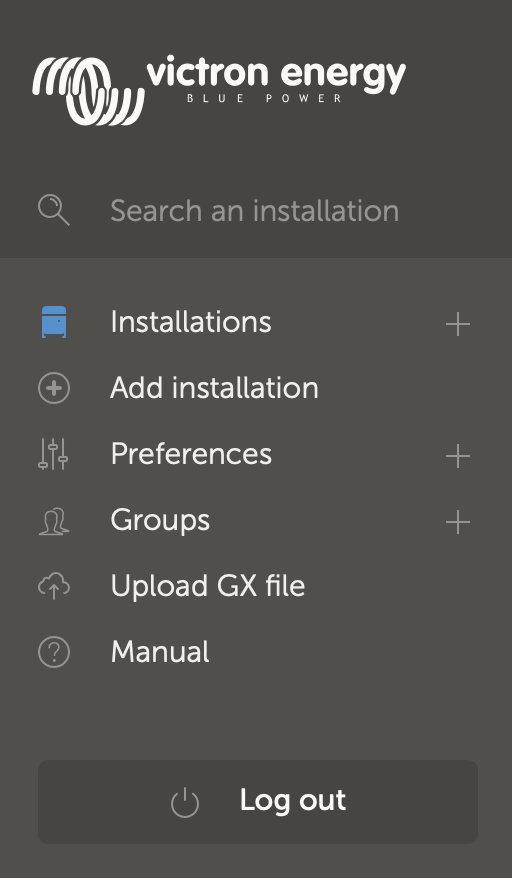
Once activated, account creation and registration is finished. Click 'Add installation' on the left side menu to continue pairing an installation to this user account.
Tip
For added security we recommend adding a two factor authentication (2FA) method to your account.
2.3. Step 2 - Add an installation to the user account
Adding an installation is only possible after the VRM Portal has received the first data transmission of your system. Therefore, make sure that the system has already started communicating with the VRM portal. Or, if it is an off-grid installation using an SD card or USB stick, upload the data file first.
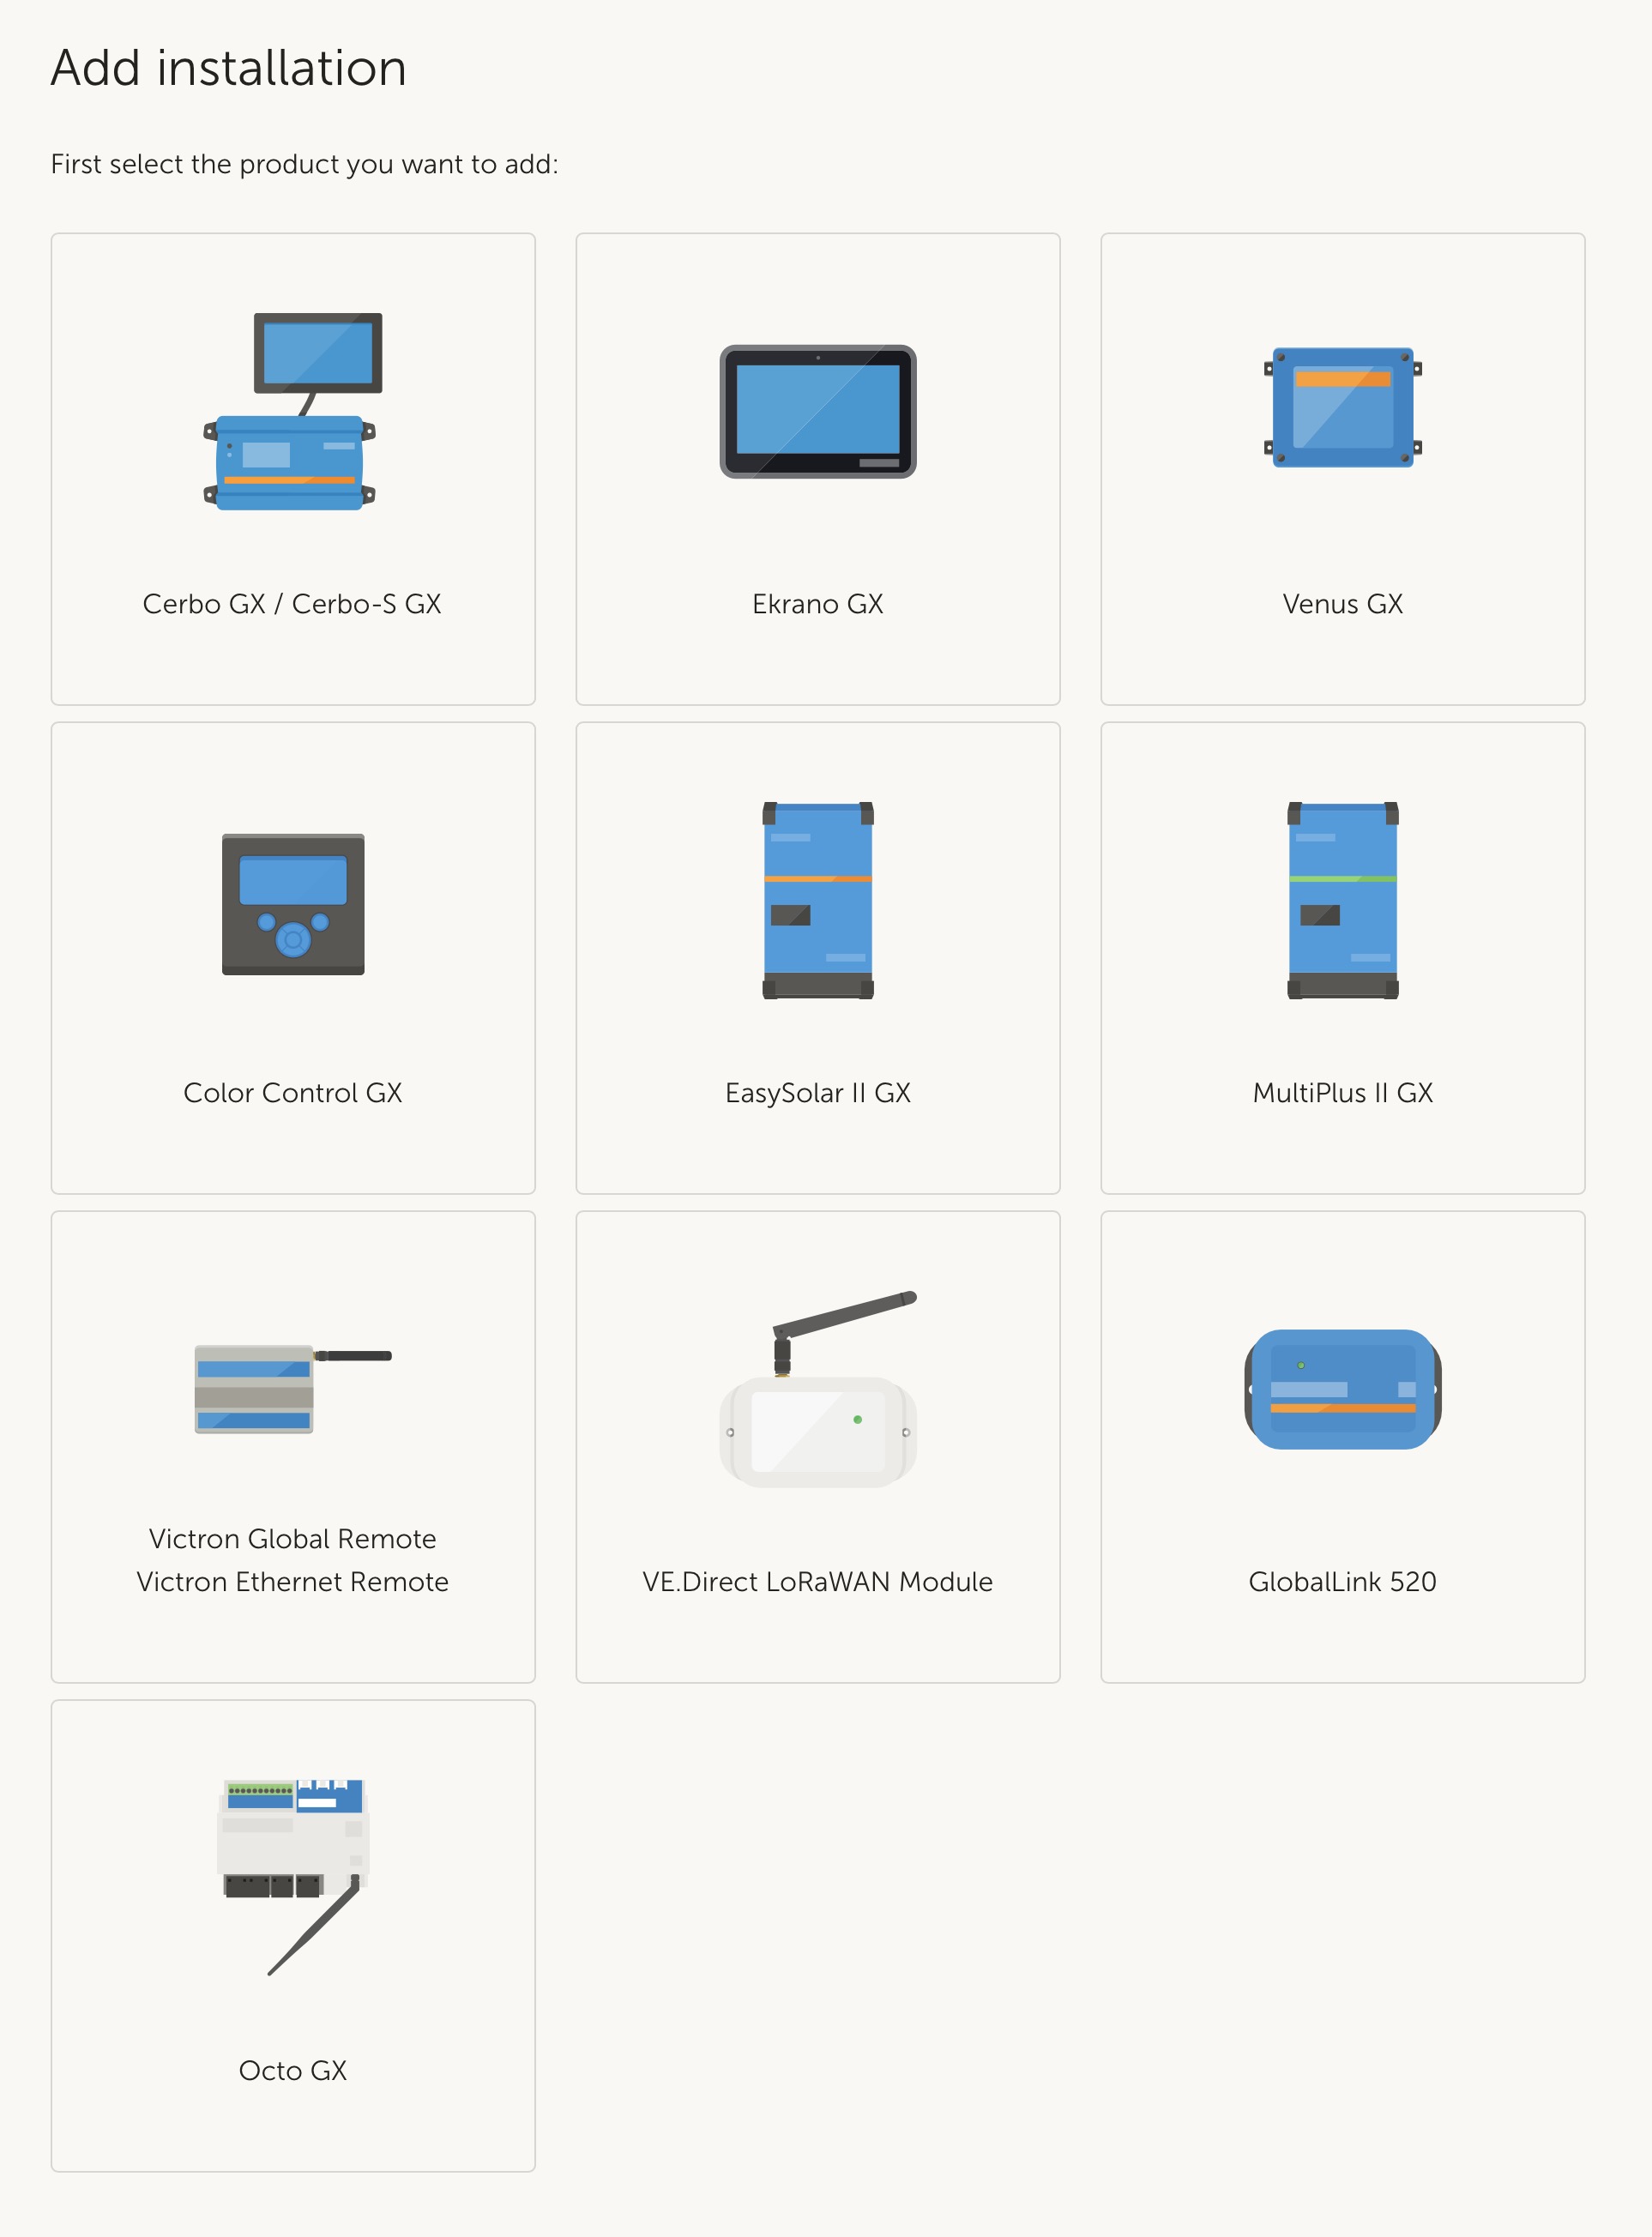
Select the product you want to add. This should be either a GX device, a GlobalLink 520 or one of the other devices shown on the page.
Enter the VRM Portal ID of the device. The VRM ID can be found on a sticker of the respective device, and also in the VRM Online Portal menu. See Requirements.
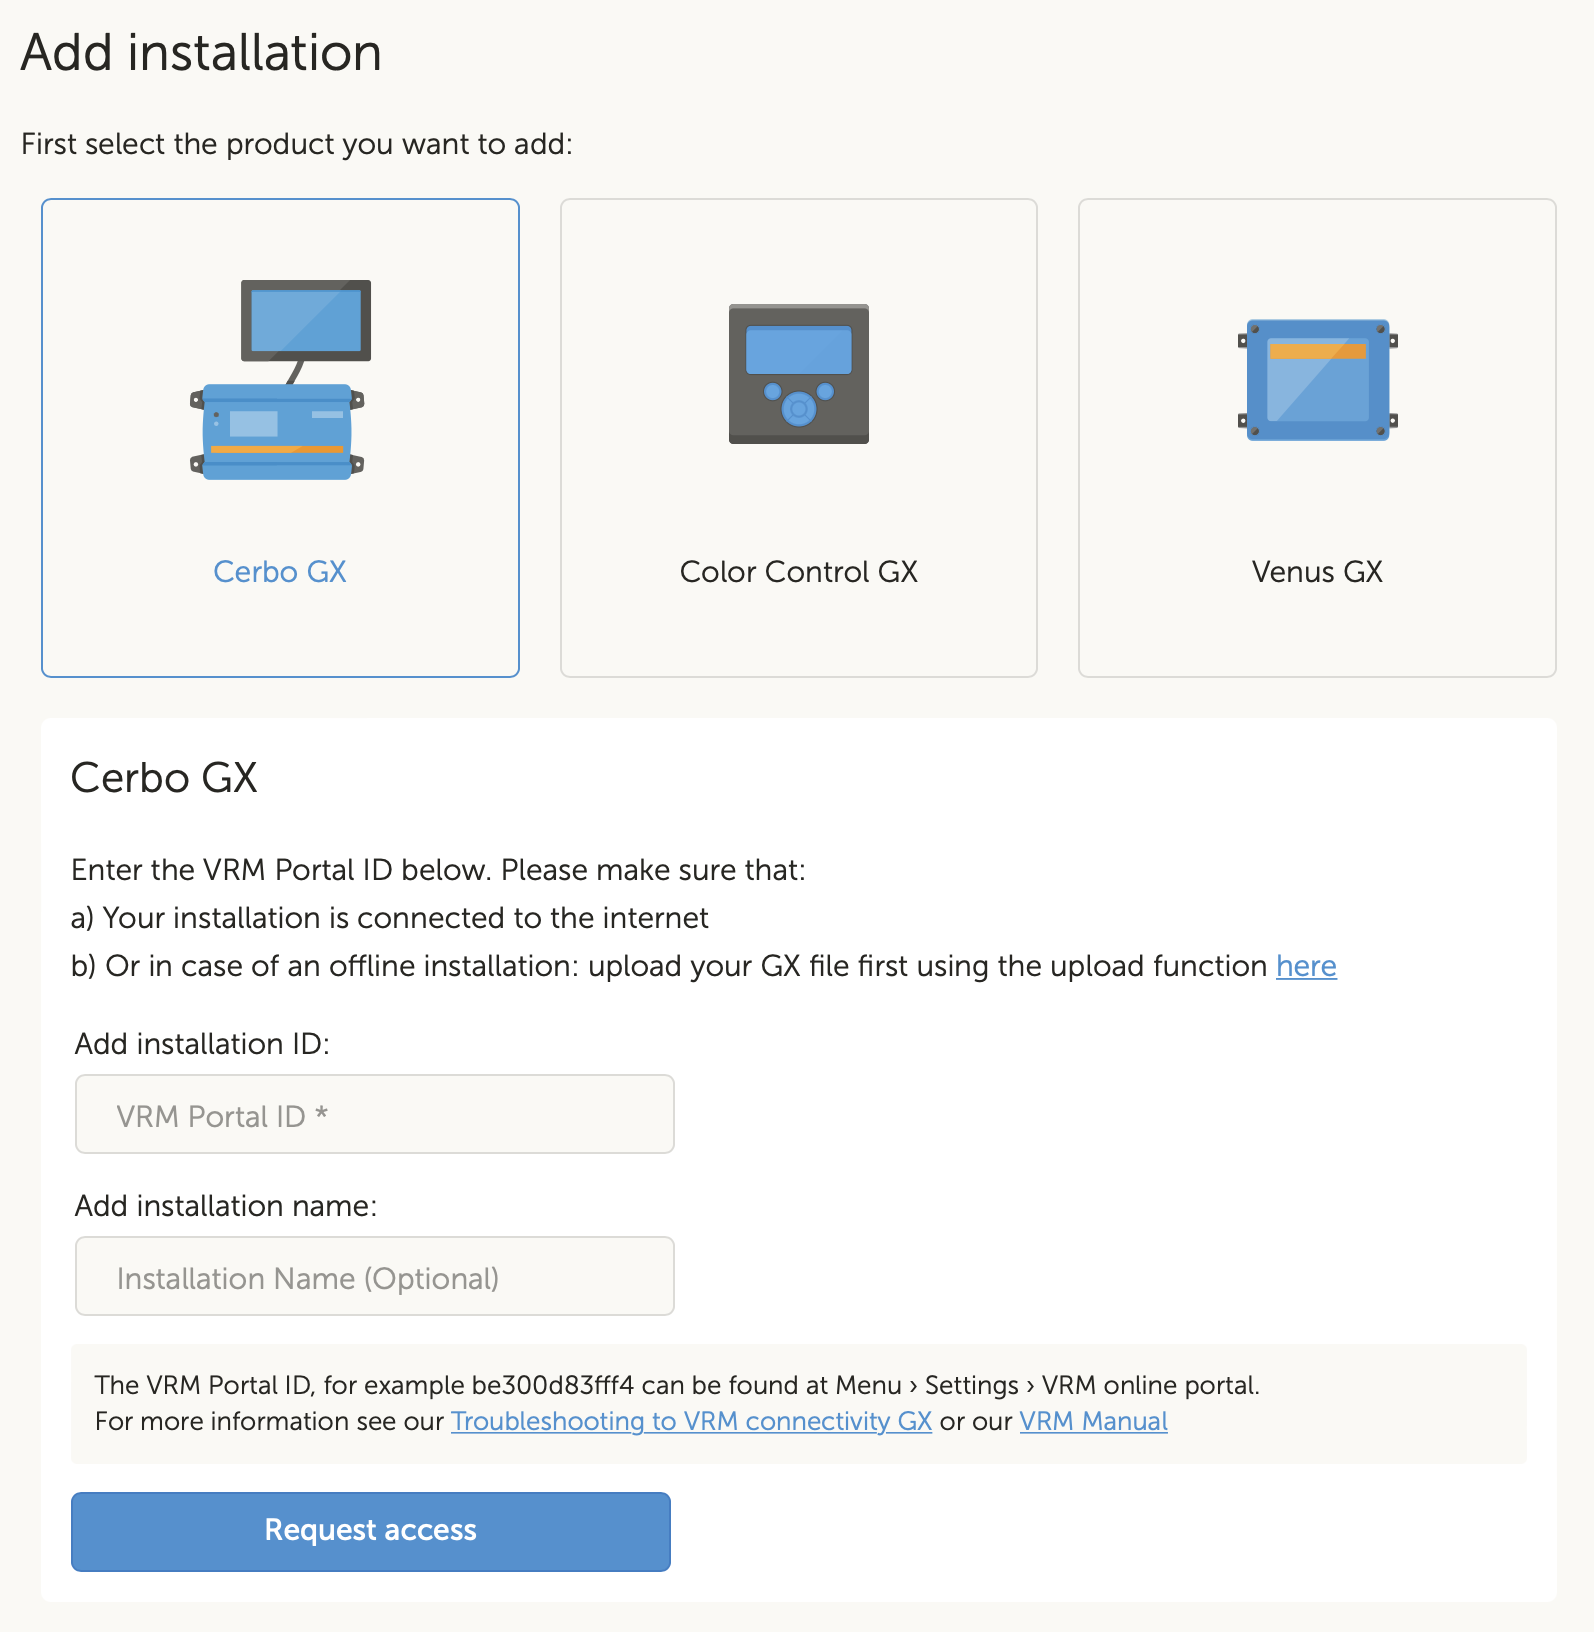
Click Request access and your device is now paired with your VRM user account.
If you are the first user to add this installation to an account, you will automatically have Admin Control rights for this installation. Any subsequent users who try and add the same VRM Portal ID will need to get approval of the site owner. This approval email is automatically sent when they try and add the site to their user account.
Subsequent users will also be added with Technician, or User (read only) access permissions. However, the Admin can assign Admin, or Technician control rights to other users via the Settings -> Users page for that installation.
If you get the "Installation could not be found" error, see the Requirements section and check the system's internet connection.
2.4. Step 3 - Configure the installation
To access configuration settings for an installation select it from the installation overview. Then open the Settings link in the left menu. This menu is only visible when you have Admin or Technician access permissions.
General tab
General settings
This menu allows you to change the system name, see the VRM portal ID and enter the GSM number of the SIM card (e. g. of your router if available, the only function of this field is to keep it in a safe place, nothing else).
Realtime updates
Toggle real-time updates for this installation. This setting is disabled by default. Note that enabling real-time updates will significantly increase data consumption while real-time data is in use. It is suggested to leave this disabled if the site bandwidth or download quota is very limited.
Inverter/Charger Control
Toggle Inverter/Charger control for this installation. Warning - enabling this feature makes it very easy to turn off AC output power, It is suggested to leave this disabled unless you are frequently turning your inverter/charger off. Please read the Inverter controls in VRM chapter for more information before enabling this feature.
Installation avatar
Here you can upload an avatar icon graphic for this installation. This will replace the current avatar visible in the Dashboard.
Unlink this installation from your user account
Unlink removes this installation from your list of installations, without deleting all the data in the database. Other users of this installation will still be able to see its data.
Delete this installation
All data in the database will be deleted. Note that, after deleting, the device needs to be rebooted to resume sending data to the VRM portal. Use this option in case the GX device is moved to another installation.
Replace the GX device of this installation
Use this option in case the old GX device is defective and has been replaced by a new one.
Carefully follow the procedure explained on VRM.
Tags tab
Set Tags
Useful for accounts that have many installations. For example a hybrid generator rental company with four depots: North, South, East, and West. Add the tag of the right depot to all installations. Then in the installation overview you can filter based on these tags.
Set location tab
Set location
Set the location of the installation by dragging the cursor to the right place. This automatically sets the timezone that is used for all x-axes on the graphs as well.
Note that your timezone setting will be updated using the new location only if you do not have it set on the GX device.
Setting a location is also required for the Solar Production Forecast feature.
Set geofence tab
Set geofence
Here you can set a geofence for your installation (typically used in RVs and Boats). This requires a GPS connected to the GX device, for example, connecting a USB GPS to a Cerbo GX.
The GlobalLink 520 does not support GPS but has the ability to identify the cell tower it is connected to, which we can locate using VRM. Note that once you set the location manually in VRM, the location should not update with the cell tower location.
Users
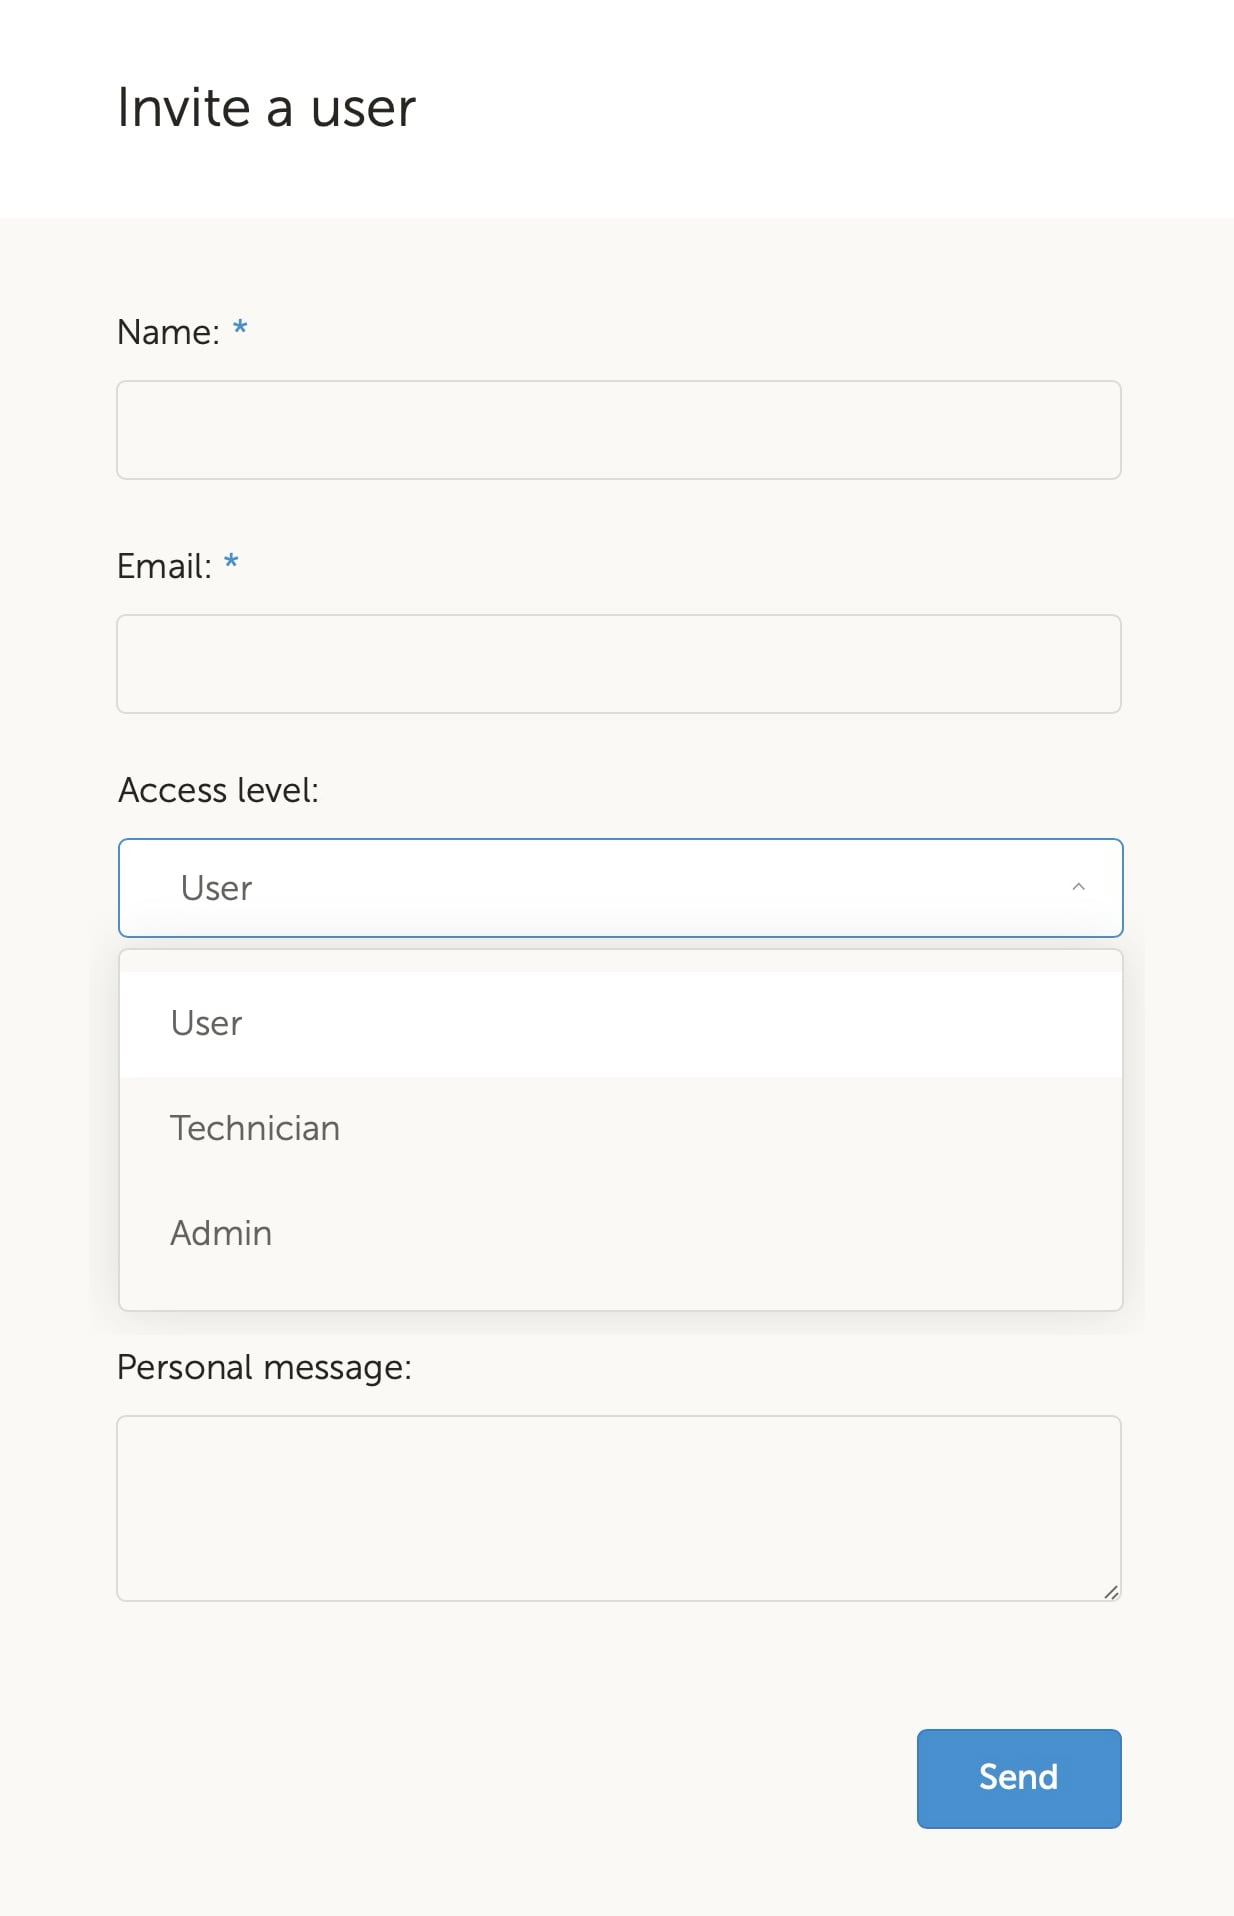
Users and Access Level
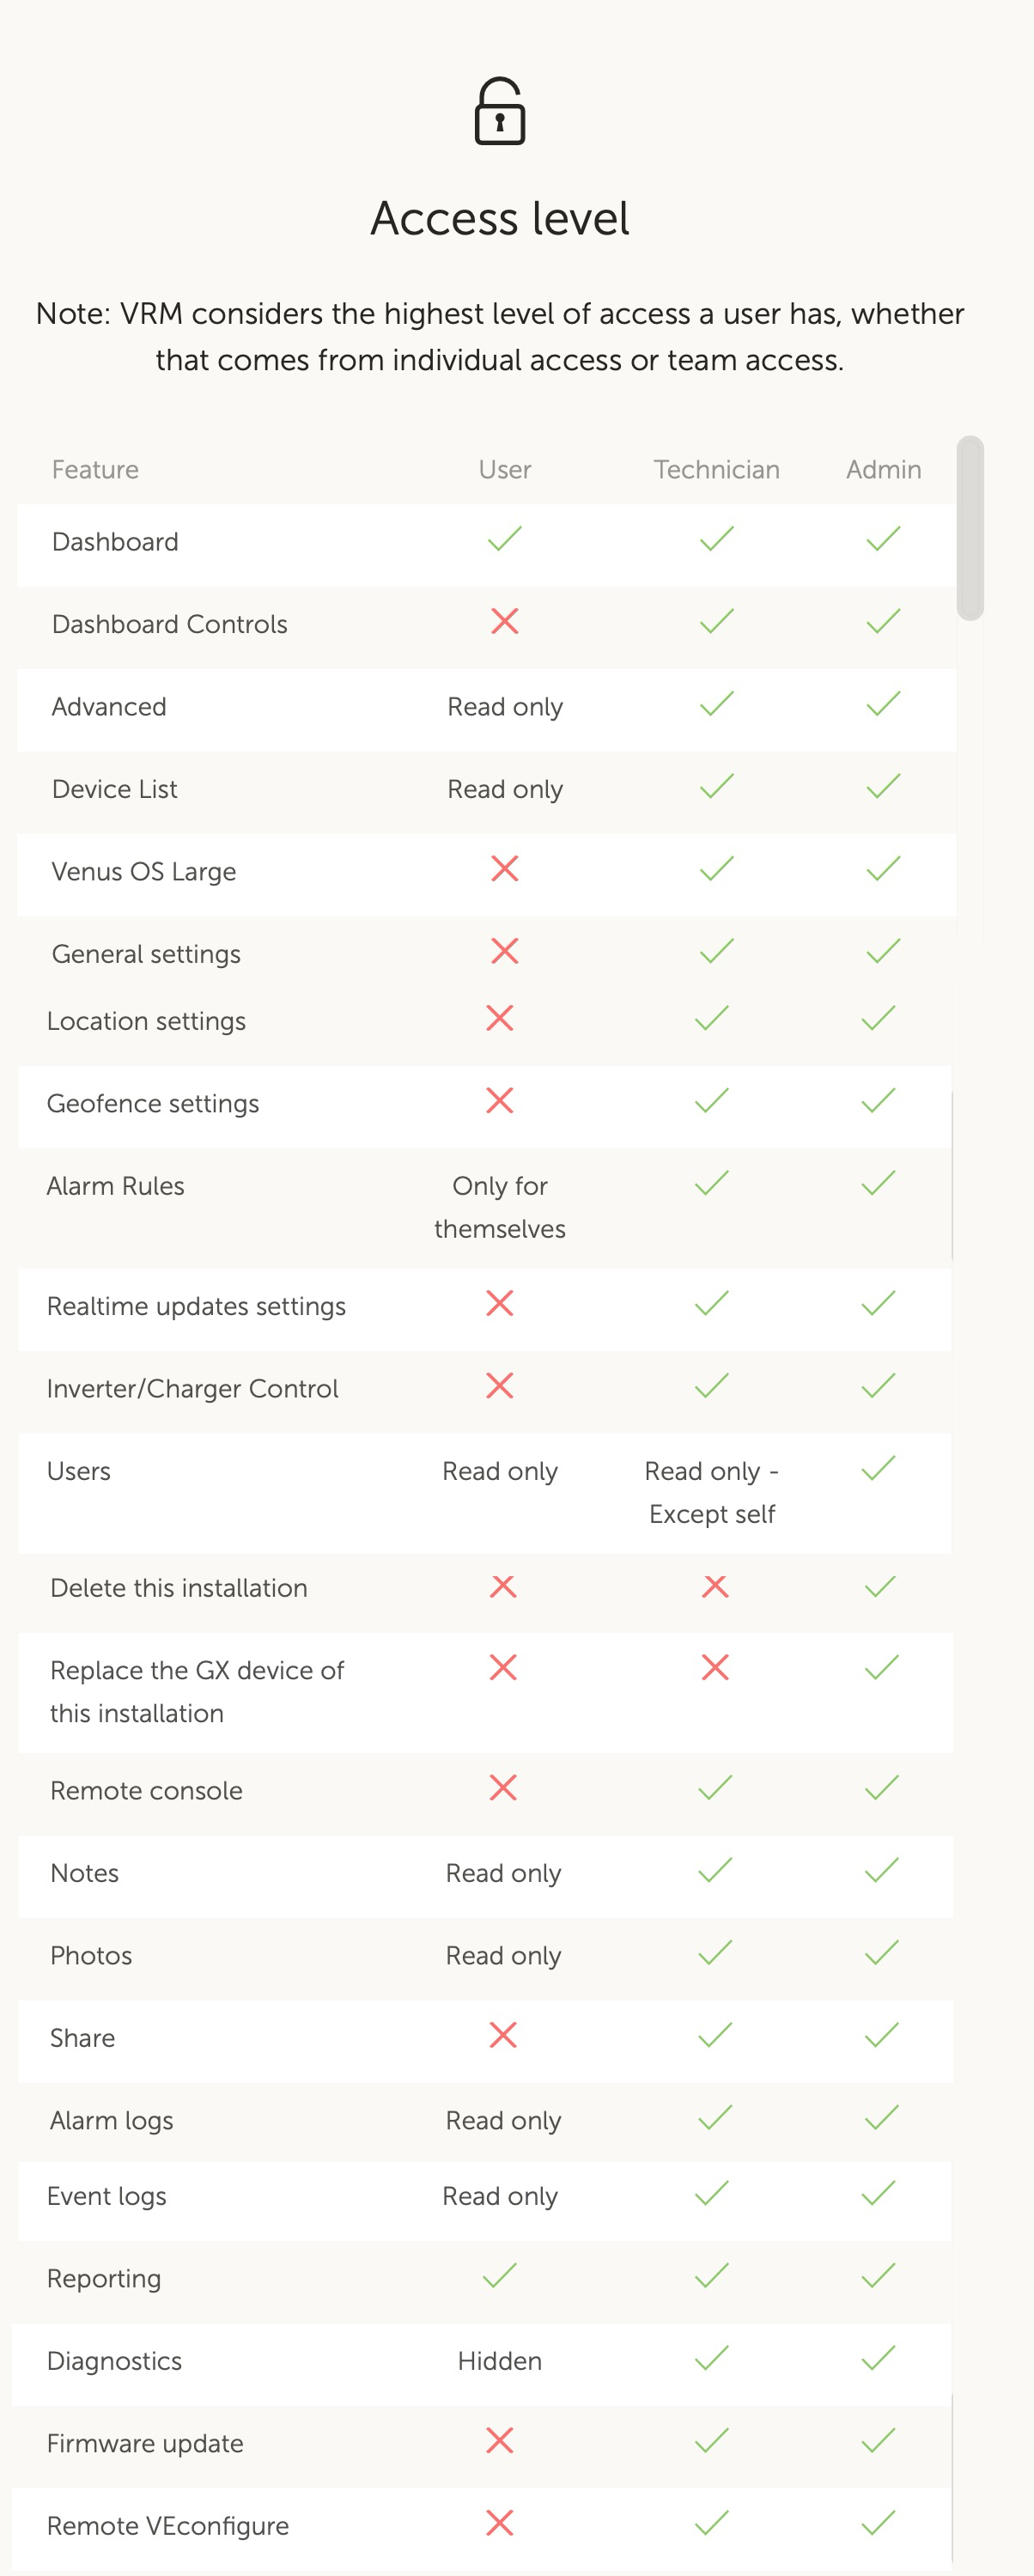
Configure the access level role for users. Access level settings are User (read-only), Technician, and Admin.
User is intended for inexperienced end-users who would like to see how their system is performing, but are read-only and cannot make any changes.
Technician can view a site's diagnostics data, perform firmware updates, and control devices linked to the site. Technicians cannot delete a site, replace the GX device linked to a site, or modify other users' access to the site.
Admin has full access to the site including the ability to add and remove other users. It is assigned by default to the first account that registers the site. A site can have more than one Admin. All sites need at least one Admin, and the last Admin cannot be removed. Consider using Technician role unless that person needs to be able to add or remove other users access.
When a user is linked to a site individually as well as through a team or installation group, VRM considers the highest access level. For example: a user has access level 'user' individually, but a team they are a part of has technician access to a site. VRM will consider them technician on the site, until the team access is revoked.
Pending invitations
Invite new users to this installation.
Teams
Add teams linked to the installation. See the Teams section.
Installation groups
Shows the installation groups to which this installation belongs. See the Installation groups section.
Alarm rules
See VRM Portal alarms and monitoring section.
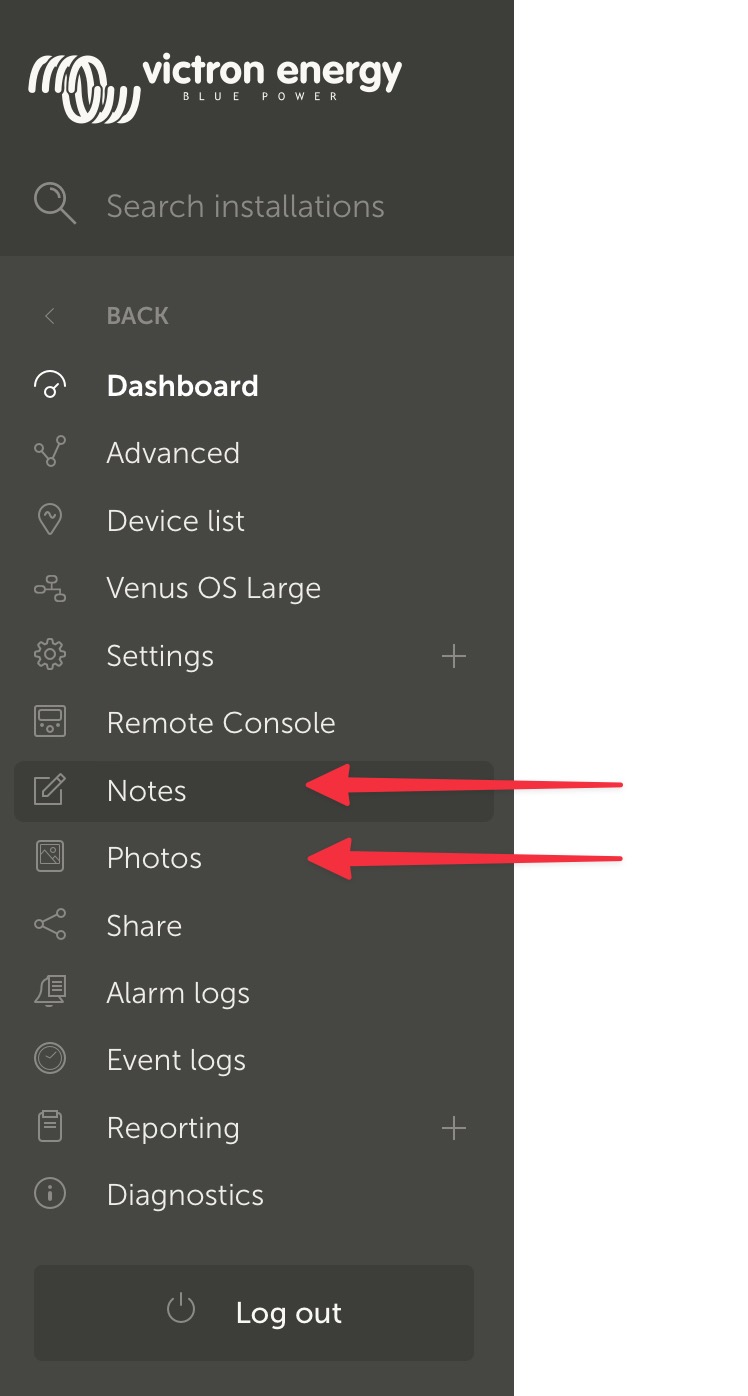
2.5. Step 4 - Add Notes and Photos
Once your site has been added to VRM it is possible to add notes about the system and photos of the installation.
These can be very useful. For example adding photos of system wiring diagrams, and photos of the system as it is installed can help a technician provide remote support.
The Photos and Notes features are both in the left hand sidebar for the site.
 |
2.6. More tips and tricks
Use the 'Invite a user' function to pair this installation to other user accounts as well. It is also possible to invite users that do not yet have a VRM user account. They will automatically be directed to the account creation page.
To see a list of all connected products, their firmware version and serial numbers, go to the Device list tab.
The screensaver enables you to quickly see what state the installation you're currently viewing is in. Configure the screensaver by going to the sidebar -> 'Preferences' -> Display preferences to automatically start after a period of inactivity, or press the “s” key twice while viewing an installation.
Check and if necessary alter the default alarm monitoring setup to your needs. See the VRM Portal alarms and monitoring chapter.
Adding tags to an installation is done in the Settings page. There are two types of tags, automatic tags, and custom tags. In the example below, an automatic tag is shown for this installation with the name: 'NO-ALARM', allowing you to filter and show only systems without active alarms. You can add custom tags by typing the tag name and clicking 'save'.

Remember to install the VRM App on your phone. It is available for free in the App Store and Google Play, for iOS and Android. For Android, it is also possible to download the APK files on our software and downloads page.
