17. Frequently asked questions
17.1. In systems with a BMV, the VE.Bus state of charge is hidden. Why?
If a BMV is in the system, the VE.Bus state of charge (SoC) is not stored into the VRM Database.
When there is a BMV in the system together with a Multi or Quattro, there are two state of charges being calculated for the same battery. Since the algorithms differ (see next FAQ entry for more information) they will hardly ever show the same percentage, and showing both causes confusion and questions.
17.2. What is the difference between the BMV SoC and the VE.Bus SoC?
SOC stands for state of charge. The BMV SoC is the state of charge measured by the BMV Battery Monitor. It calculates this value based on measurements taken by the shunt. And, assuming the shunt is installed in the correct place in the system, it takes into account all the loads and chargers.
The SoC taken from VE.Bus is calculated by our Multis and Quattros. To calculate the SoC, they use only the internally measured charge and discharge currents. Because of this you can only use it for some system types, see here for which ones. The battery capacity can be configured with VEConfigure.
BMV SoC vs VE.Bus SoC algorithm
The BMV has the advantage in its calculations that it sees all DC currents: so this includes MPPT solar charger currents, DC loads (typical in marine and automotive applications, for example alternators, lights and pumps), or other DC chargers. The Multi and Quattro have the advantage that it knows when the bulk state is finished, and can then sync the VE.Bus state of charge to 80%. Instead of (as the BMV does) having to wait until the battery is really full (sync parameters are met), and only then will it sync to 100%. See also Battery State of Charge (SOC) in the GX device manual.
17.3. What are the requirements for the Solar yield and Consumption tab?
These are the Solar yield and the Consumption tab on the VRM Portal:
Solar:

Consumption:

These graphs work on information calculated by the GX device, based on energy counter values read from connected devices.
General requirements
GX device e.g. a Cerbo GX with latest firmware version
Multi or Quattro with a 26 or 27 hardware: the 7 digit firmware number needs to start with 26 or 27. If it starts with 19 or 20, the product has old hardware. To get the consumption and solar yield tabs working for these products, the product needs to be replaced or get a control board upgrade.
Multi or Quattro firmware needs to be recent as well:
1xx firmware (virtual switch), needs to be xxxx159 or newer
2xx firmware (assistants gen1), needs to be xxxx209 or newer
3xx firmware (assistants gen2), needs to be xxxx306 or newer
4xx firmware: all versions will work
More information: VE.Bus firmware versions explained
Extra requirements for systems with AC Coupled PV (i.e. a grid-tie inverter on the output), for example ESS
PV Inverter power and energy needs to be measured. For example a direct Fronius connection, or with our AC Current Sensor.
There's an issue when a single EM24 three-phase meter is used to measure both grid- and PV-power (grid on its phase 1 terminals and PV power on phase 2). In this case the solar to grid value is incorrect. The solution is to use an ET340 or ET112. See Energy Meters for details.
When using the AC Current Sensor, make sure to use the latest version of the Assistant, as released in October 2014. See the AC Current Sensor Assistant.
'Has DC system' GX device setting related limitations
‘Has DC system’ is a feature on a GX device. When that config switch is enabled, a new box called 'DC Power' appears on the GX display. Its value is calculated from the differential between the power measured by the BMS or battery monitor, and the power flow measured by the inverter/charger and other sources that are actively monitored by the GX. Its typical use is in Marine and Automotive applications, as they have alternators, and lights, fridges, and many more DC loads. For more details, see the GX device manual.
If this feature is enabled, and the used battery monitor is a BMV 700 or 712, then the minimum required BMV firmware version to make the VRM Energy dashboards operate correctly is v3.08.
The calculated value for 'DC Power' is not used in any way by the GX, beyond just being displayed 'on screen'. In particular it is not logged on the VRM portal and it is not included in system calculation and it does not appear as part of the recorded Solar Yield.
Other limitations
A system with multiple MPPTs, even a mix of VE.Can and VE.Direct, is supported: the algorithm will totalise all the counters - as long as they are all actively monitored.
Multiple AC current sensors measuring multiple PV inverters is supported as well.
These overviews work correctly when Victron Solar Chargers are used. When one or more non-Victron solar chargers are used, the system cannot read their energy yields, and because of that the resulting overviews are incorrect and unreliable.
The VGR, VGR2 and VER do not provide any energy data.
Combining MPPT Solar Chargers and PV Inverters in a system is supported.
Note that the same data used to show these energy graphs is also available as a download. See the Advanced tab on VRM, and then the download icon on the top right.
17.4. How does the screensaver work? How is the displayed state determined?
The screensaver is disabled by default but can be configured in your profile settings to automatically show after a period of inactivity. You can also open the screensaver directly by pressing the 's' key twice.
The screensaver displays which source of energy your installation is currently running on. This is determined by looking at which source of energy (the sources being solar, generator, battery and grid) is delivering the largest amount of energy to consumers (locally connected devices using the energy). Then, if no consumers are using any power, it looks at which source provides the largest amount of energy to the battery. Then, if no battery is connected or it is not being charged, it looks at which source is delivering the most energy back to the grid. If at this point the source is still not determined, apparently no energy is being produced or used anywhere, and the state defaults to 'on grid'.
17.5. I want to analyze the data in a spreadsheet, how do I do this?
Open the Advanced tab.
Choose a date range.
Click the download button
 at the top right. A link where to download the spreadsheet (choose between CSV or XLS) will be sent to your email address.
17.6. How can I remove an installation from my account?
Go to the tab Settings → General.
Scroll to the bottom of that page.
Click the Unlink button
 . This will unlink the installation from your account.
17.7. How can I move an installation's history from one GX device to another?
Connect the new GX device to the internet and register it. Take note of the VRM Portal ID.
Open the old site on VRM and go to Settings → General.
Scroll down to "Replace the GX device of this installation". The further procedure is explained there.
17.8. Why are some values shown red?
In case the data is too old, which means older than would have been expected from the configured logging interval, the value will be shown red. Use the System overview page to check if there are products that are not connected anymore. One typical example where this might happen is:
The system has been connected to a three-phase system, and now it is connected to a single-phase system. But the data for L2 and L3 is still being shown in a red color. Reboot the gateway (usually a GX device) to reset the data.
17.9. For how long is the data being stored?
Advanced data shown in the Advanced tab is being stored for at least 6 months, with exception of Battery state of charge.
Dashboard data used to show the solar yield and the consumption information (kWh data) is stored for a minimum of 5 years.
17.10. How can I zoom out any of the graphs?
The graphs can be zoomed out to their original zoom level by clicking the cog wheel icon
 in the top right of the graph and then clicking on 'Reset zoom' or by clicking Reset zoom on the graph itself.
17.11. Why do I get such a weird high value for AC Input when a PV inverter is feeding back to the grid through the Multi?
Since VE.Bus firmware version xxxx205, the Multis and Quattros report the direction of the AC input current. Earlier VE.Bus versions reported only the absolute value: you could not see if the power was being fed back to the mains, or taken from the mains.
VGRs, VGR2s and VERs interpret this value incorrectly. They show around 650 Amps instead of -5 Amps.
If you really want to see the right data, replace the VGR/VGR2/VER with a Cerbo GX.
17.12. What is the column logtime Offset in the XLS/CSV download for?
Use it to see the quality of the Internet connection.
The values relate to the backlog feature. Usually the column is either empty, or you see series of rows with a decreasing logtime offset. Once zero, the columns are empty again. These series mean that there was a problem with the Internet connection. And the value shown is the number of seconds for which that particular row of data had been backlogged.
17.13. How can I change my email address, add new additional users, or delete my VRM account?
Add new additional users:
Login to VRM with the existing account.
Go to Settings → Users.
Under the Pending invitations item on the right, click Invite user. See this video example.
If the new user will be an Admin, you will need to enable full control.
A confirmation email will be sent to the new user to accept the invitation.
Change your own email address:
From the Installation overview click 'BACK' in the top left
Click 'Preferences'
Click 'Profile'
Enter the new email address and hit the blue 'Save' button
That is all, there will be an email sent to the new email address and you can use that to login. No data will be lost during this procedure.
Delete your VRM account
To delete your VRM account, go to the profile settings (https://vrm.victronenergy.com/profile/settings) and click the ‘delete account’ button at the bottom of that page. Note that this action cannot be undone by any admin, so ensure that all of your VRM installations are transferred to a trusted user before carrying out this action.
17.14. How can I upload very large database files to the VRM with a 200MB upload limit?
The VRM Portal allows up to 200MB uploads for GX device data files. The portal will accept gzip files, so you can compress the sql database file and then upload the compressed version. A compressed 200MB file can contain several years worth of data!
17.15. I have just connected my GX device after not being online for a long time, why is it not updating?
The first thing to check is the VRM menu to make sure that the VRM is connected and communicating - if it isn't, follow the troubleshooting here.
If you are seeing that the GX device is connecting to VRM, then it can take up to a few hours or more for the data to sync to VRM and for the updates to show, depending on how much data there is to catch up.
If it still has not got up to date after 24 hours of connection time - try asking for more help on Victron Community.
17.16. Why can't I get push notifications in my Google Chrome browser on a Apple Mac?
There are two possible reasons why you don't receive notifications:
Google Chrome is not allowed to show notifications on macOS
Google Chrome has disabled notifications in the app settings
Allow Chrome to send notifications to the macOS Notification Center by opening System Preferences → Notifications in macOS. Then scroll down to Google Chrome and turn on “Allow notifications”.
Also make sure Notifications are enabled in the Chrome app settings (in the Chrome app go to Settings → Content → Notifications) and the VRM domain is allowed to send notifications. Check out this Community post that explains this process in more detail.
17.17. When trying to add a new installation I get a popup message saying that all administrators of the installation have been notified by email, why?
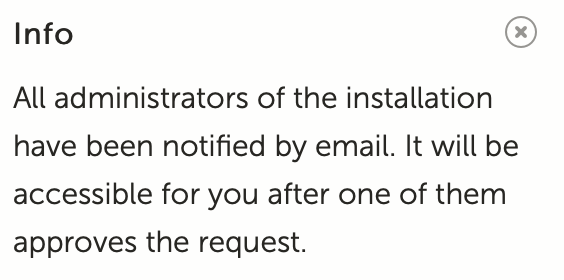 |
There are two possible reasons for this to show:
You purchased a second-hand installation with the GX device while the system (and with that the VRM Portal ID of the GX device) is still registered to the previous owner.
You had the system installed by a professional installer who only registered you as a user without admin rights.
The easiest remedy is to contact your place of purchase, and ask them to approve the request in their email. This email is automatically sent.
If you do not receive a reply from them directly, and you wish to modify the Administrator of the VRM site, you will need to contact the dealer from whom the part was purchased.
Send an email or call the dealer and make a "Victron VRM Change of Administrator Request" with them, along with the VRM Portal ID, and proof of purchase/ownership of the device.
If the Installer, Dealer, Distributor chain is no longer available, or unknown you will need to open a support ticket here: https://professional.victronenergy.com/support/
17.18. How can I access more detailed diagnostic information about a VRM site?
There is a special advanced technician page that allows for quickly searching a lot of the most recently received data attributes by VRM.
You can access this data by adding the suffix /diagnostics to the site URL in the location bar of your browser. e.g https://vrm.victronenergy.com/installation/1234/diagnostics
Note
Not all of the information available in the diagnostics page is documented, please use the modifications space on the Victron Community for any questions.