Setup using the charger
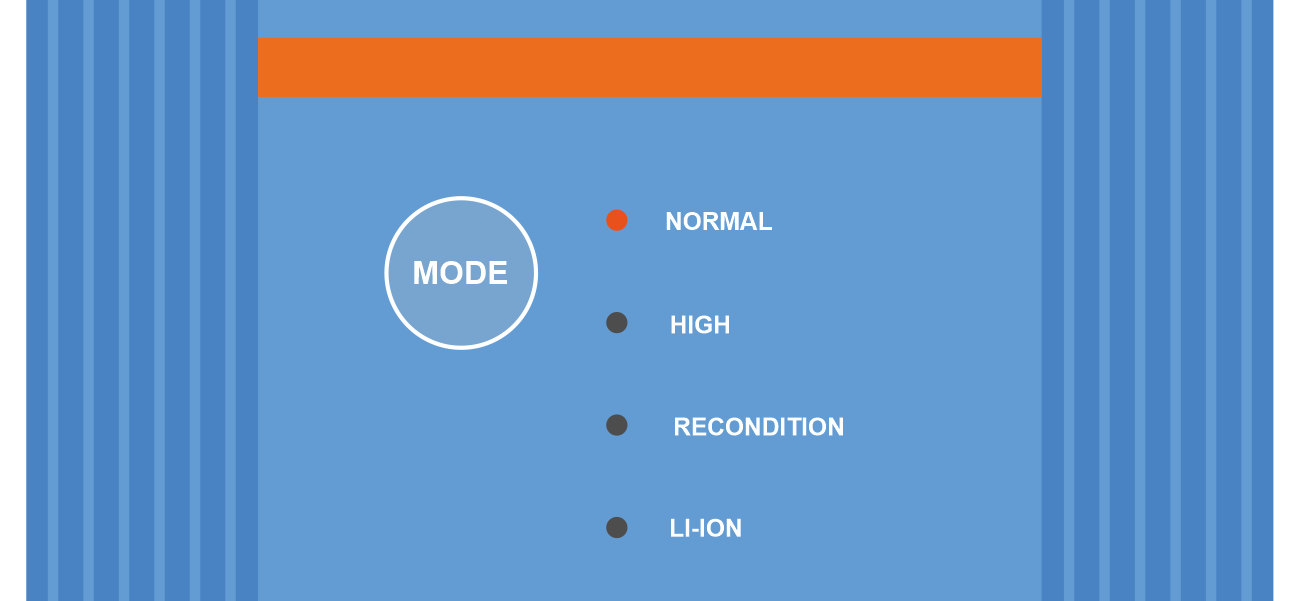
The charge mode and charge current limit most appropriate for the battery type and capacity can be selected directly on the charger, using the MODE button.
Connect the AC power cable to a mains power outlet; after a short delay, the LEDs indicating the current charge mode and charge state will illuminate.

Select the most appropriate mode from the integrated charge presets (Normal, Normal + Recondition, High, High + Recondition or Li-ion) by briefly pressing the MODE button on the charger to cycle through each option; the LED beside the currently selected charge mode (NORMAL / HIGH / LI-ION) will be illuminated, as well as the RECONDITION LED if recondition stage is enabled.
Ensure that recondition stage is only enabled when required, as unnecessary or overuse will reduce battery life.
If required, enable low current mode (charge current limited to 50% of the maximum rated charge current and disabled fan); to enable (or disable) low current mode depress and hold the MODE button for 6 seconds, when enabled the NIGHT LED will blink.
Alternatively night mode can be enabled, which temporarily activates low current mode for a period of 8 hours (typically overnight to eliminate fan noise); to enable (or disable) night mode depress and hold the MODE button for 3 seconds, when enabled the NIGHT LED will be illuminated.
The charger will automatically store the selected charge mode and recall it for future charge cycles (even after being disconnected from power).
Notice
To ensure proper charging, battery longevity and safe operation it is important to select a charge mode appropriate for the battery type and capacity being charged; refer to the 'Operation > Charge modes' section and the battery manufacturer’s recommendations for more information.