Synchronised charging
To setup a VE.Smart Network with Synchronised charging:
Connect the AC power cable for all compatible chargers to a mains power outlet; after a short delay, the LEDs indicating the current charge mode and charge state will illuminate.
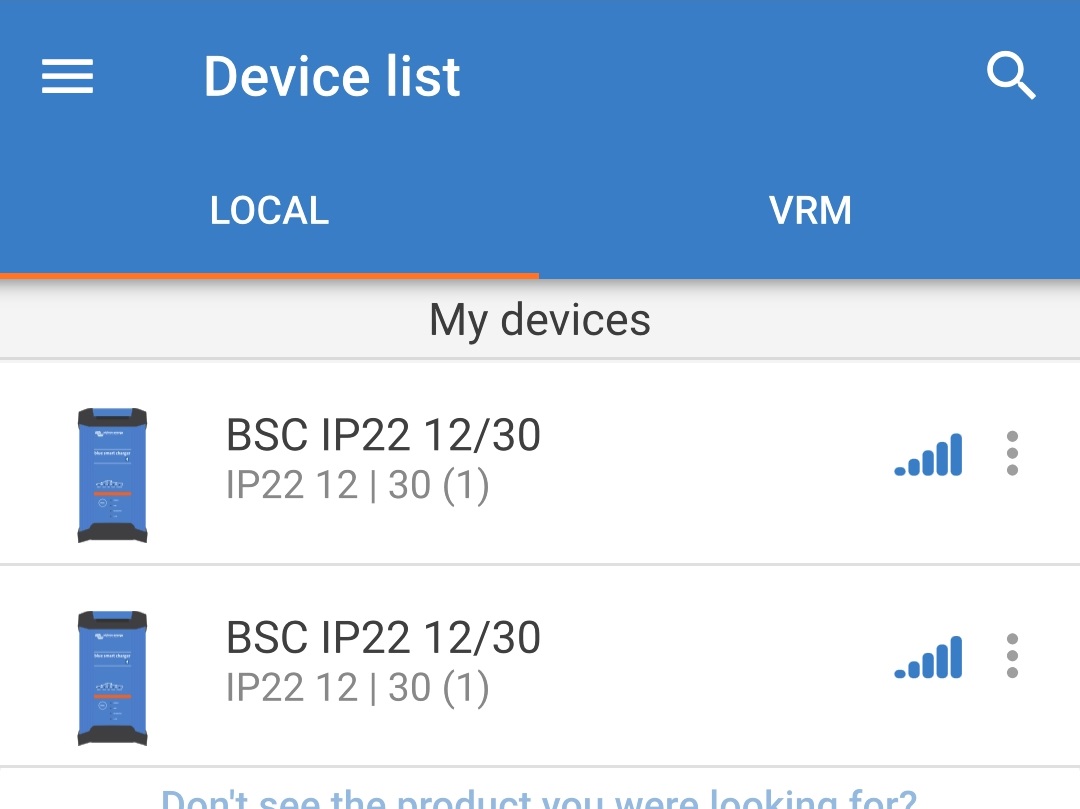
Using a Bluetooth enabled device (such as a mobile phone or tablet), open the VictronConnect app and locate the first Blue Smart IP22 Charger in the 'LOCAL' page device list, then connect to the device (default Bluetooth PIN code is 000000).
Select the ‘Setting’ icon (gear in the top right corner) to access the 'Settings' page.

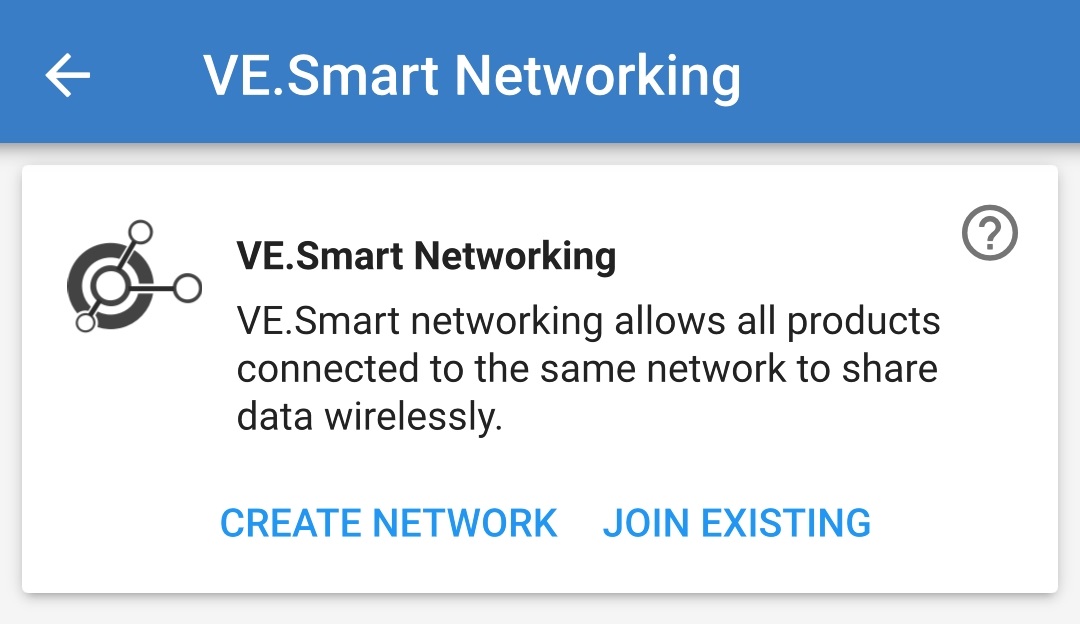
Select 'VE.Smart networking' to access the 'VE.Smart networking' page.

Select 'CREATE NETWORK' (or 'JOIN NETWORK' if the VE.Smart network has already been created).
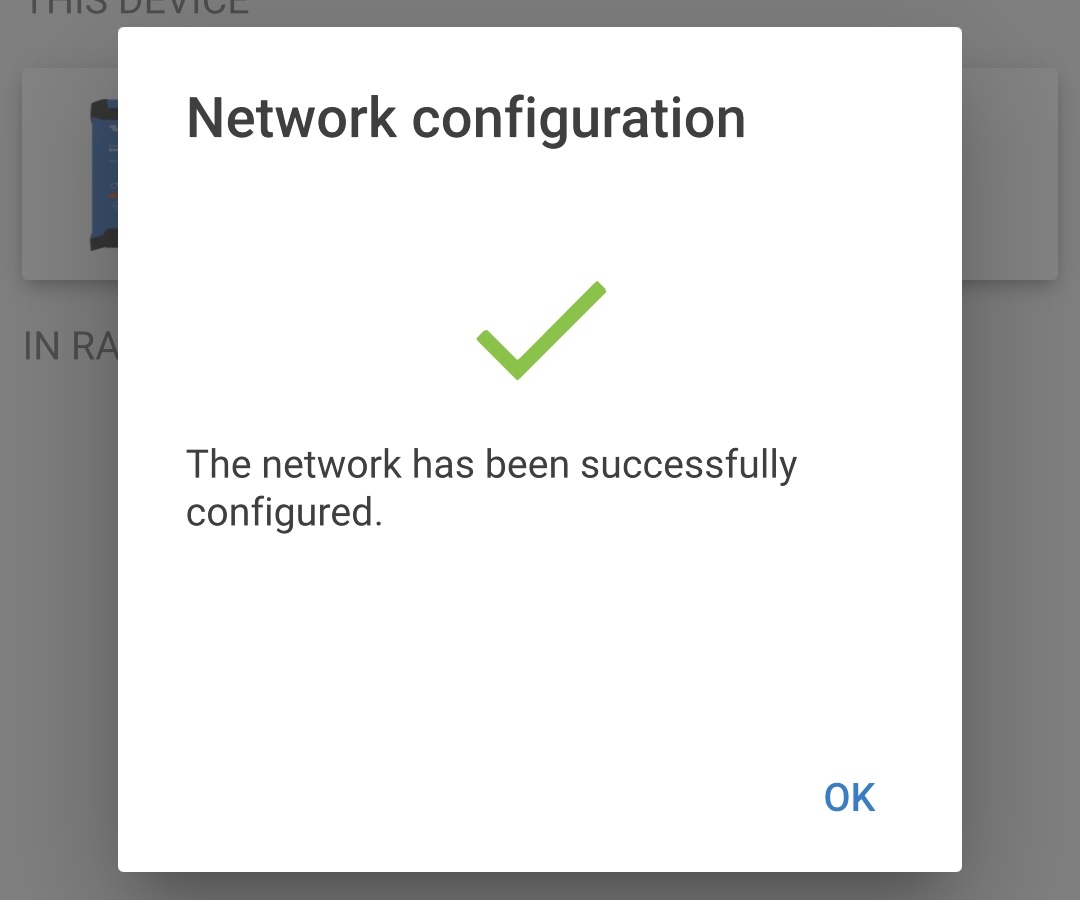
Enter a name to identify the VE.Smart network and select 'OK' to the prompts.

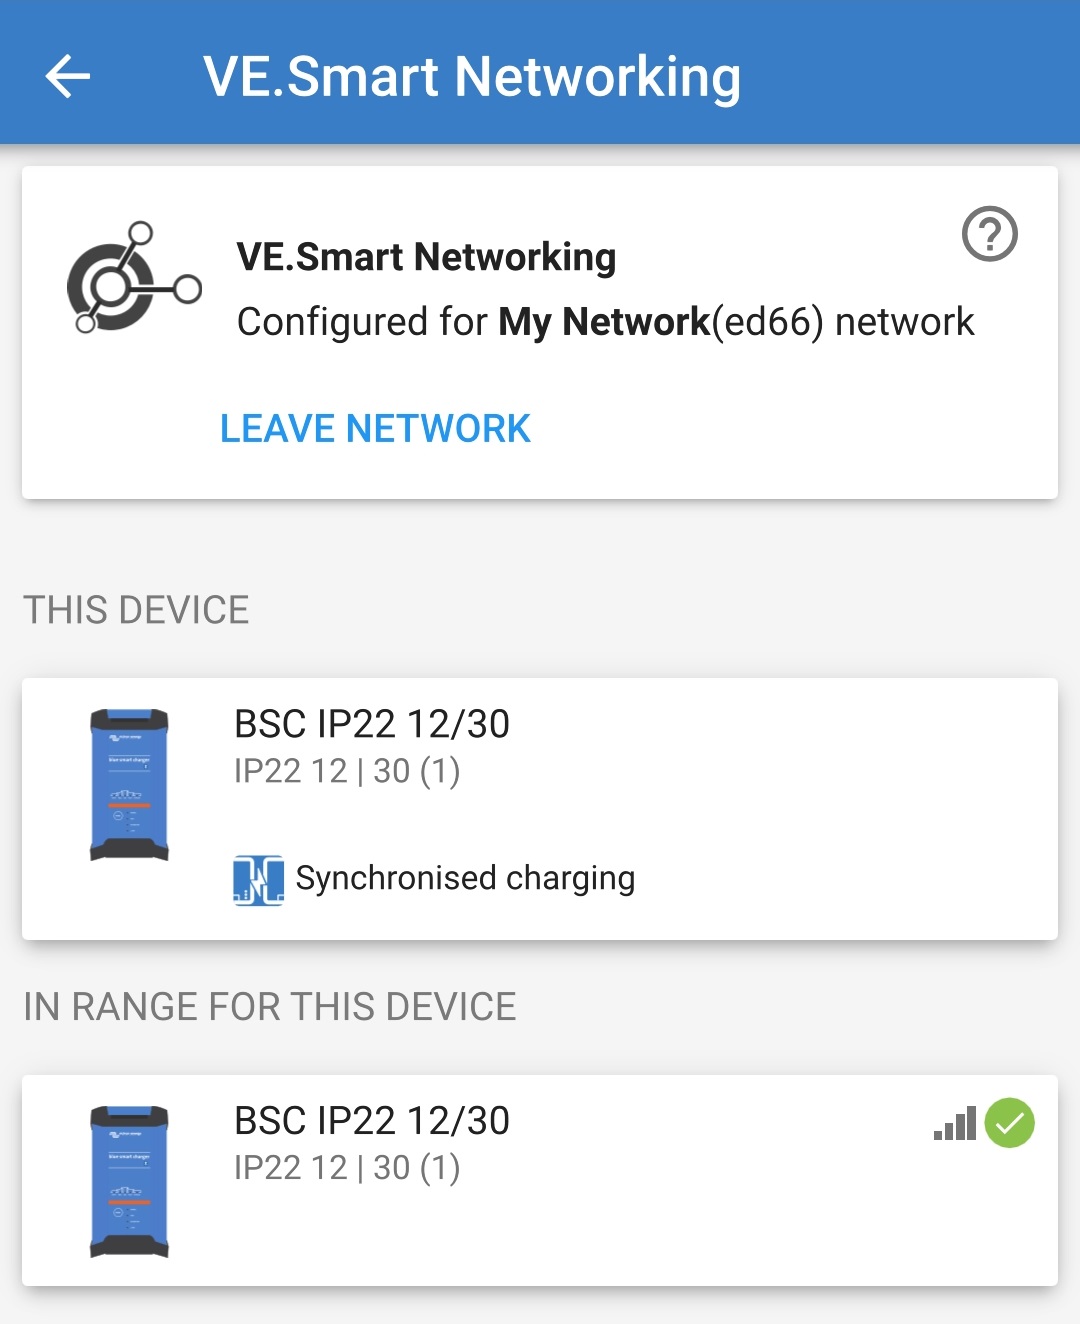
Once setup, details of the data being transmitted to the VE.Smart network are shown on the VE.Smart networking page.
Exit the device by selecting the back 'arrow' icon and 'close' icon (cross) in the top left corner.
Using a Bluetooth enabled device (such as a mobile phone or tablet), open the VictronConnect app and locate another compatible charger in the 'LOCAL' page device list, then connect to the device (default Bluetooth PIN code is 000000).
Select the ‘Setting’ icon (gear in the top right corner) to access the 'Settings' page.
Select 'VE.Smart networking' to access the 'VE.Smart networking' page.
Select 'JOIN EXISTING'.
Select the VE.Smart network previously setup (or the network you want to join if there are multiple), then select 'OK' to the prompts.

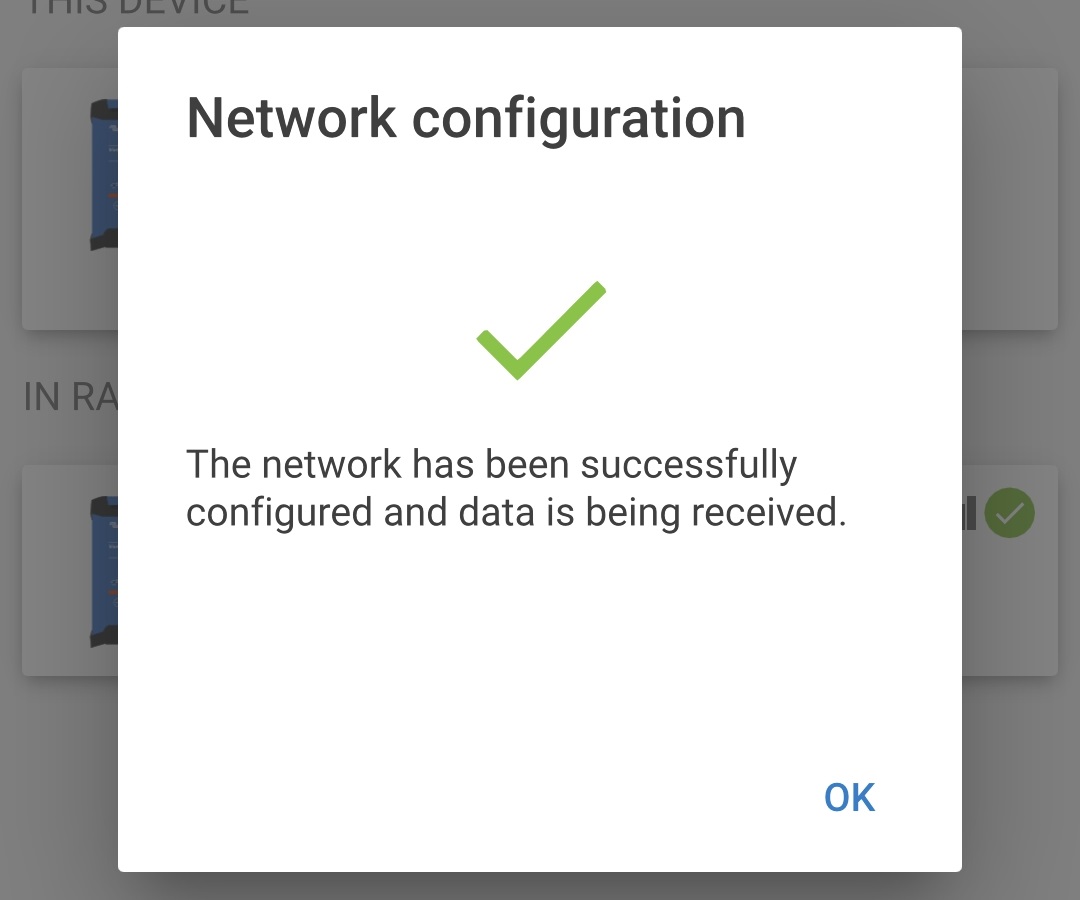
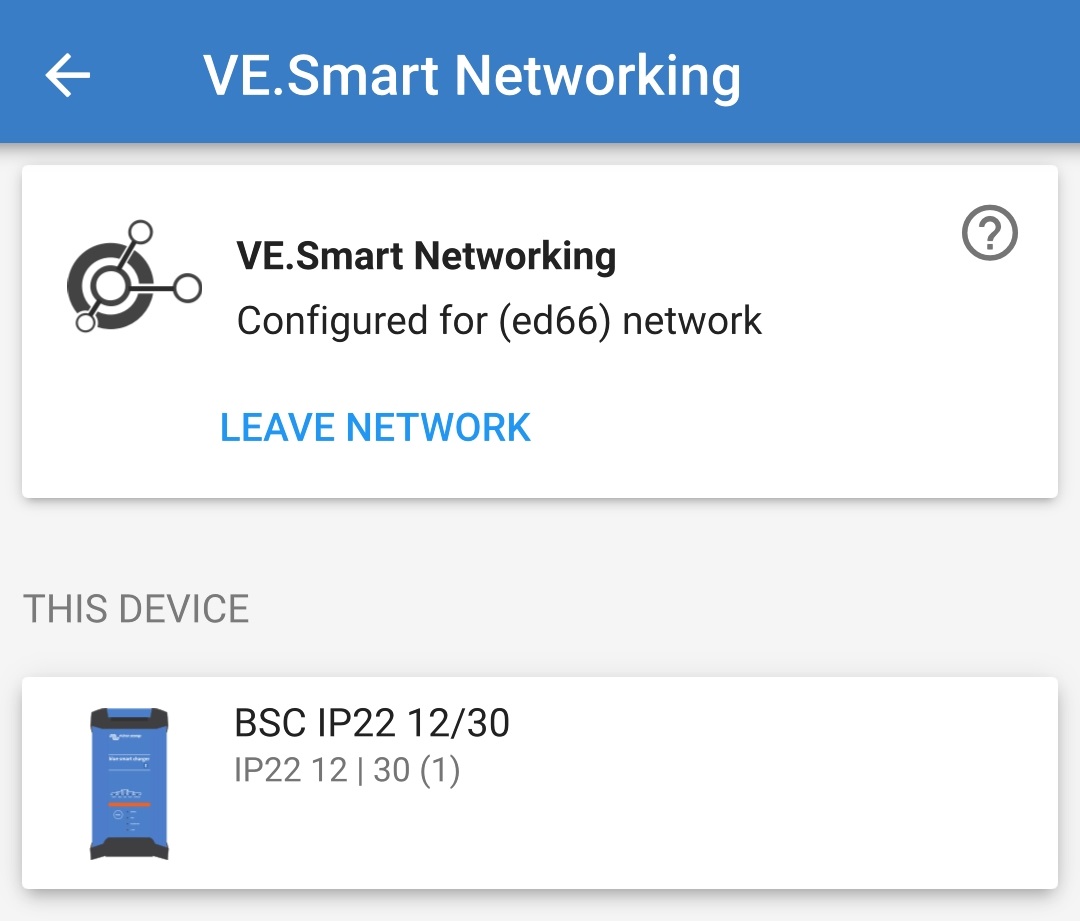
The VE.Smart network is now configured, details of the syncronised chargers in the VE.Smart network are shown on the VE.Smart network page.
Once successfully configured:
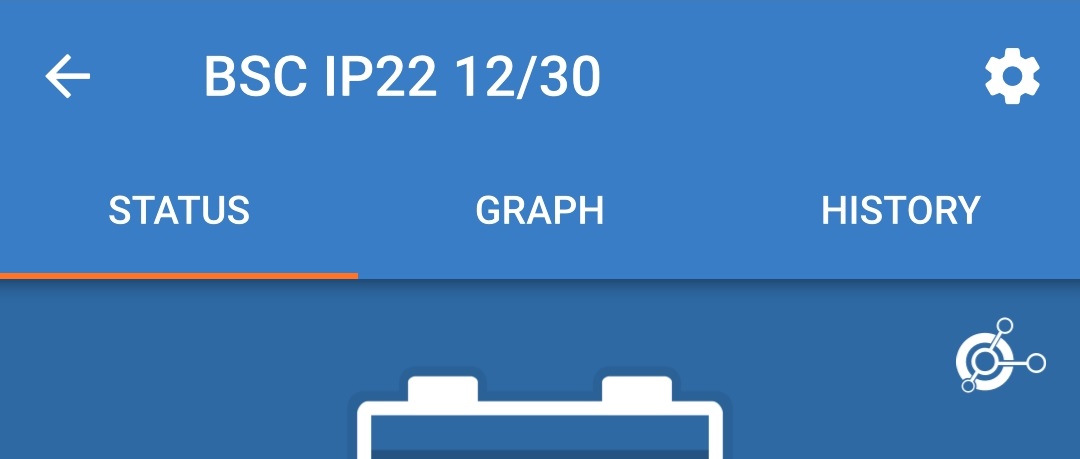
The VE.Smart network symbol will appear in the top right corner of the STATUS screen (of each charger in the network).
The active charge state LED on the charger (BULK, ABS, FLOAT and STORAGE) will blink (turn off) momentarily every 4 seconds.

For systems with multiple compatible chargers, repeat the relevant steps above for each additional charger.
Notice
Multiple chargers in a common VE.Smart network must have the same charge settings, since the 'master' can change dynamically any charger could become the 'master'.