Setup using Bluetooth
The charge mode and charge current limit most appropriate for the battery type and capacity can also be selected using Bluetooth enabled device (such as a mobile phone or tablet) with the VictronConnect app.
For further details about the VictonConnect app refer to the VictronConnect manual.
Download and install the VictronConnect app onto the mobile phone or tablet.
The VictronConnect app can be downloaded from the following locations:
Android - Google Play Store
iOS/Mac - Apple App Store
Windows and other - Victron Energy website > Downloads > Software
Enable Bluetooth on the Bluetooth enabled device (mobile phone or tablet) if not already enabled, but do not attempt to pair with the Blue Smart IP22 Charger.
Connect the AC power cable to a mains power outlet; after a short delay, the LEDs indicating the current charge mode and charge state will illuminate.

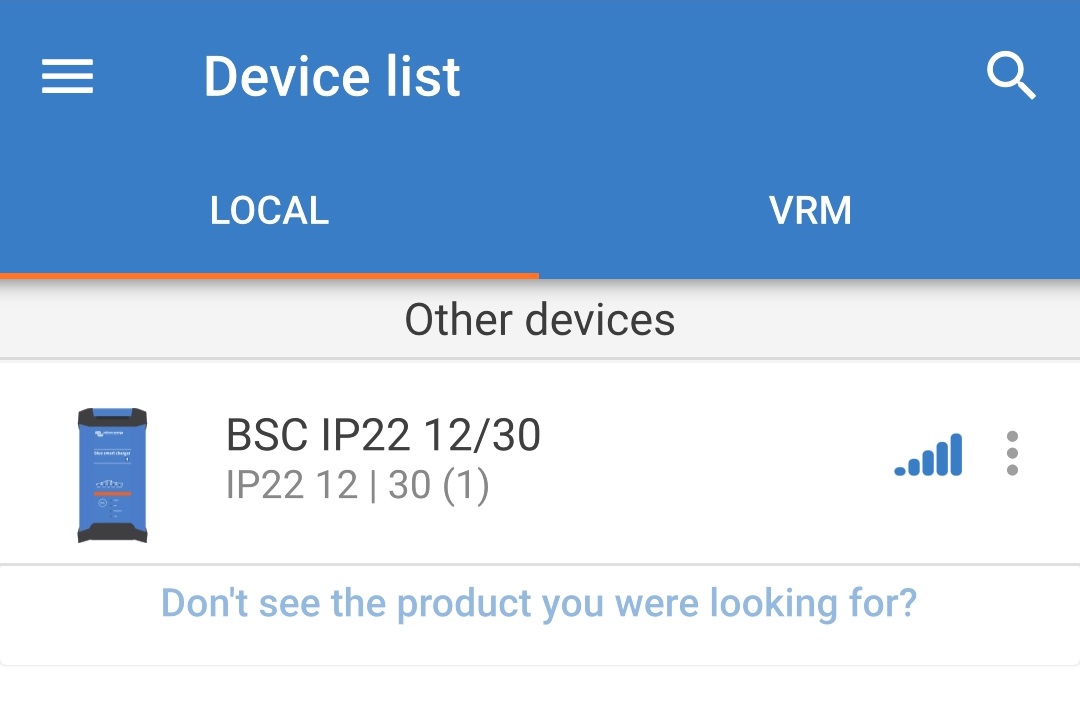
Open the VictronConnect app and locate the Blue Smart IP22 Charger in the 'LOCAL' page device list, under 'Other devices'.
In case the Blue Smart IP22 Charger doesn’t automatically appear, ensure that the mobile phone or tablet has Bluetooth enabled and is within close range, then perform a manual scan for devices by selecting the ‘scan’ button (round orange button with circular arrow) in the bottom right corner.
Select the Blue Smart IP22 Charger from the 'LOCAL' page device list, under 'Other devices'.
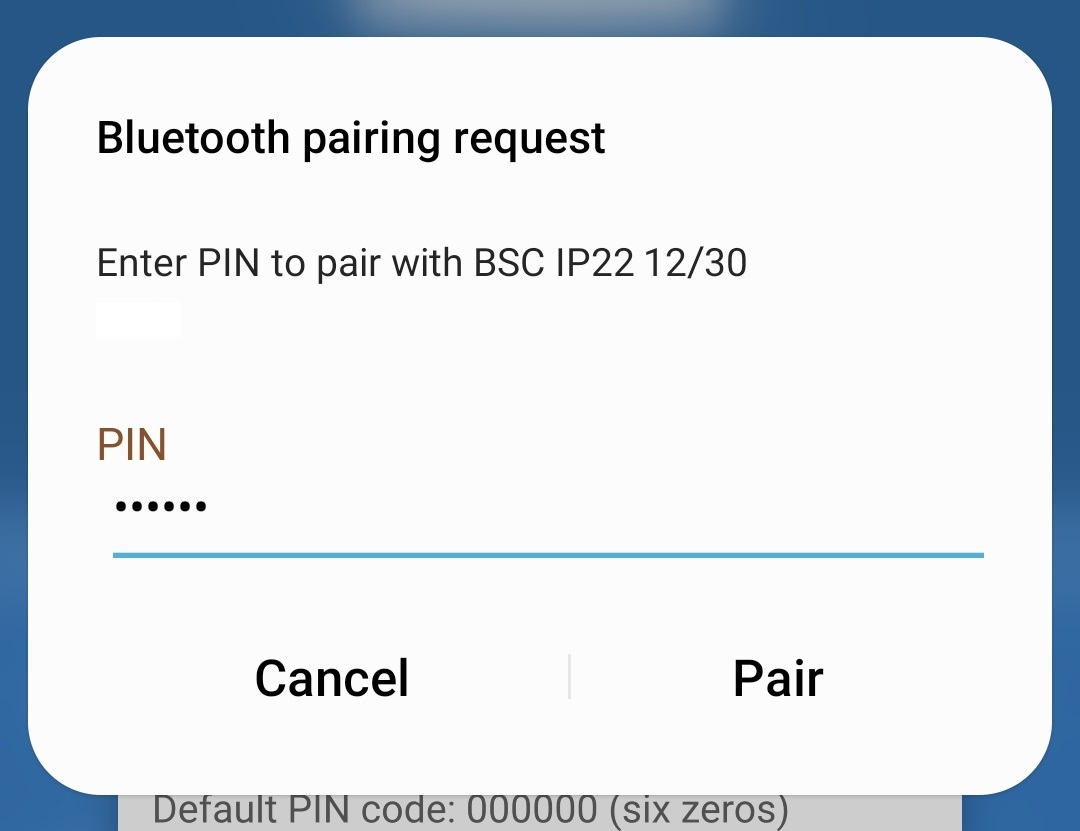
During initial connection a ‘Bluetooth pairing request’ prompt will appear requesting the Bluetooth PIN code; enter the default PIN code 000000, then select 'Pair'.
Select the ‘Setting’ icon (gear in the top right corner) to access the 'Settings' page.

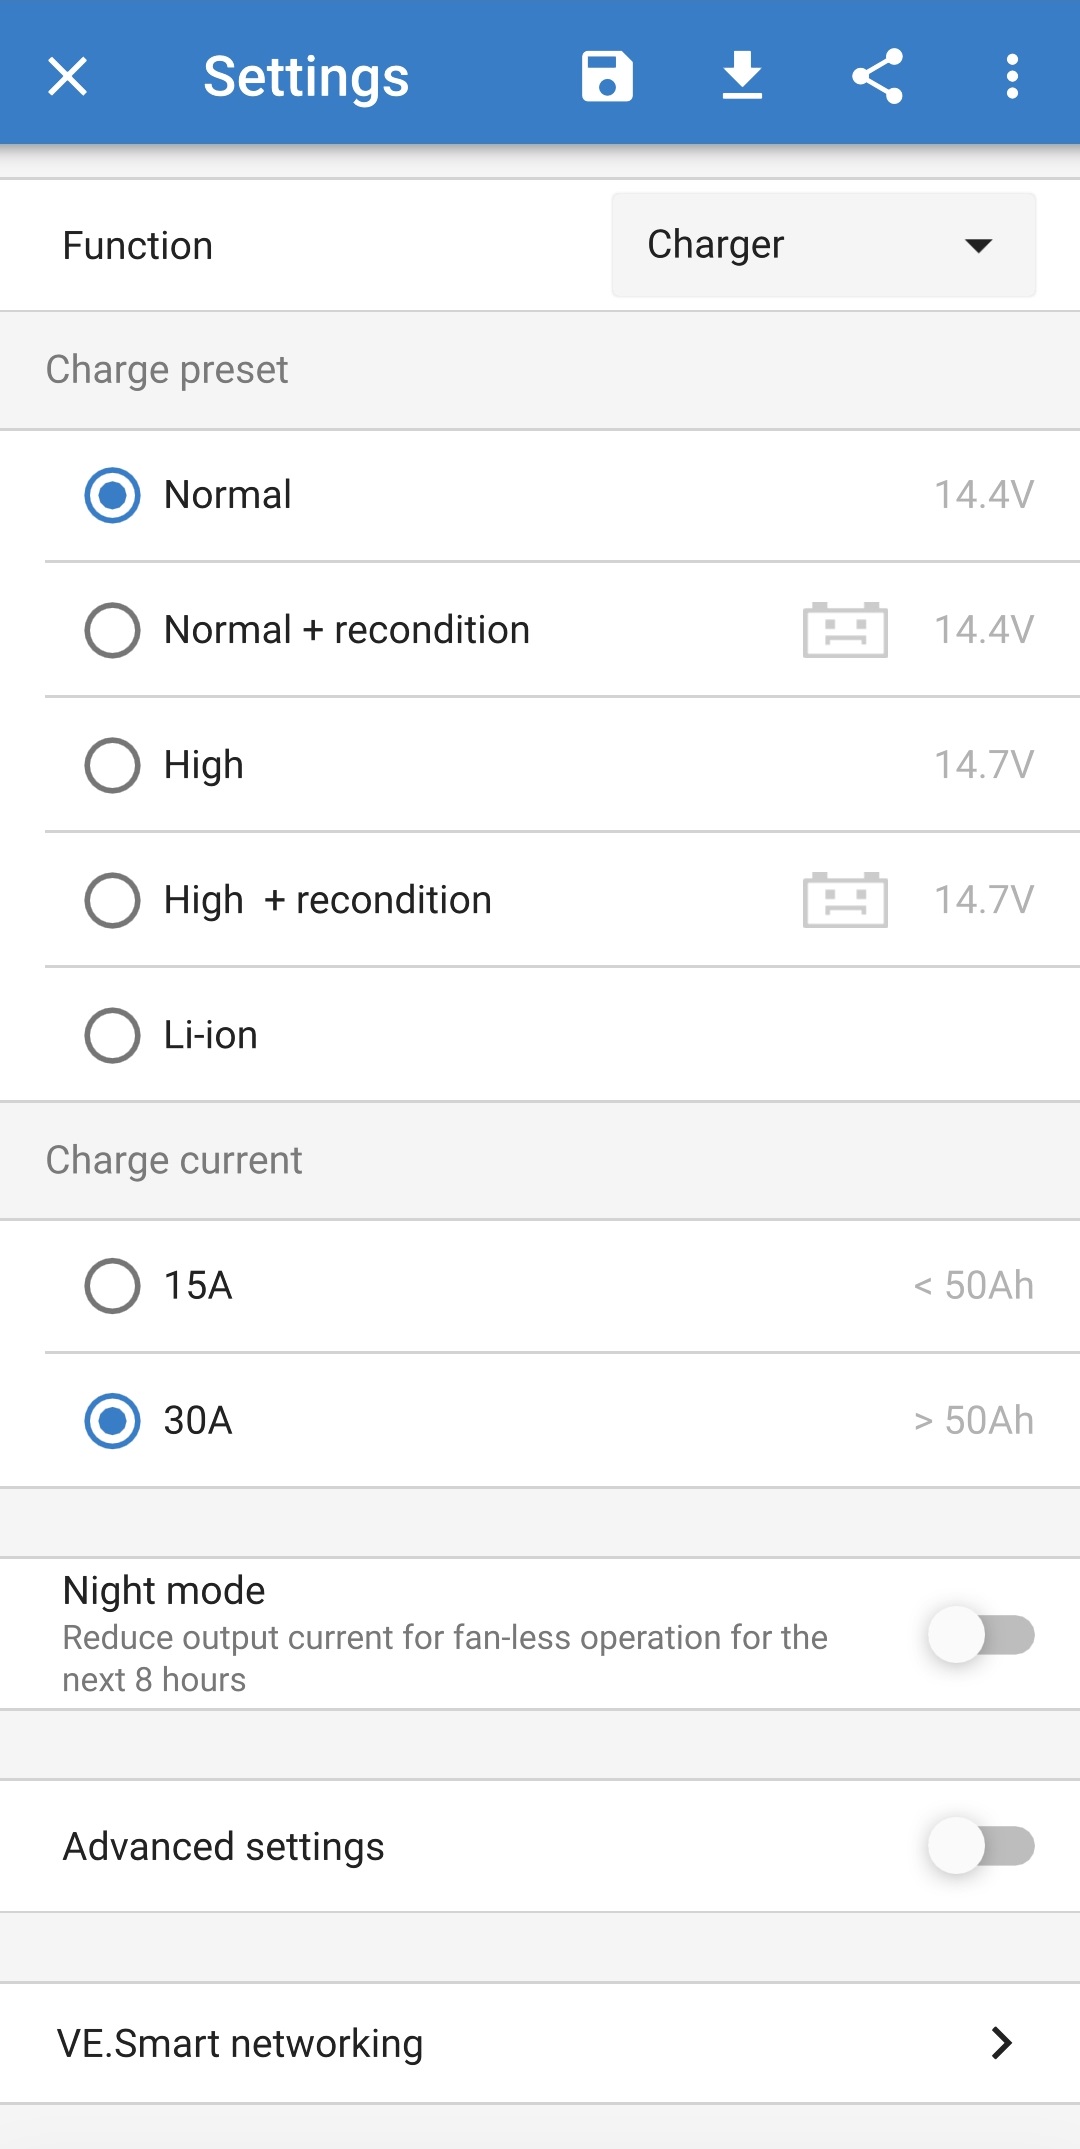
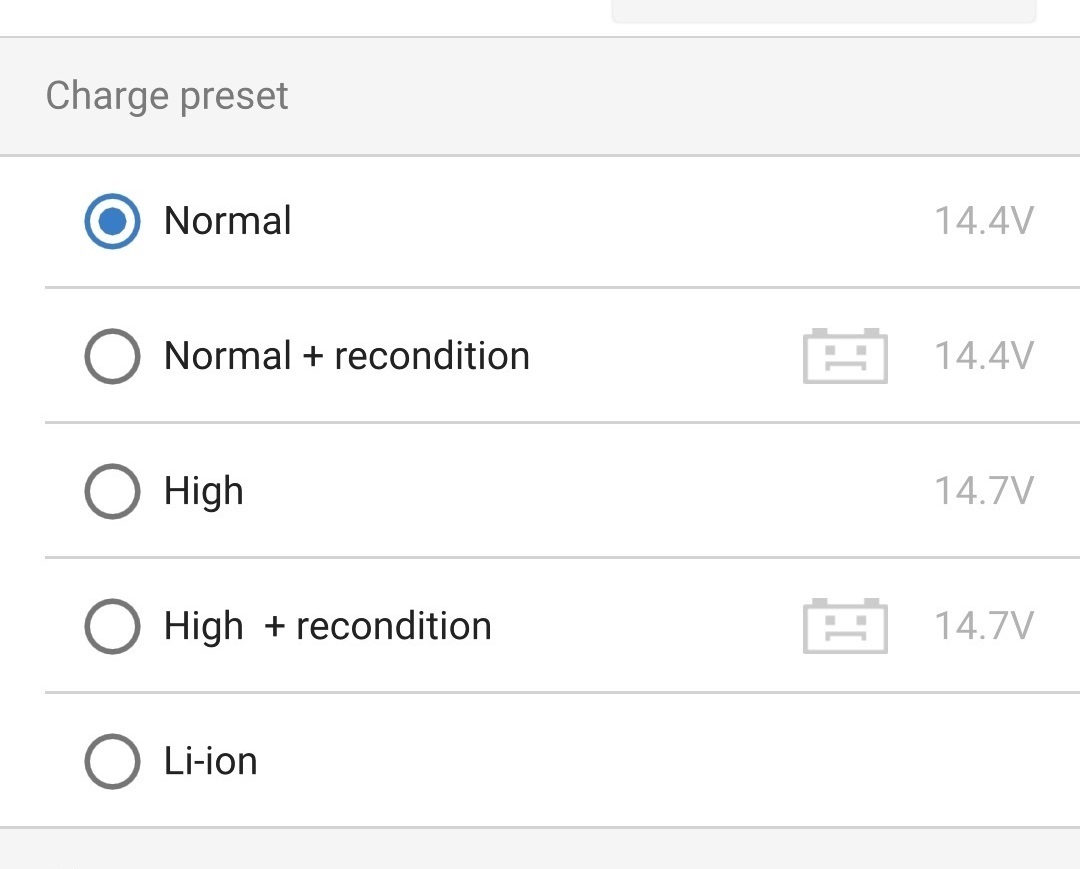
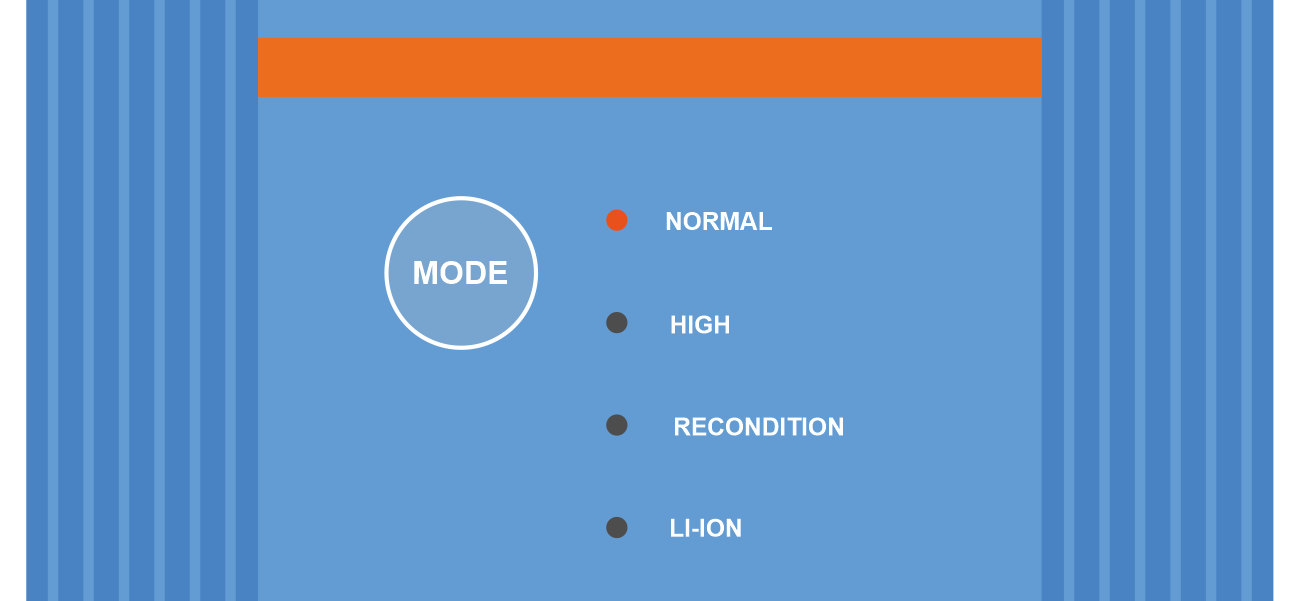
Select the most appropriate mode from the integrated charge presets (Normal, Normal + Recondition, High, High + Recondition or Li-ion) in the 'Charge preset' menu; the LED beside the currently selected charge mode (NORMAL / HIGH / LI-ION) will be illuminated, as well as the RECONDITION LED if enabled.
Ensure that recondition stage is only enabled when required, as unnecessary or overuse will reduce battery life.
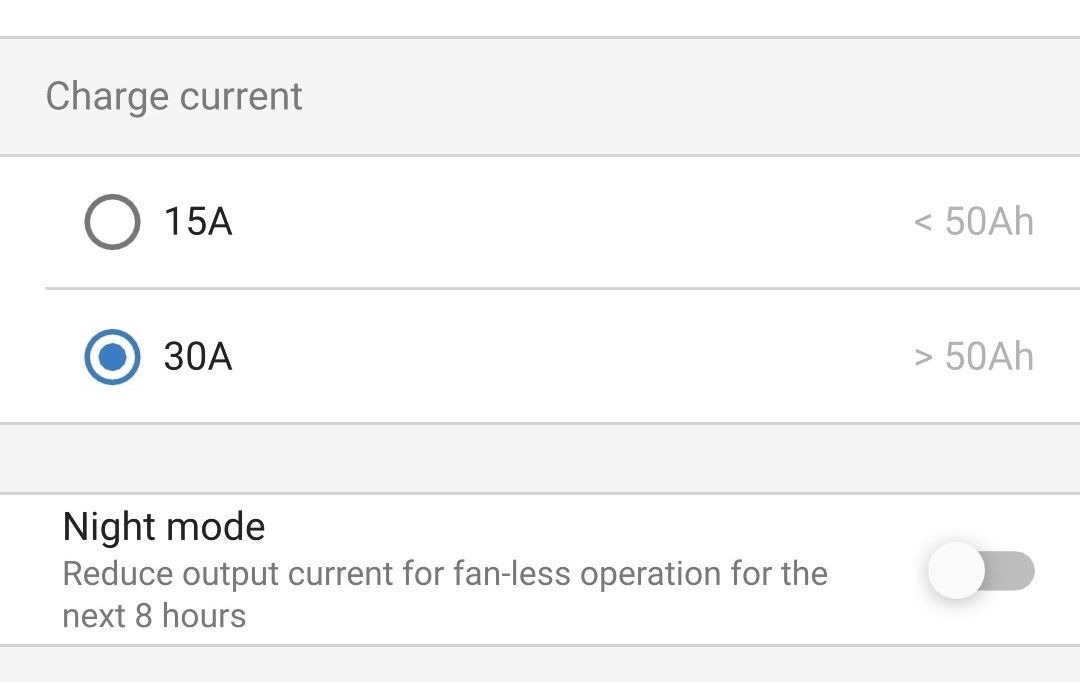
If required, enable low current mode (charge current limited to 50% of the maximum rated charge current and disabled fan); to enable (or disable) low current mode select the required option from the 'Charge current' menu, when enabled the NIGHT LED will blink.
Alternatively night mode can be enabled, which temporarily activates low current mode for a period of 8 hours (typically overnight to eliminate fan noise); to enable (or disable) night mode toggle the 'Night mode' switch on (or off to disable), when enabled the NIGHT LED will illuminate.
The charger will automatically store the selected charge mode and recall it for future charge cycles (even after being disconnected from power).
Notice
To ensure proper charging, battery longevity and safe operation it is important to select a charge mode appropriate for the battery type and capacity being charged; refer to the 'Operation > Charge modes' section and the battery manufacturer’s recommendations for more information.