We’ve introduced several improvements to VRM for installers and fleet managers overseeing multiple Victron systems. These enhancements build on the updates released last year, including the introduction of groups and teams features.
These changes are a result of our ongoing discussions with operators, helping us identify ways to save them time and provide superior service to their customers.
Overview of the New Additions:
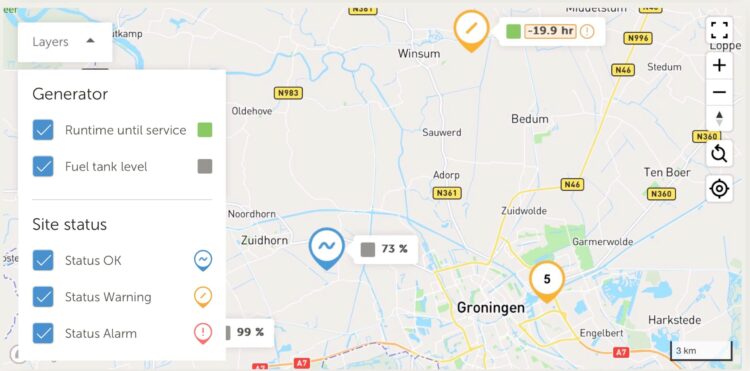
- Map Details: Preview multiple sites in close proximity, including fuel tank levels and generator run time until the next service
- Mini Graphs: View maximum load and other key metrics from the installations overview
- Prominent Warnings and Alarms: Improved visibility of warnings and alarms in the installation overview
- New Access Control Role: ‘Technician’ added for enhanced access management
- Remote Generator Service Reset: Ability to remotely reset the generator service interval clock
- Overall Speed Improvements: 8x faster load time of side navigation list, very noticeable for 100 sites or more
1. Map Details
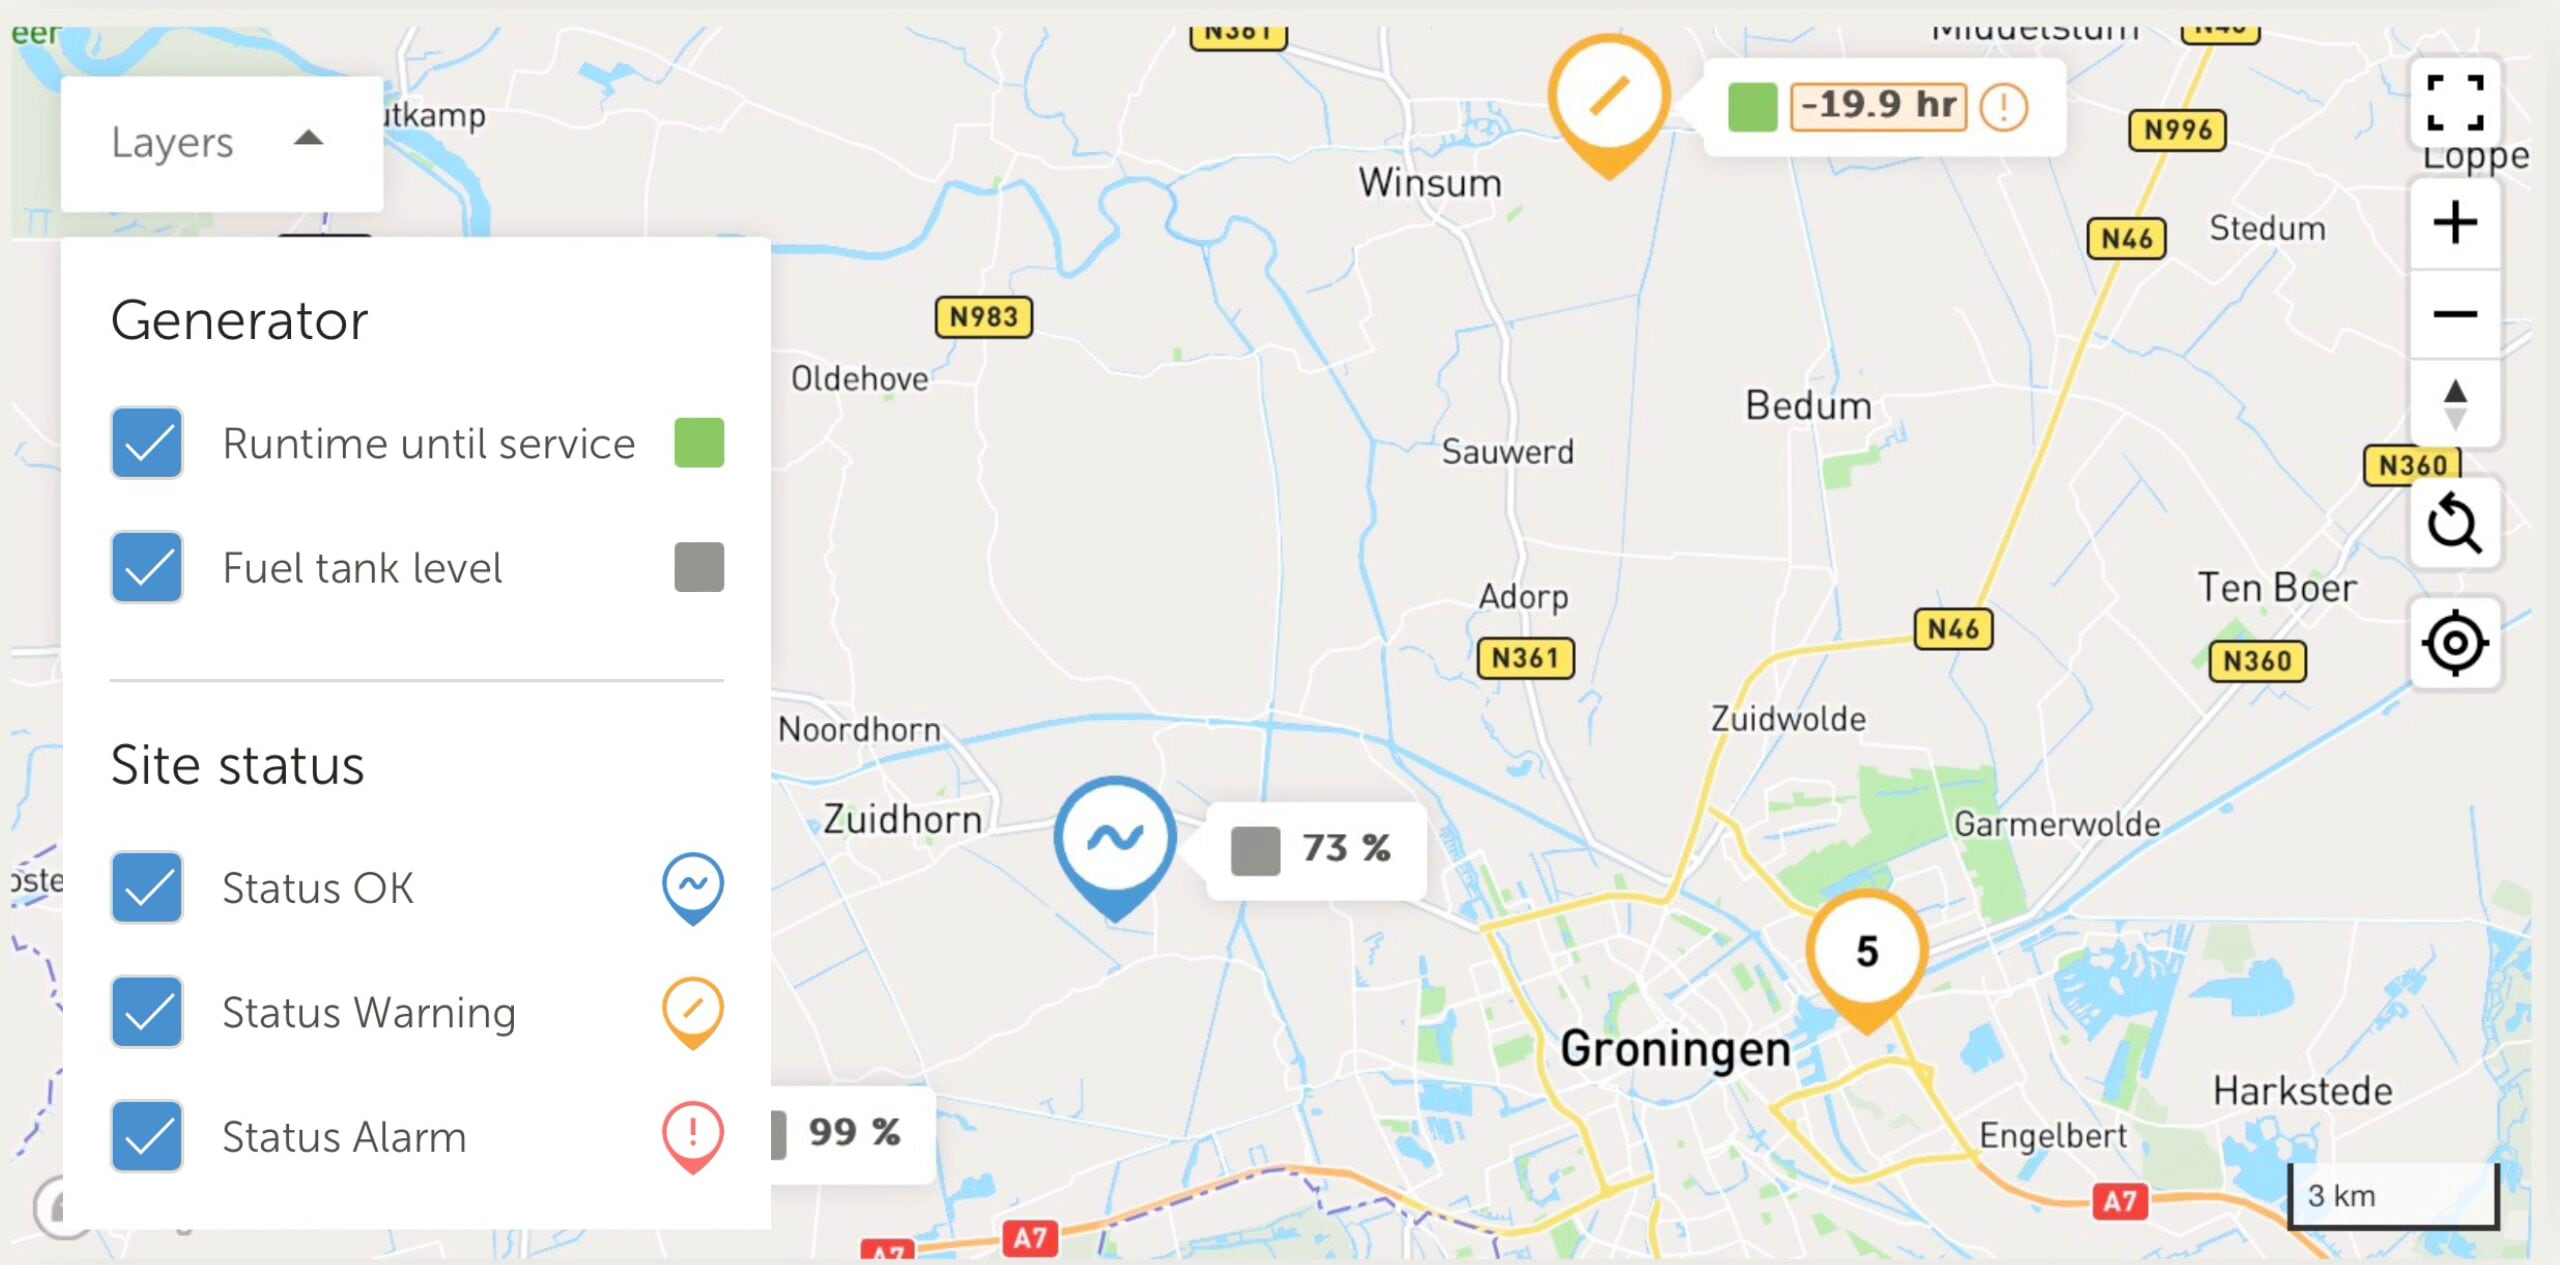
The map has been updated and improved to help manage large numbers of systems more efficiently. You can now filter systems and view actionable information such as:
- Runtime Until Service: Displayed along with fuel tank levels.
- Warning and Alarm Information: Icons provide details about warnings and alarms, and filter options to view sites based on the site status.
- Expandable Site Clusters: Clusters of sites in the same location can now be expanded to reveal more details.

You can access the map by clicking the globe icon in the top-right corner of the installation overview. This will display all your systems around the world.
The map also functions as a filter for the installation overview list. Zooming into a specific area will update the displayed systems accordingly.
The map’s display coordinates and selected tags are added to the URL, allowing you to bookmark specific regions. For example, you can create a bookmark to show only systems with an active alarm located in Amsterdam.
This feature is particularly useful for displaying various regions on fleet management screens in a control room or during routine inspections. We’ve received feedback from users requesting additional information, such as battery state of charge, and plan to continue rolling out new details.
2. Mini Graphs on VRM Installation Overview

This update is designed to help you monitor your fleet at a glance without needing to open each installation separately. You can view the following metrics for 24 hours:
- Battery state of charge
- Solar production
- Maximum load
- Grid supply
- Generator supply
This feature helps quickly identify and addresses potential issues. For example, spikes in maximum load can indicate that a system may be undersized for a particular application, even before warnings or alarms are triggered. This allows fleet operators of hybrid generator systems to ensure their customers have correctly sized equipment.
How to Access the Mini Graphs
The mini graphs are hidden by default. To enable them, log in to VRM, select the table settings button in the installation overview, and activate detailed mode.
This may take a few moments to load, depending on the number of systems in your fleet. Once loaded, you can begin exploring the enhanced data insights.
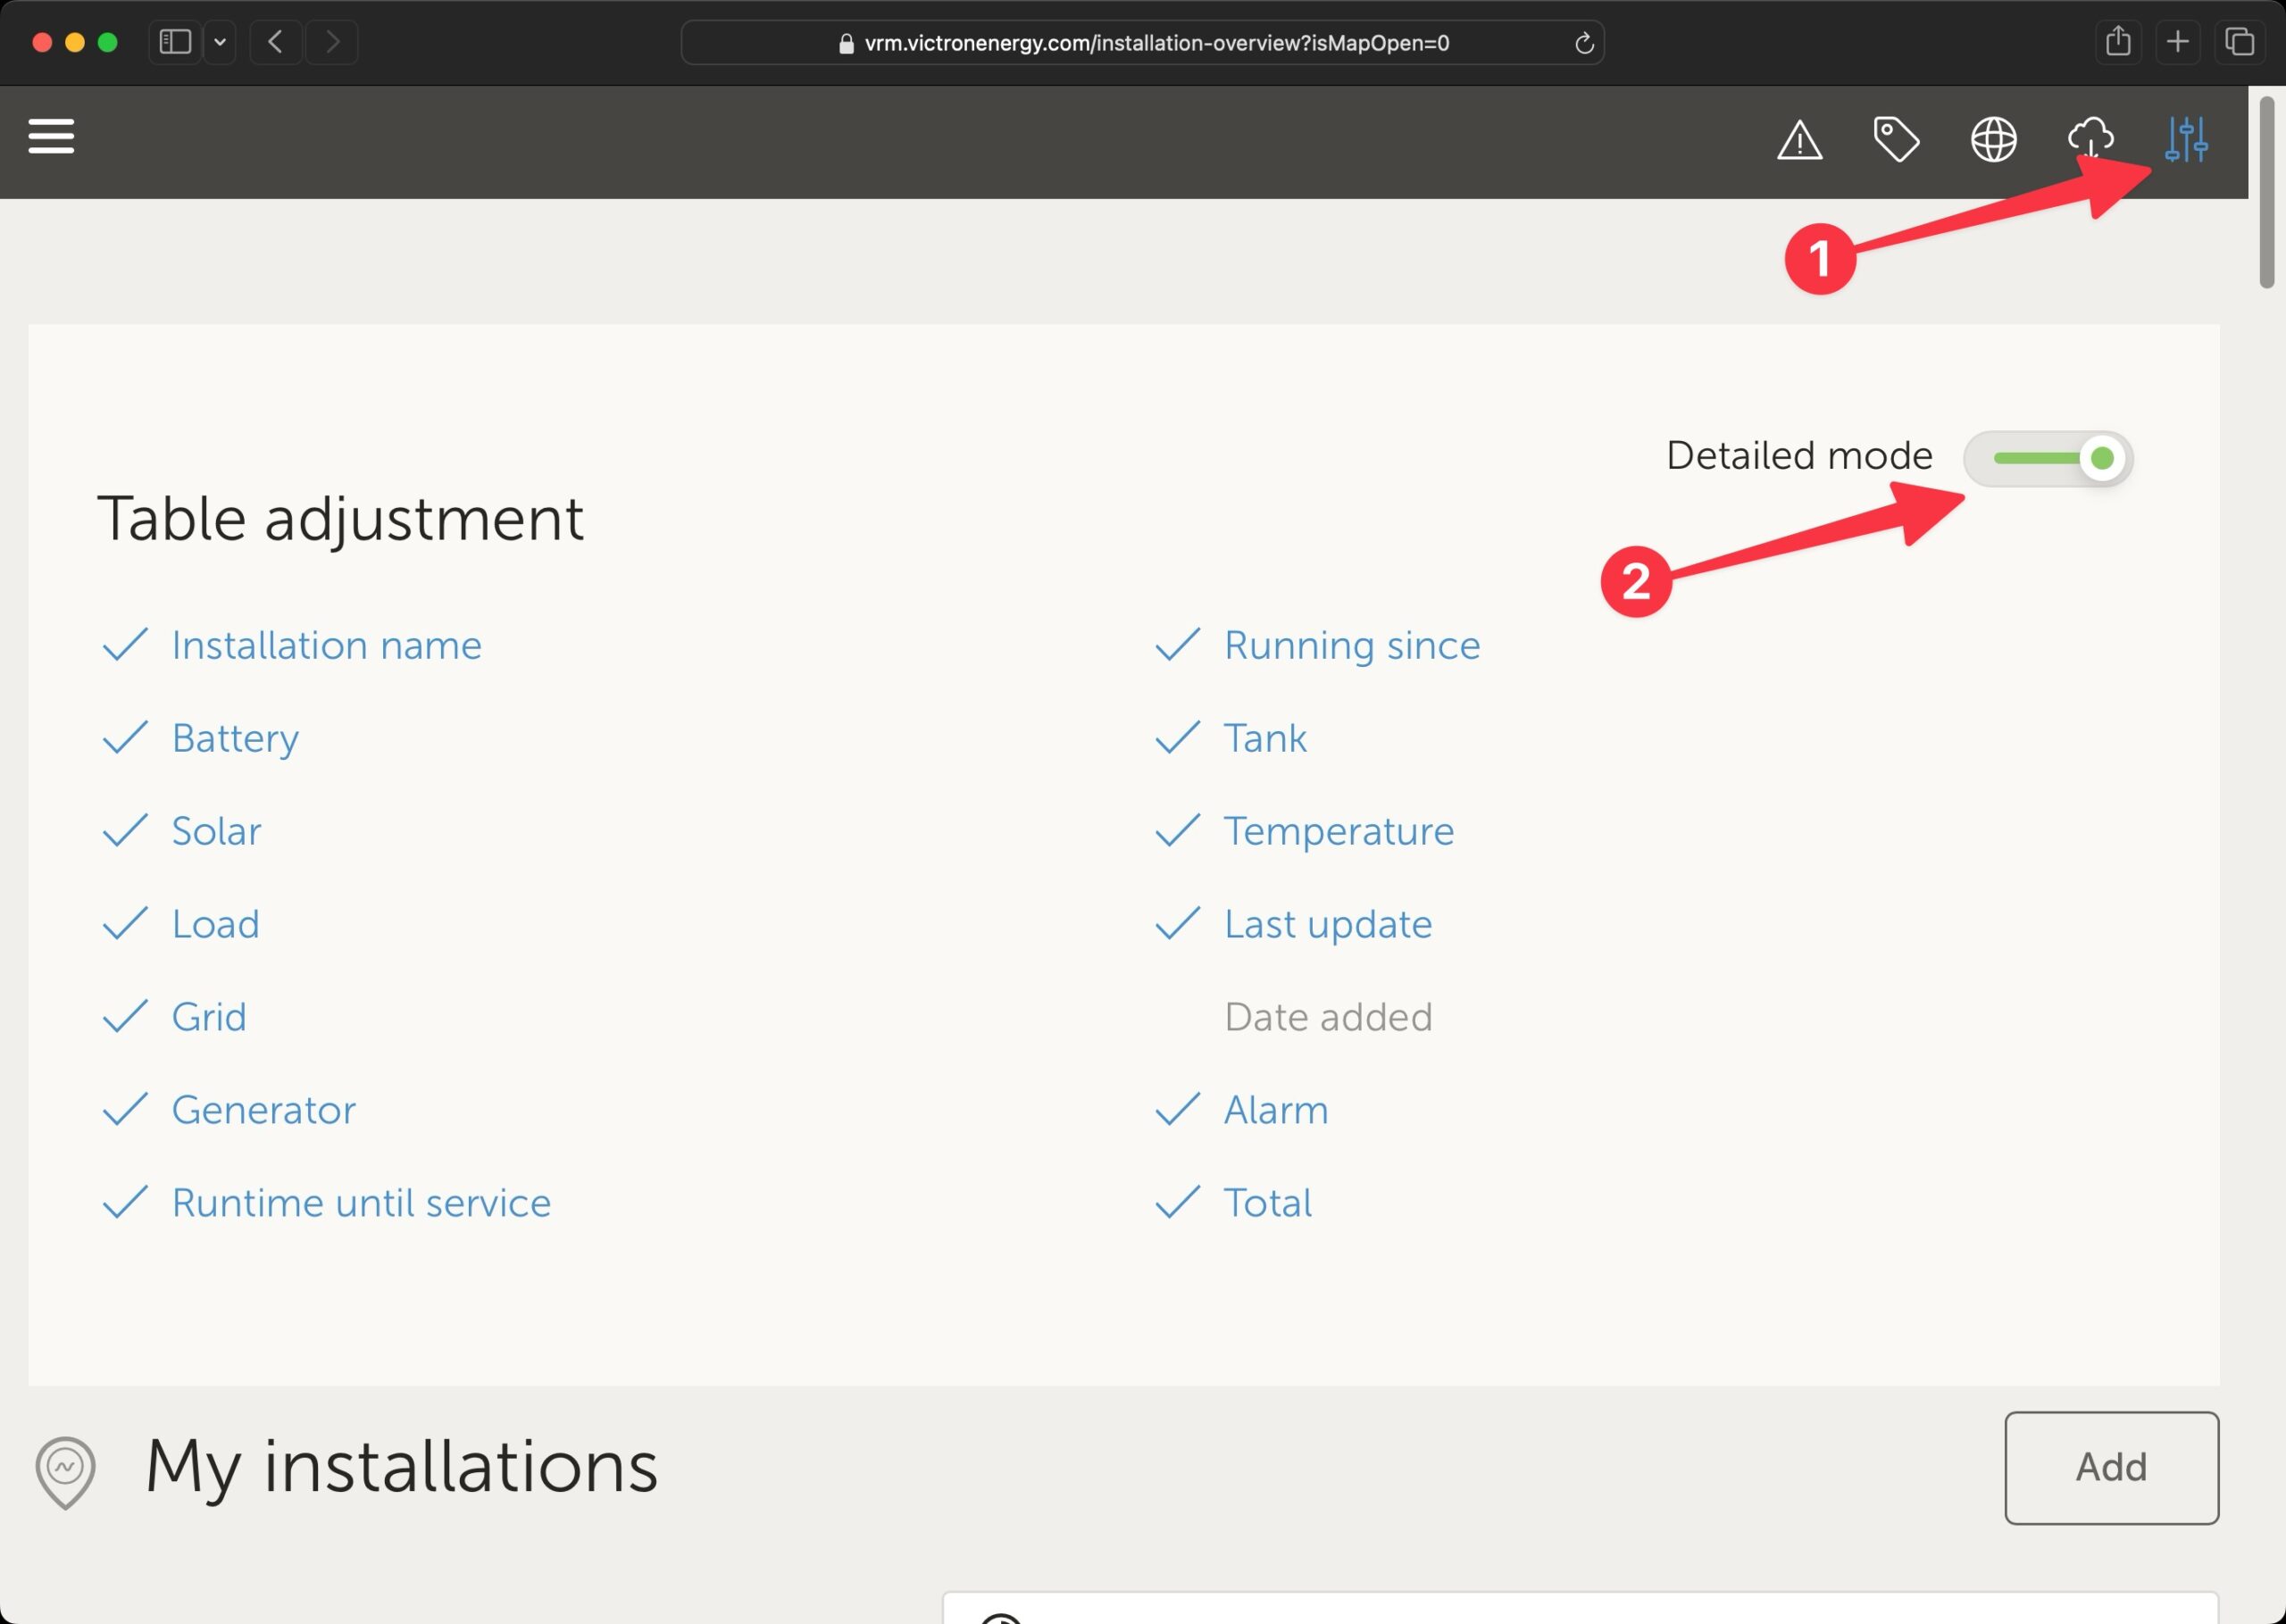
Note: This feature is optimised for desktop use. On a mobile phone, you need to use landscape mode.
3. Prominant Warnings and Alarms

We’ve improved the warnings and alarms in the installation overview. You no longer need to click into a site to identify issues. Simply hover your mouse over an alert to view a pop-up message with more details. Clicking on the alarm will take you to the alarm log for further information.
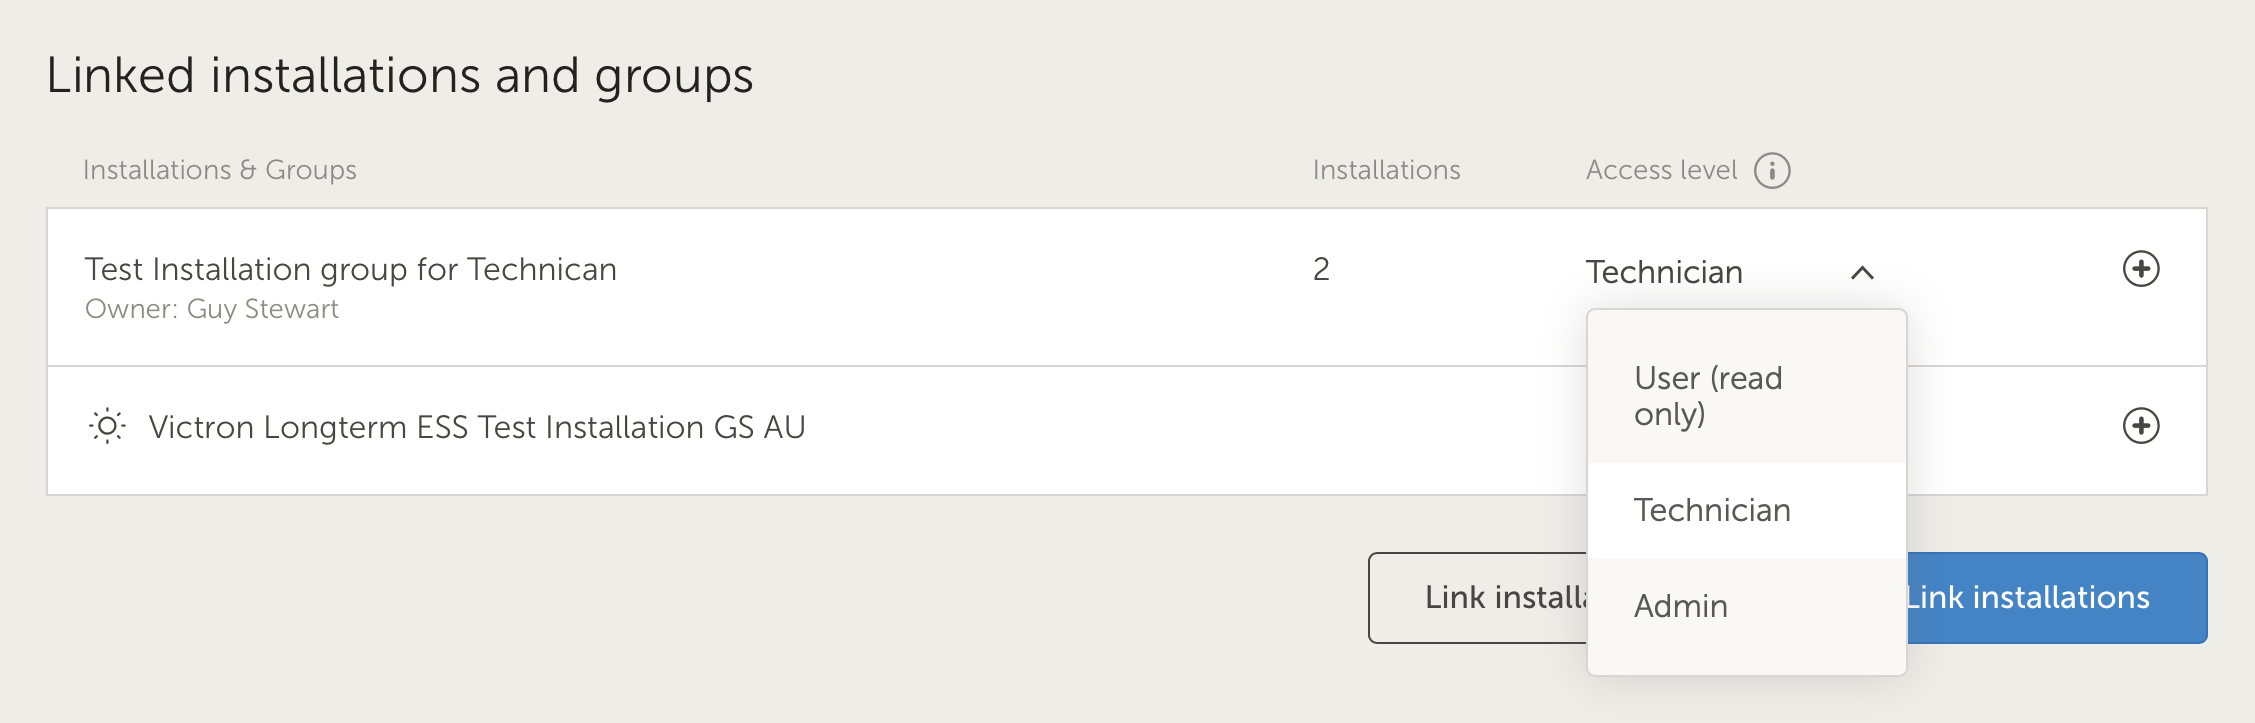
4. New Access Control Role: ‘Technician’

The new ‘Technician’ access control role provides similar control to full access users, including access to a site’s diagnostics data, firmware updates, and the ability to control devices linked to the site.
Key differences between Technicians and Site Admins include three restrictions: Technicians cannot delete a site, replace the GX device linked to a site, or remove other users’ access to the site.
The ‘Technician’ role is perfect for sharing a site with users who can troubleshoot and perform maintenance on a system, without the risk of making administrative changes that cannot be easily reversed (such as removing access for others).
The previous ‘non-full access’ role has been renamed to ‘User’. Aside from the name change, the access rights of this role remain unchanged.
A User and Technician access level account are able to invite other users (equal to their access level) to the site as well, but they are not allowed to remove other users from the site.
To change a user’s access to ‘Technician’, go to the user settings of your site in VRM. You will find a dropdown next to each user with the choices ‘User’, ‘Technician’, and ‘Admin’. At the top of the user table, click on the ‘i’ icon to refer to a list of actions and see which user roles are permitted in VRM.
A site must always have at least one Admin and will block the last Admin from changing their role to ‘Technician’. However, if there is more than one Admin, an Admin can change their own role to ‘Technician’. This change is immediate, and the Admin will then not be able to change it back without the help of another Admin of the site. Therefore, it is recommended to create another test account until you are confident in the changes.

This role is available for individual sites as well as for Groups and Teams.
5. Remote Generator Service Reset
If your installation has an autostart generator that is activated by the GX device, one of the useful features of VenusOS is the ability to track the runtime hours and count down to a service interval. This is originally set up in the auto-start generator controls menu on the GX device itself.
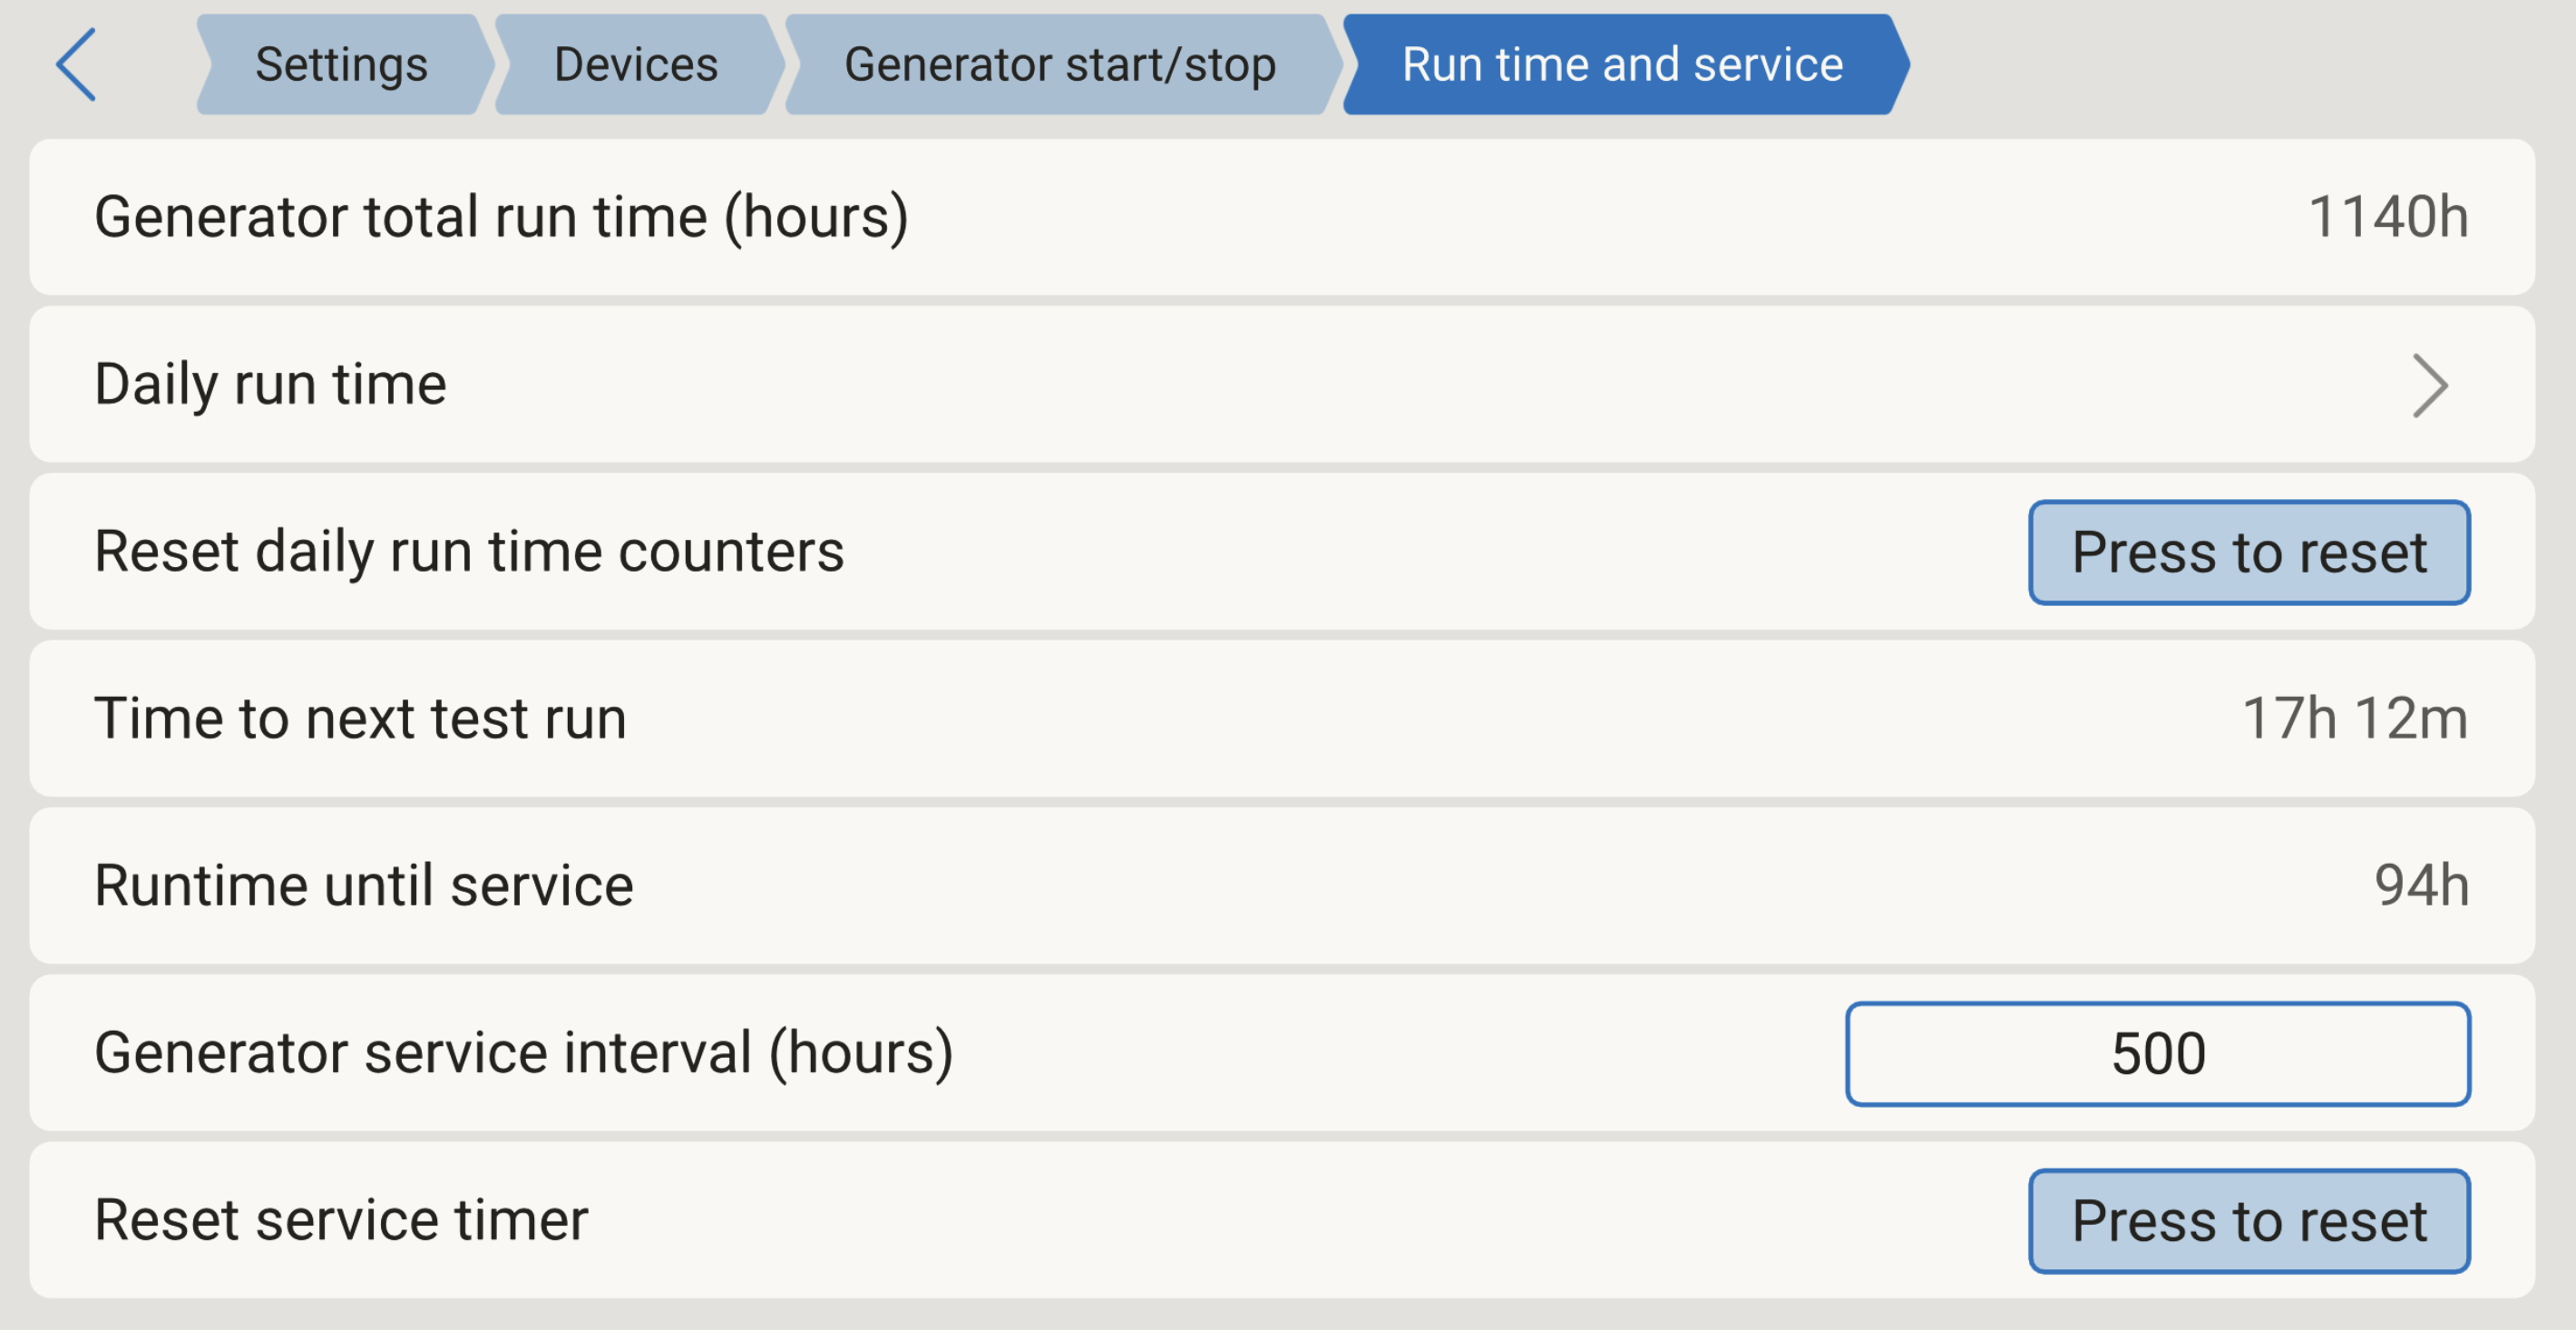
When managing multiple sites, the maintenance process might be automated with a service crew in the field. In such cases, having a central operator monitor and resetting the service clock remotely can save time.
While this was previously possible, it required going in via the remote console. This improvement brings the service interval reset button to the control centre in VRM alongside the other generator controls, making it faster to access and easier to use.

If you’d like to see these new features in action, they are demonstrated in this short introductory training.
Closing Remarks
VRM is a core component of the Victron ecosystem of products and services, supported by a dedicated team committed to continuous improvement. Updates are pushed weekly and have been for over nine years! You can view a full list of changes in our public VRM change log.
If you have any feature requests, suggestions for improvements, or issues, please share them with your Victron Dealer, Victron Sales Manager, or via the Victron Community with the topic tag VRM.


