
Android GX WiFi Display

3. Initial configuration

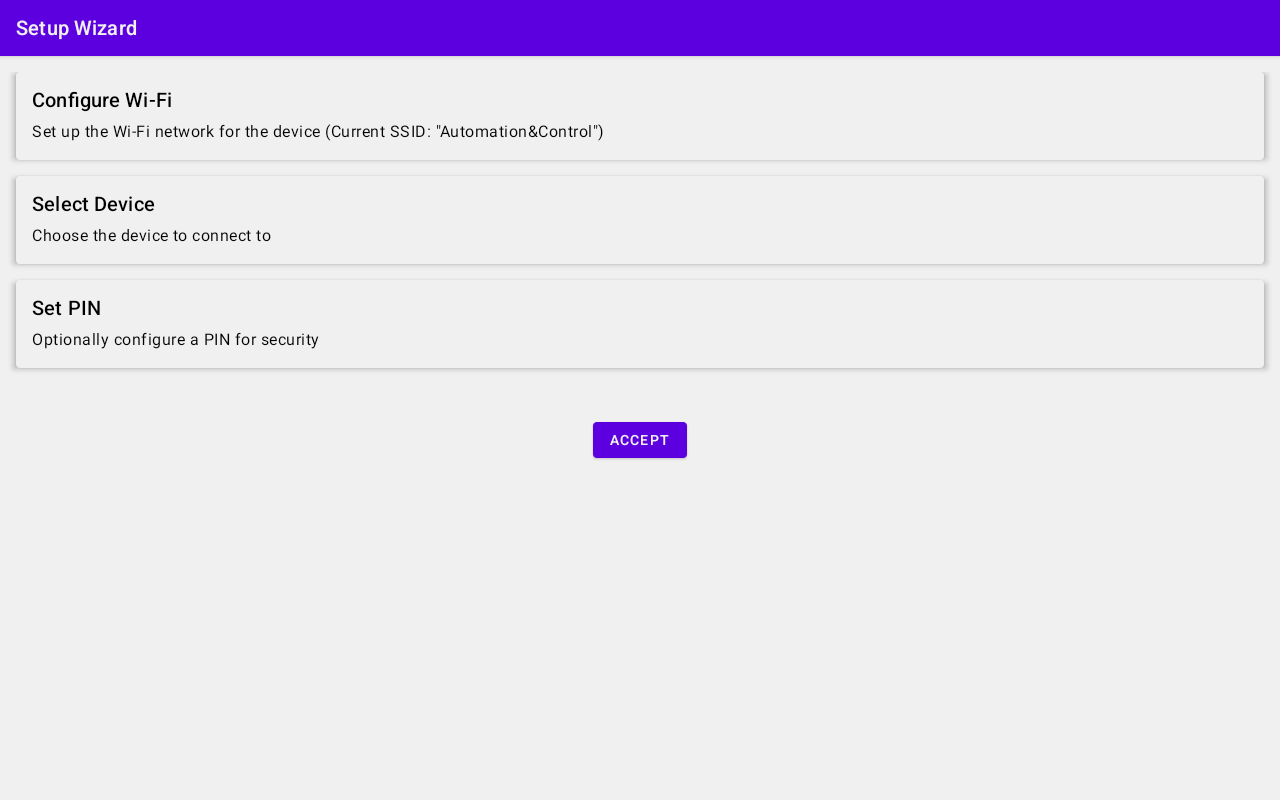
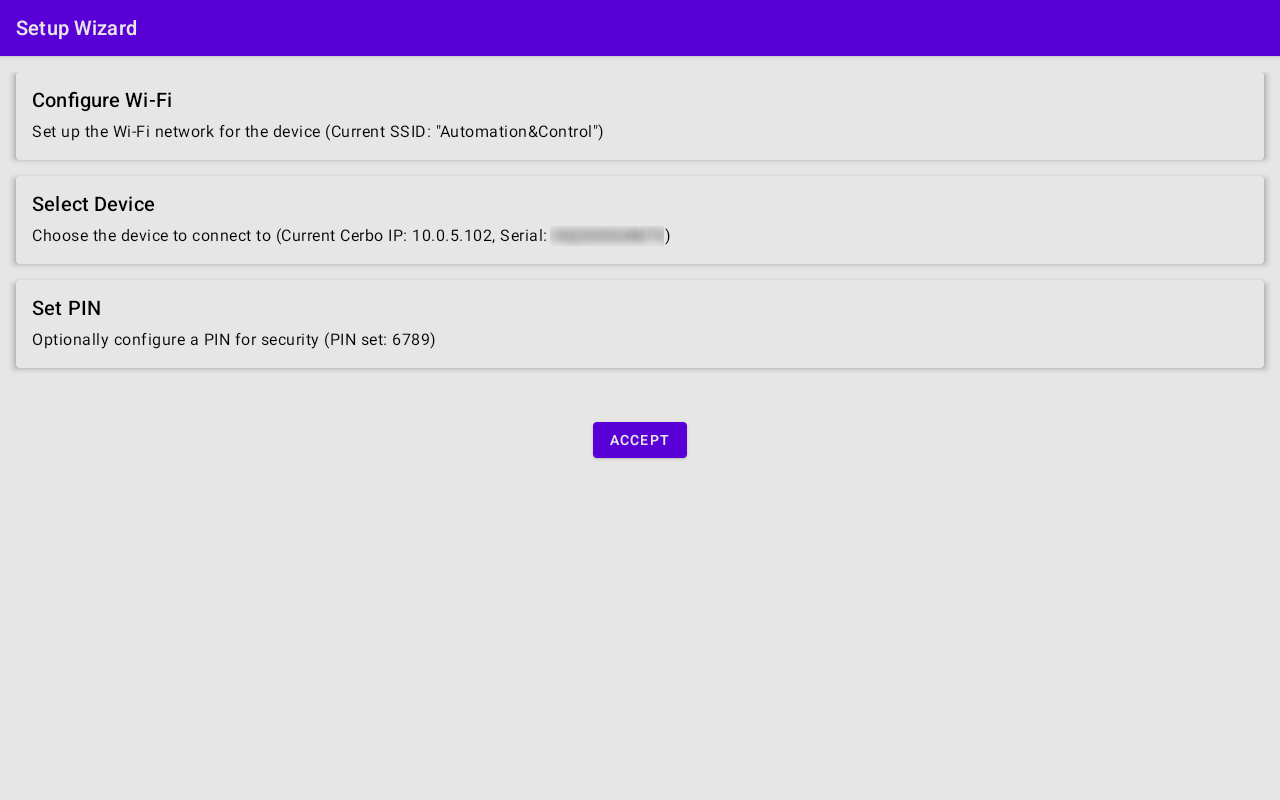
When the installation process has finished, the Setup Wizard screen will appear.

To complete the setup wizard, tap on each section and enter the necessary information.

  • Configure WiFi: The device will already be connected to the WiFi network that was used during installation. You may change this to another one if you wish.

    Tap the box to launch the WiFi Wizard.

  • Select Device: Choose a GX device to connect to from the device list.

  • Set PIN: You have the option to set a PIN to restrict access to the Android device settings. Setting a PIN is recommended.

GXDisplay_Setup_Wizard.png
  • WiFi Wizard: The WiFi network that was configured in the previous installation steps will be automatically connected.

    You can choose a different network if you prefer.

    If the GX device has been configured as an access point, you will find its network among those displayed in the list of available networks. Selecting this network allows your device to connect directly to the GX device.

  • From the list of available networks, select the one you want to connect to.

    Enter the network's password in the pop-up box that appears after your selection.

Located at the bottom of the screen, you will find three buttons that represent alternative WiFi connection methods.

  • Enter manually: Using this method, you can connect to networks that are not displayed in the list or have a hidden SSID.

    A popup box will appear where you can enter the network's SSID and password to establish the connection.

  • Scan QR code: If you have a QR code for your preferred WiFi network, you can use this method to connect.

    This will activate your Android device's camera to scan the QR code and automatically establish the connection.

GXDisplay_WiFi_wizard.png
  • Android WiFi Settings: If the steps provided using the WiFi wizard don't work, you can connect to WiFi by accessing your Android device's native settings.

    After successfully connecting to your WiFi network, press the back button to return to the WiFi Wizard page.

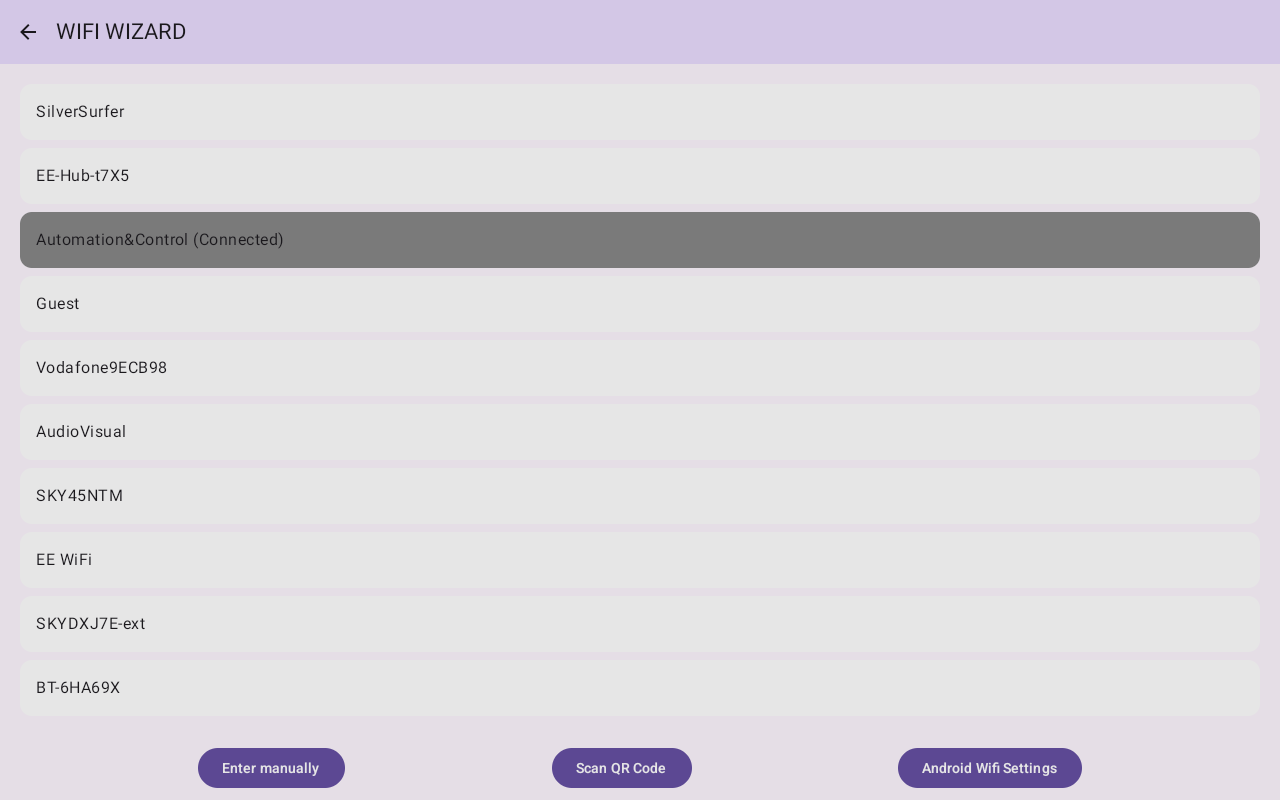
To navigate back to the Setup Wizard page, locate the arrow on the top left corner of your screen and tap it.

GXDisplay_Android_WiFi_settings.png
  • Device list: It can take a short amount of time for the device list to populate, displaying the available GX devices on your network.

    To connect to your chosen GX device, simply tap on the connect button to the right.

    You'll then return to the Setup Wizard page.

GXDisplay_Device_list.png

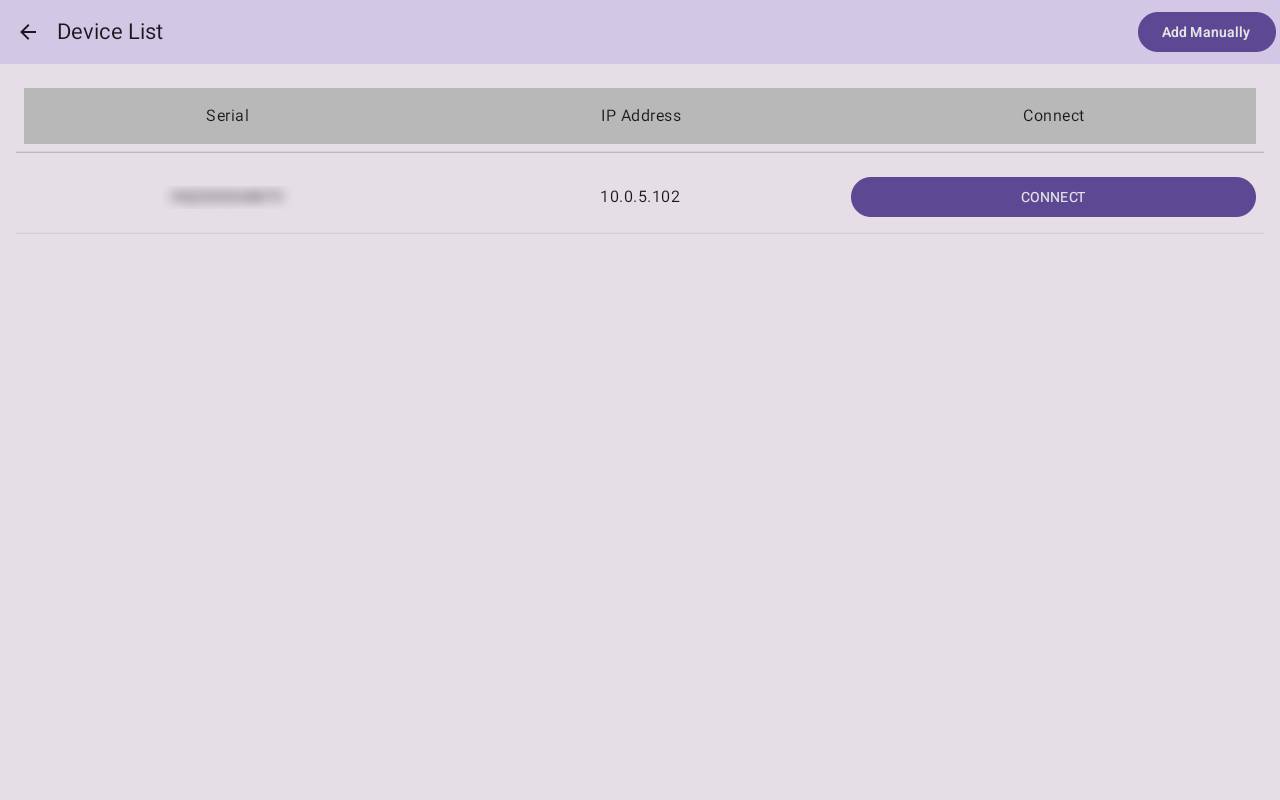
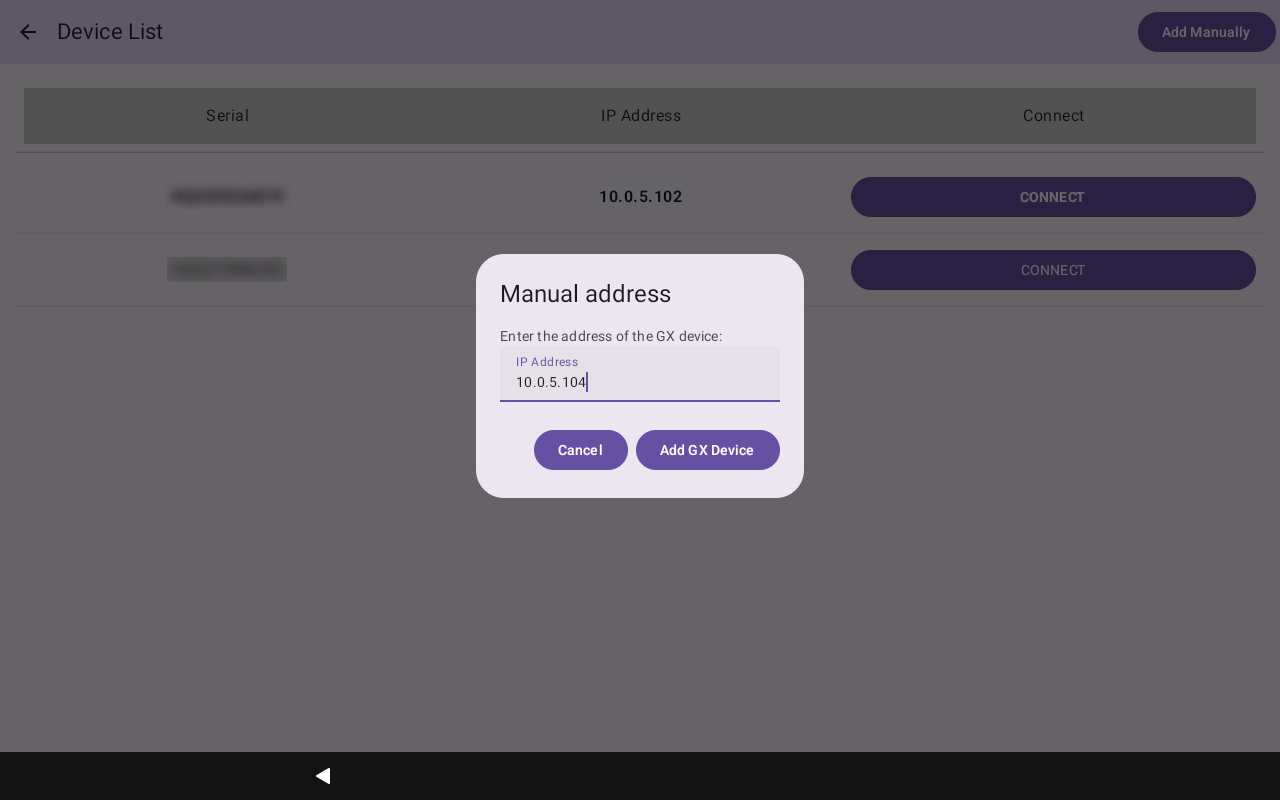
In some cases, the GX device might not automatically appear in the device list. Perhaps the GX device is on a different subnet.
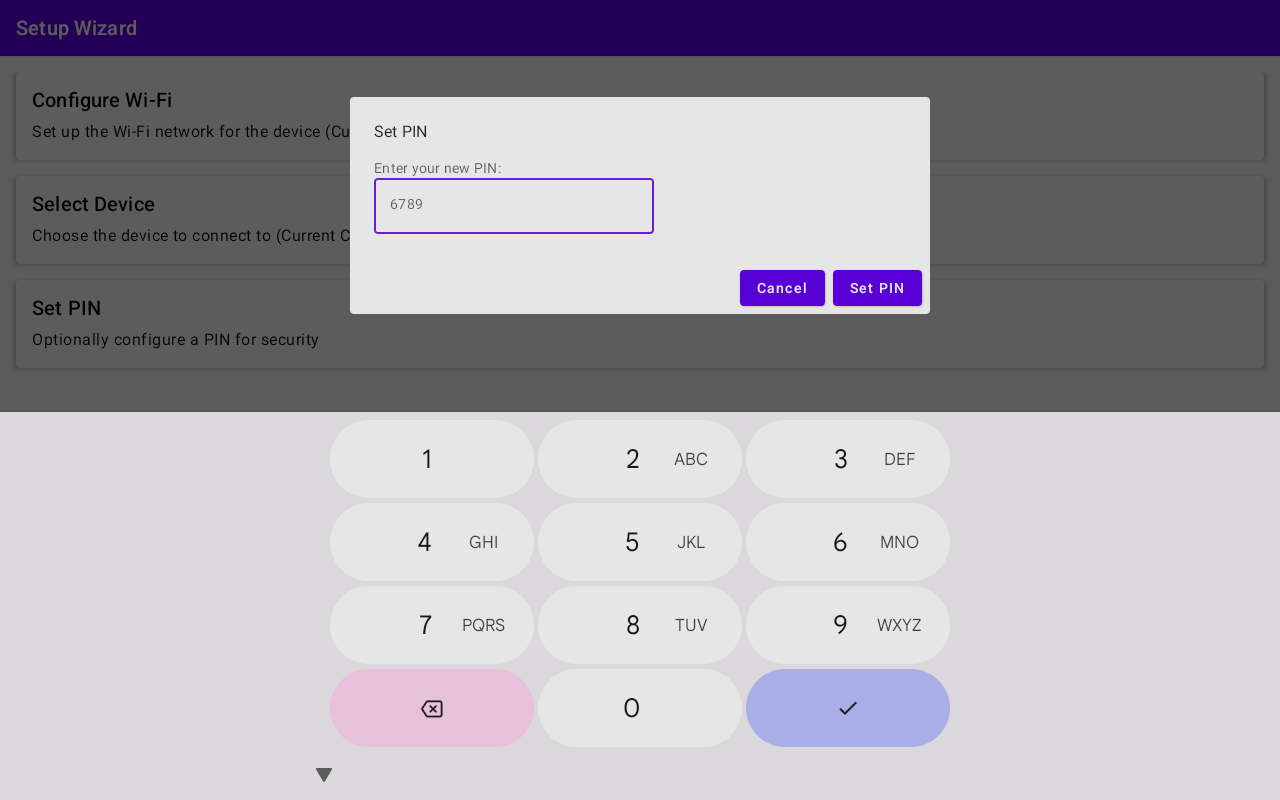
  • Add Manually: If your desired GX device is not found in the displayed list, look for the option to add a device manually by tapping the "Add Manually" button at the top-right corner of the screen.

    Type the IP address of the GX device in the popup box, and press "Add GX Device".

GXDisplay_Device_list_add_manually.png

Important

You should consider setting a PIN to prevent changes to the settings on the Android device's service menu.

This PIN does not protect settings changes on the GX device.

  • Set PIN: From the setup wizard screen tap "Set PIN" and enter a unique PIN in the popup box.

GXDisplay_Set_PIN.png
  • Tap "Accept" to complete the initial setup wizard.

GXDisplay_Setup_wizard_populated.png

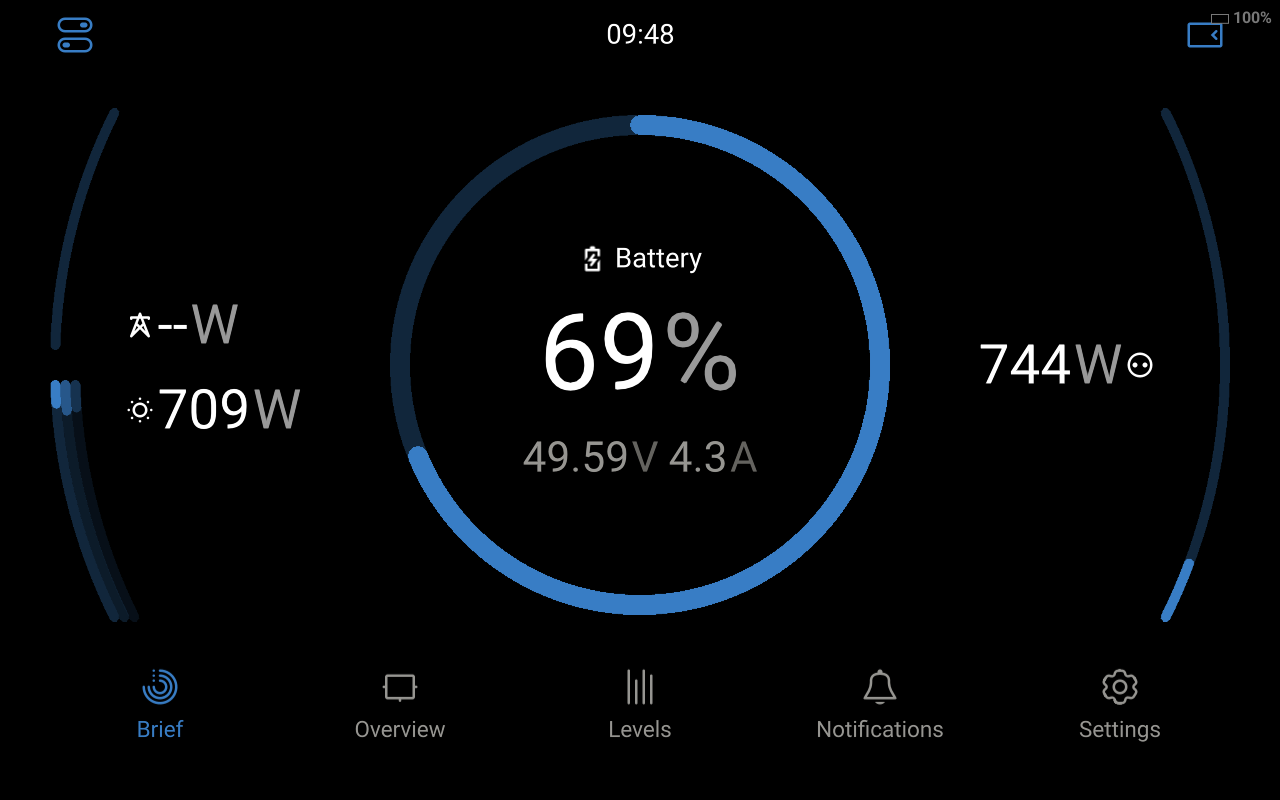
The Android device is now connecting to the GX device, which will load the required components for the display.

GXDisplay_gui_loading.png

After a short while, the display will load.

The user interface closely mirrors that of a GX Touch or Ekrano display, with identical touch controls and menu structures.

The user interface on this device, on other devices, and on the GX Display operates independently, allowing each device to display different pages.

GXDisplay_main_display_menu.png