 Add this page to your book
  Remove this page from your book
  Manage book (
 Help
Help This is an old revision of the document!
Table of Contents
Getting started with VRM
There are two separate steps that need to be taken. First, you need to create a VRM user account. And after that the installation, called 'site' needs to be paired with that user account. It is possible to pair one site to multiple user accounts.
Requirements
- A computer connected to the Internet
- The VRM Portal ID, which uniquely identifies your system.
- Color Control GX: the VRM Portal ID can be found in the menu Settings → VRM Logger. It looks like this: be300d83ff04. For more information, see Troubleshooting VRM Portal Connectivity for a CCGX.
- VGR, VGR2 and VER: the VRM Portal ID is the IMEI number. It is written on a label on the back of the modem, and on a label on the outside of the carton. It can also be requested by sending a text message to the modem with the command 'GSM'. For more information, see Troubleshooting VRM Portal Connectivity for a VGR.
- The gateway, be it a Color Control GX, VGR, VGR2 or VER, needs to have had a successful connection to the VRM Portal.
Note: it is recommended, especially when working with SIM cards, to first configure and test the internet connection in your office, before installing it on location. It is not necessary to connect any equipment, such as a Multi or BMV battery monitor: applying power to a stand-alone Color Control or Victron Global Remote will do, as they also connect to the VRM Portal when there are no products connected.
Creating a VRM user account
1. Go to https://vrm.victronenergy.com
2. Click ‘Sign up for Free’:

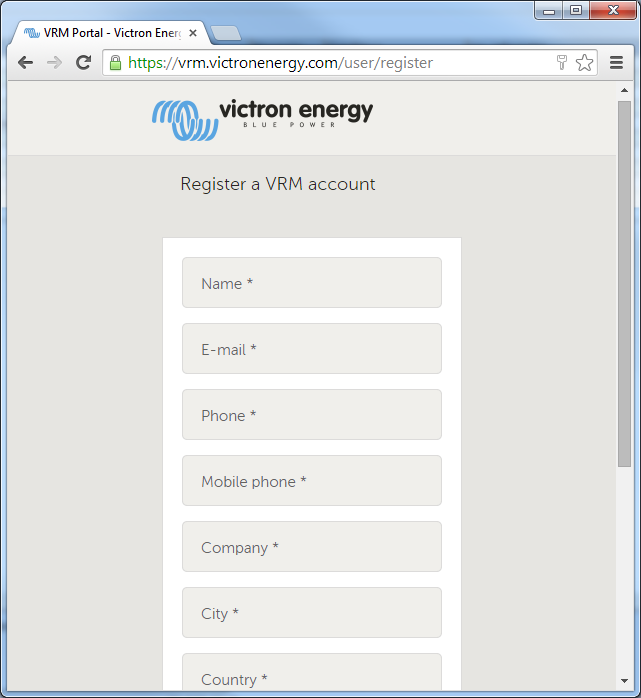
3. Complete all the requested information:
4. You will now receive a confirmation email with a link to activate your account.
Account creation is now finished, click add site to continue pairing a site to this user account.
Pairing a site to a user account
Note: make sure that the VGR/VER/CCGX has already started communicating with the VRM Site. Otherwise it is not possible to pair and add a site to a user account. If the VGR/VER/CCGX has not started communicating with the VRM site yet, this error screen will appear:

1. Enter the IMEI or MAC Address number for one of the VGR, VER or CCGX products.
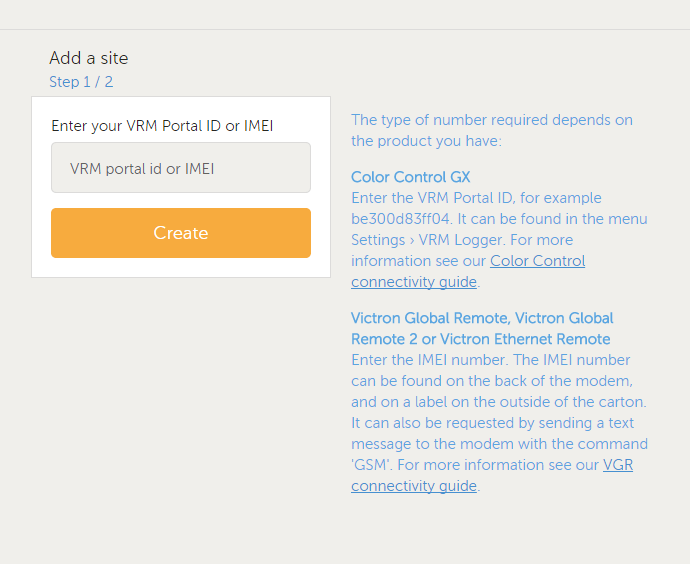
2. Click next and your device is now paired with your VRM user account. In case you are the first user to add this site to your account, you will automatically have Admin rights for this site. Any subsequent users that add this site to their account will become a normal user, that cannot change any settings. An Admin user can assign Admin rights to other users on the Settings page.
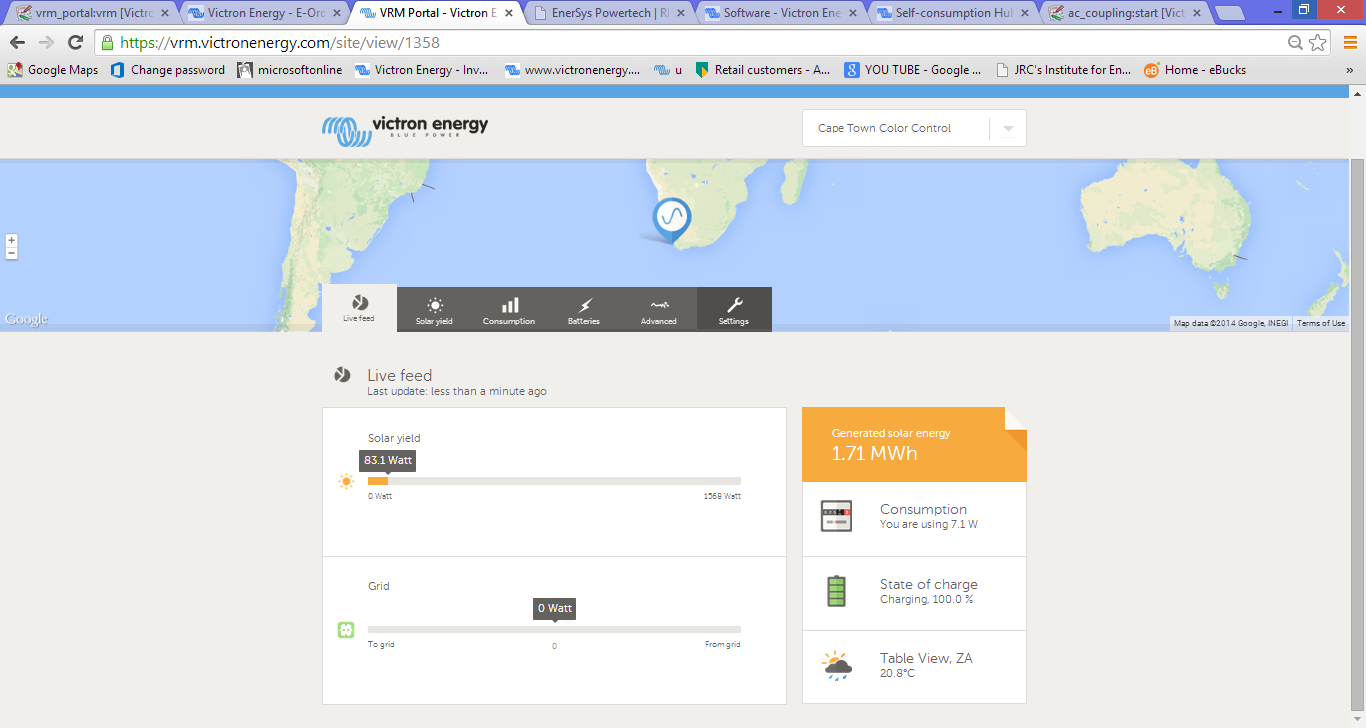
3. The first page will be as the screen below. If the CCGX/VGR/VER is not yet installed there will no data shown.
4. Once more than one site is linked to your VRM user account, you will see all of them on a map. When multiple sites are close together, they will be grouped into one balloon. The color of the balloon will be red when one or more sites grouped in that balloon has a problem.

Configure the site
In the Settings tab, only visible for sites at which you have admin rights, go through the following settings:
General
- GSM Number: useful to save the GSM number of the sim card of a Victron Global Remote. The only function of this field is to keep it in a safe place, nothing else.
- Generator: enable when there is a AC generator connected to the system. In case of a Quattro, the VRM Portal will assume that the generator is connected to AC input 1.
- Mains: enable when there is Mains (utility grid or shore) available to the system. In case of a Quattro, the VRM Portal will assume that this is connected to AC input 2.
- Use VE.Bus SOC: Enable this for systems in which the Multi . The website will then use battery state of charge as reported by the Multi or Quattro. Note that you need to configure the battery capacity in VEConfigure. More information in the VRM FAQ
- Has DC System: Enable this for boats, vehicles and other installations with DC loads and chargers other than the Multi and MPPT chargers. Not applicable for most Off-grid installations. The difference between the DC current measured by the Multi and by the BMV will be attributed to a 'dc system'. It can be an alternator, pumps, DC fridge, etcetera. Note that the value shown will always be an approximation.
The Generator and Mains settings are used to translate power and voltages reported by the Multi and Quattro to 'Genset' or 'Mains'. Instead of AC input 1 and AC input 2.
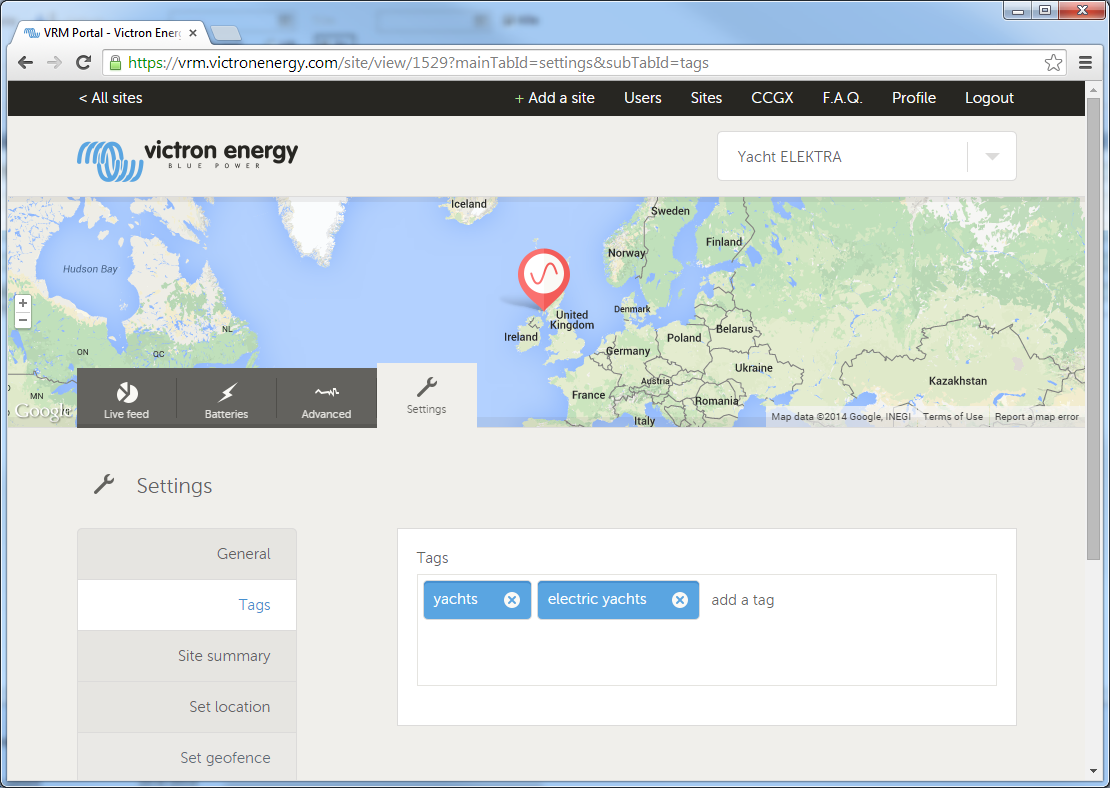
Tags
- Useful for accounts that have many sites. For example a hybrid generator rental company with four depots: North, South, West and East. Add the tag of the right depot to all sites. Then in the sites overview you can filter on these tags.
Site summary
- Configure the data that you want to see on the home page, that shows a summary of all sites in your account. Only useful for accounts with multiple sites.
Set location
- Set the location of the site by dragging the cursor to the right place. This automatically sets the timezone that is used for all x-axes on the graphs as well.
Advanced tab setup
- Select which widgets you want to see on the advanced tab.
Users
- Configure which users are admin and which not. Admins can change settings on all sites for which they have admin rights.
- Invite new users to this site.
Alarm rules
More tips and tricks
- Use the Invite a user function to pair this site to other user accounts as well. It is also possible to invite users that do not yet have a VRM user account. They will automatically be directed to the account creation page.
- To see a list of all connected products and their firmware version numbers, go to the Settings tab, and then the System overview section.
- The screensaver enables you to quickly see what state the site you're currently viewing is in. Configure the screensaver in your profile settings to automatically show up after a period of inactivity, or press the “s” key twice while viewing a site.
- Check and if necessary alter the default alarm monitoring setup to your needs. VRM Portal alarms and monitoring.
- When you have many sites, it is possible to switch to a table view:
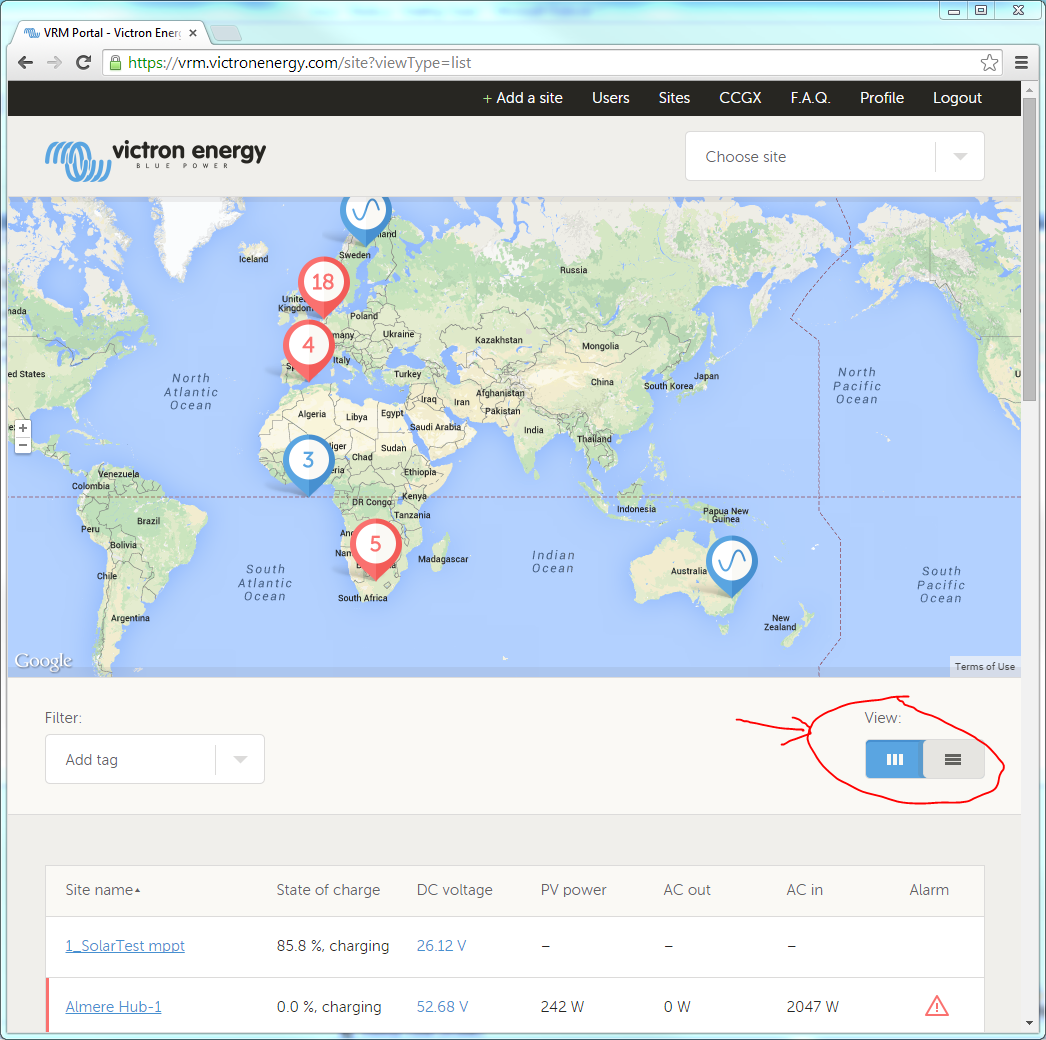
- In the screenshot above, on the left, there is a filter. Use it to filter. Adding tags to a site is done in the 'Settings' page. In the example below, two tags are added to this installation, 'yachts' and 'electric yachts'.
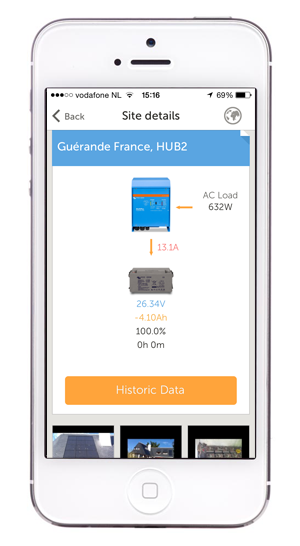
- Do not forget to install the VRM app on your phone. It is available for free in both the Apple store and the Google Play store for Android. For Android, it is also possible to download the APK files on our software and downloads page.
- See the VRM Portal - Frequently asked questions section for more information.
- New - Documentation for VRM World
- We maintain a change log for VRM
Increased security when logging into your VRM site
DISQUS
~~DISQUS~~