 Add this page to your book
  Remove this page from your book
  Manage book (
 Help
Help Table of Contents
Two-step verification
Protect your account against unauthorized access with two-step verification. Two-step verification adds an extra layer of protection to your account by requiring you to enter both your password and a security code when logging into your VRM installation. The code can be sent to a phone number via SMS or obtained through an authenticator app.
This manual describes how two-step authentication can be switched on or off for your VRM account. The activation sequence for each two-step authentication method is detailed below in its own section.
If you want to deactivate two-factor authentication please refer to the last section.
Accessing two-step verification settings
Before making changes to the two-step verification settings on your account, you will be required to authorise those changes. This section explains where to find the two-step verification menu and how to use it.
Step one
Log into your account at https://vrm.victronenergy.com/user/login
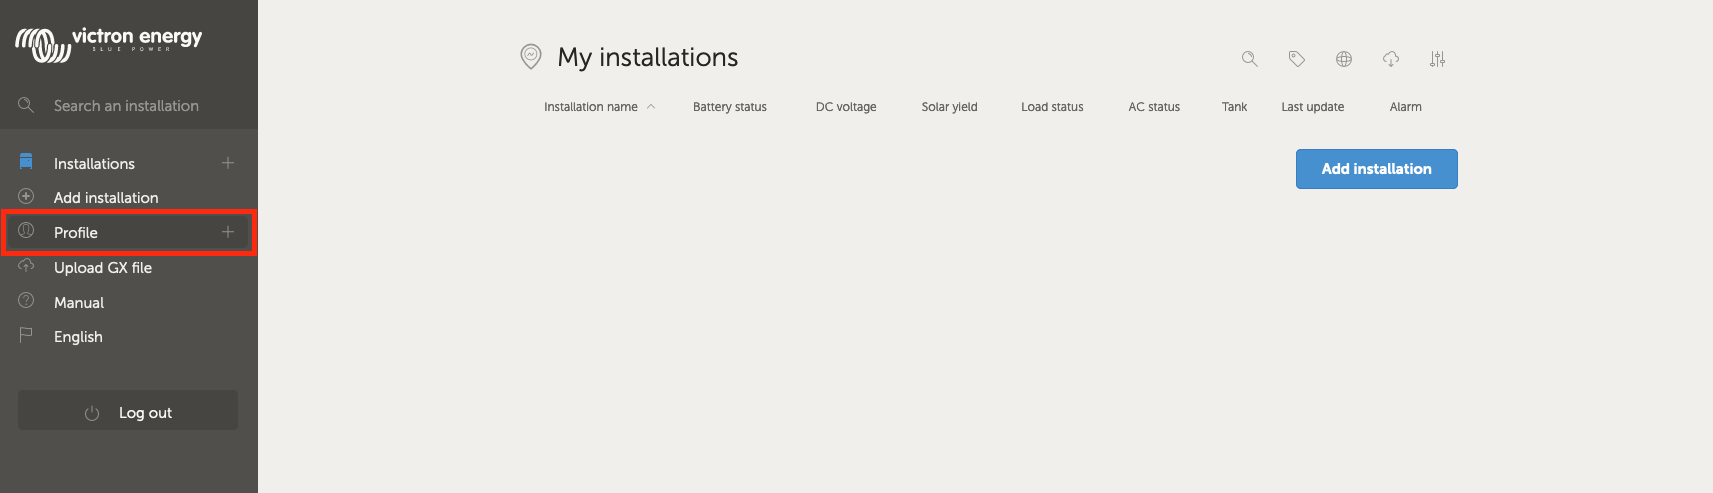
Once logged in, you will be redirected to your VRM homepage, shown in the image below. On this page select 'Profile' on the left as shown in the example image below, where 'Profile' is marked with a red box.
Step two
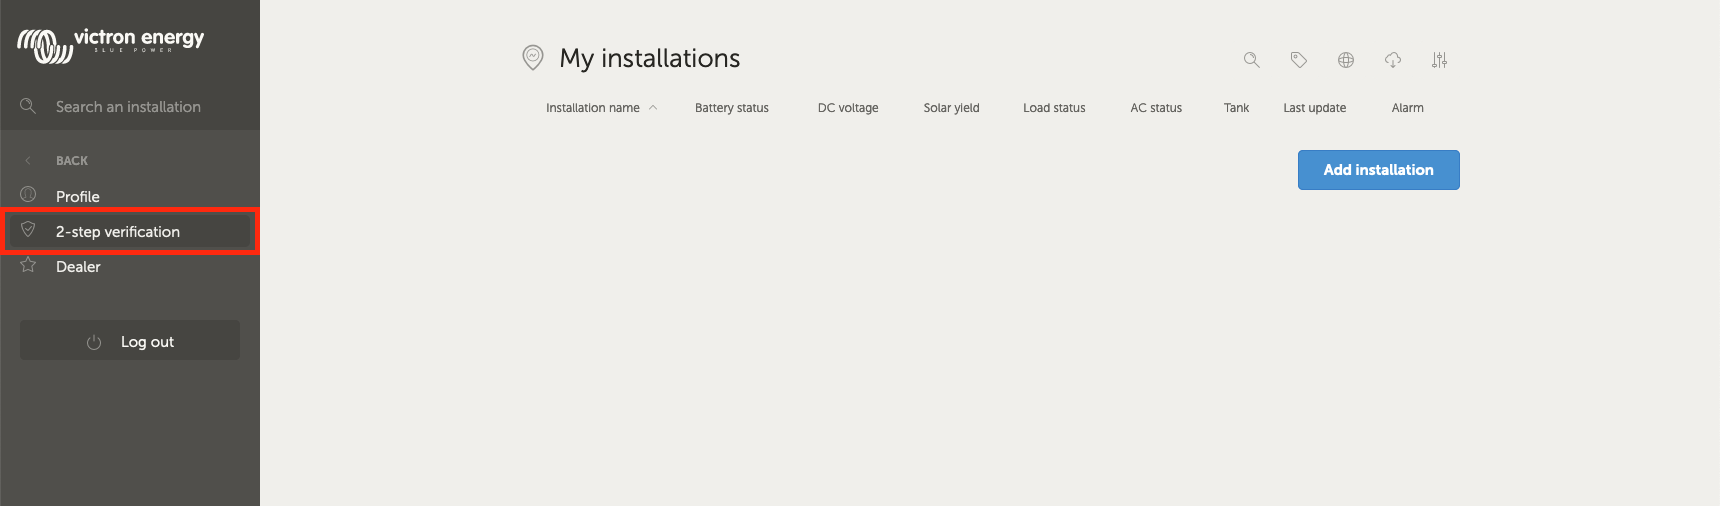
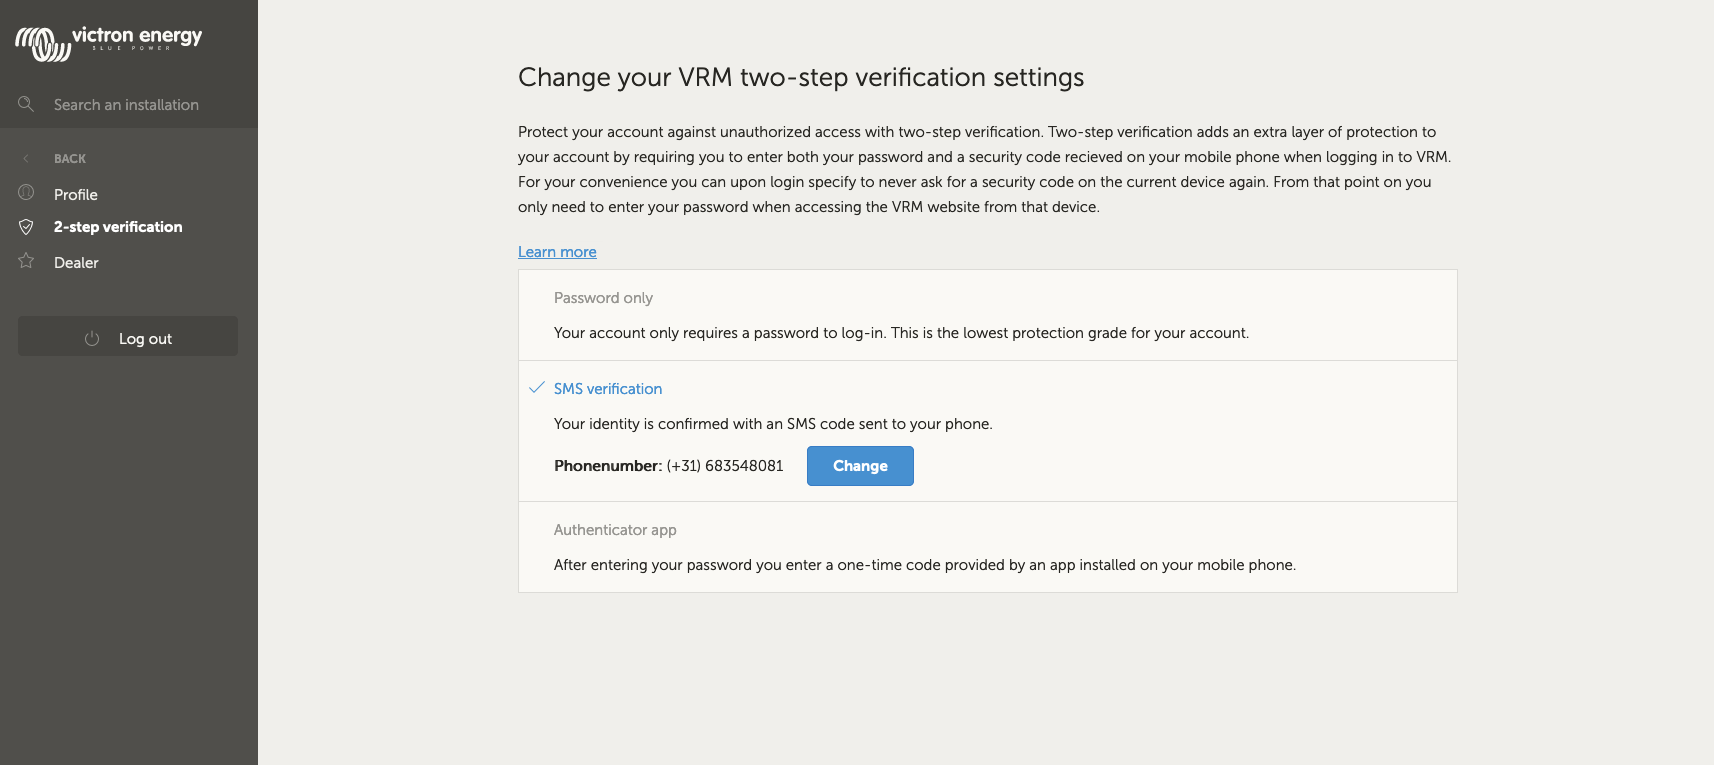
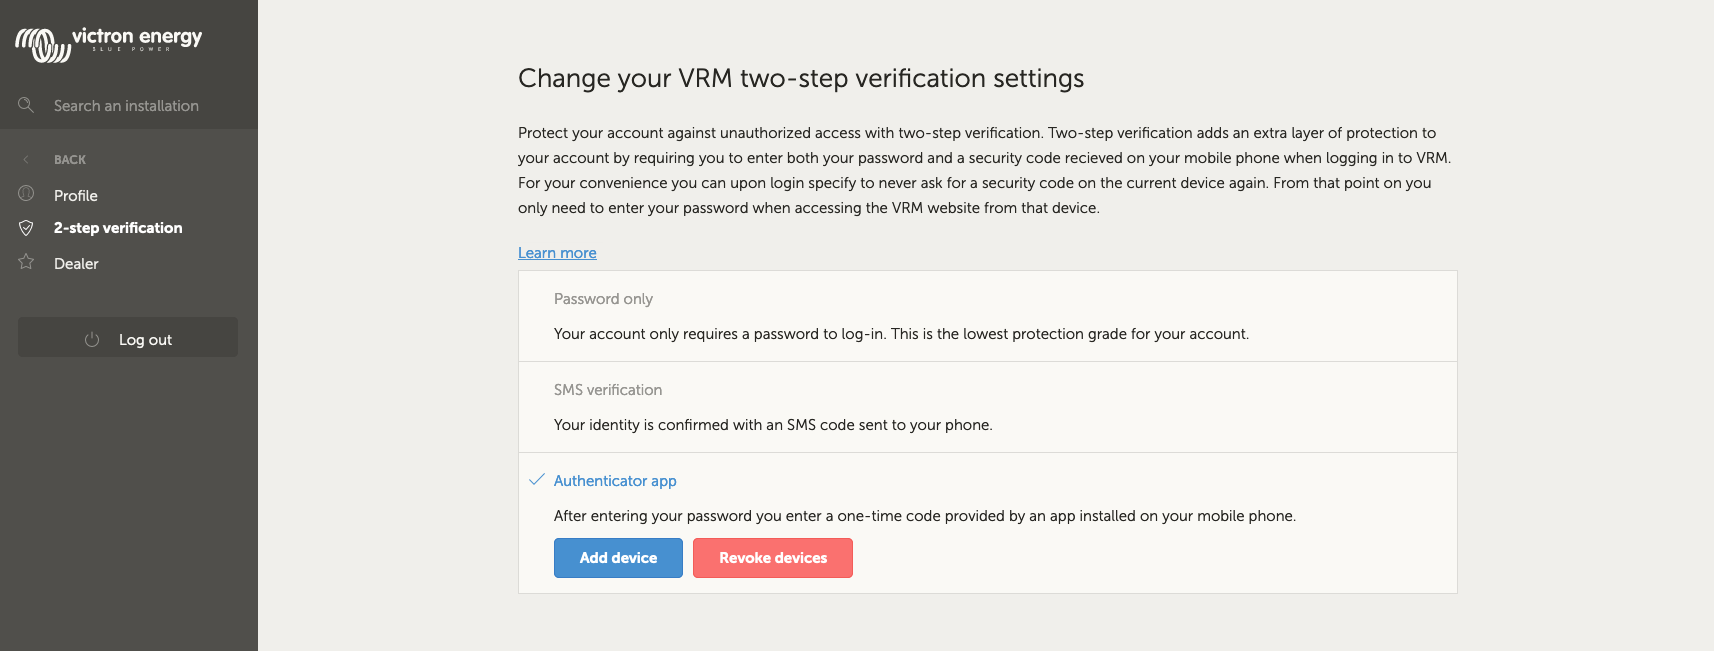
After selecting 'Profile' in the top menu, you will arrive at the ‘Change your VRM two-step verification settings’ page. On this page you can make changes to your profile as well as set up two-step verification. For this you will have to select the button '2-step verification' marked in red in the image below.
Step three
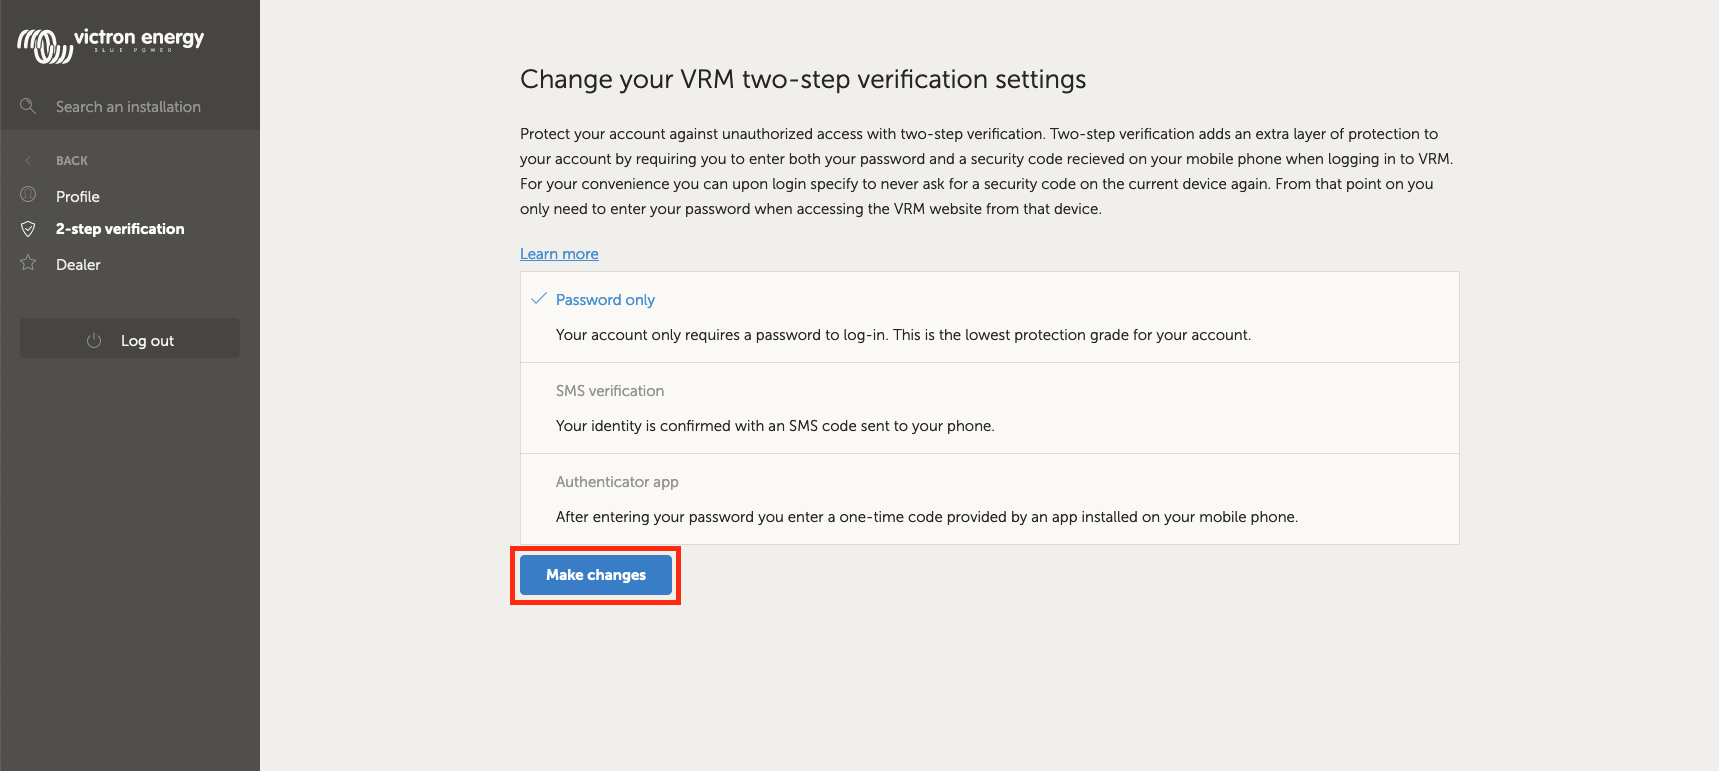
To be able to make changes select the button ‘Make changes’ marked in red in the image below.
Step four
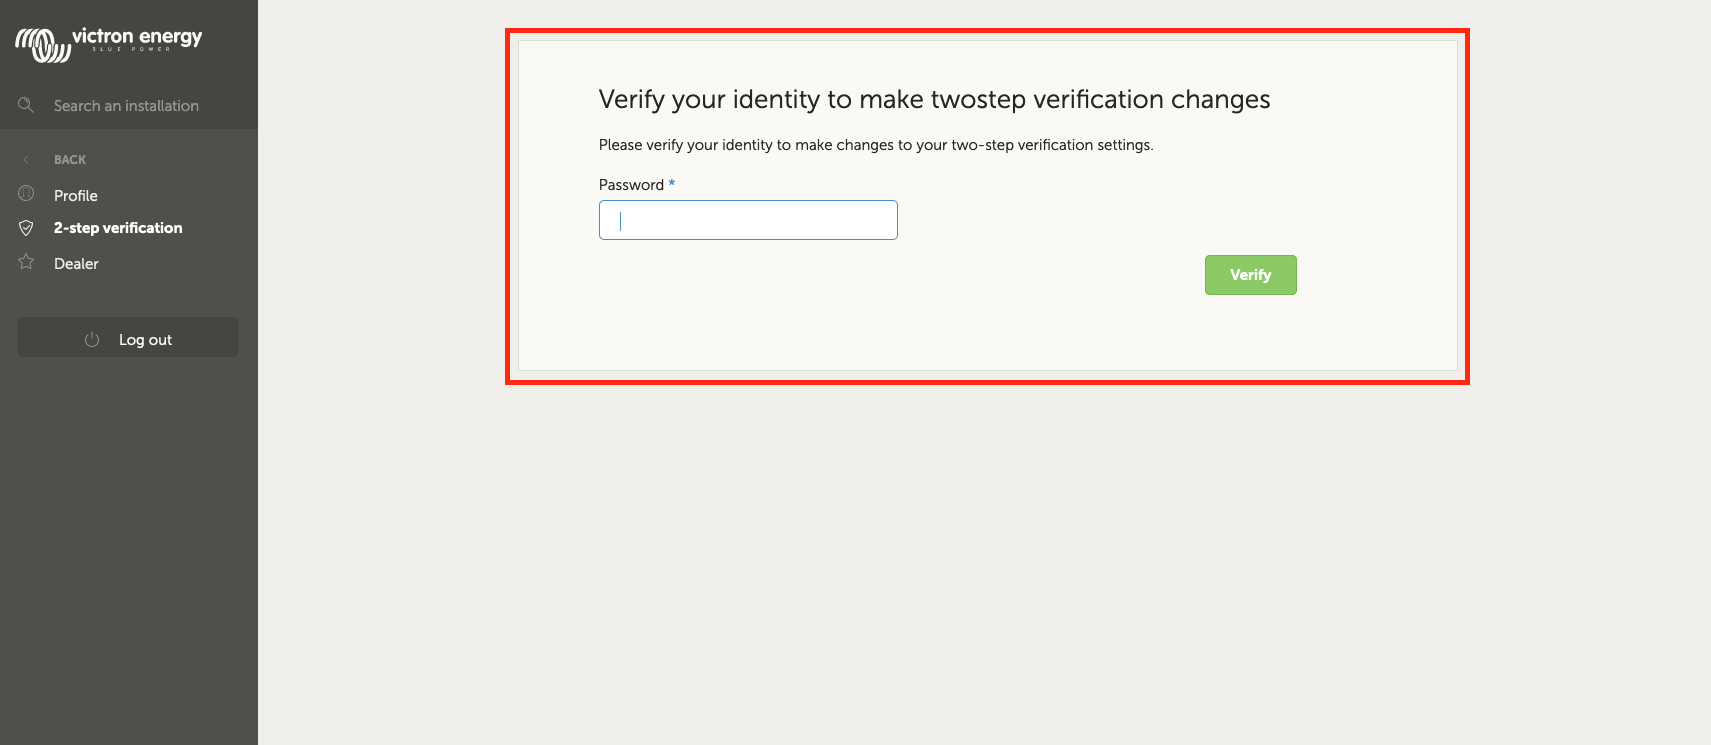
To authorize making changes to the two-step verification settings you are required to perform the already configured two-step verification process.
The authorization form (as shown below) will indicate to you what information to provide.
- In the case of “Password only” setting you are only required to enter your password.
- If the active two-step verification mode is SMS then you will receive a security code on the phone number registered on your account.
- When using an authenticator app use the app to generate the required security code.
After filling in the required information, click the green button labelled ‘Verify’ to continue.
Step five
If the verification code is correct you will be redirected to the two-step verification settings page. The blue “Make changes” button should have disappeared and you can now make changes to your settings.
SMS verification
With SMS verification mode, each login attempt will require you to enter a unique login-code to verify your identity. In addition, the two-step verification settings page will also be protected by the same verification sequence.
Activation
This section details how to activate SMS verification as two-step verification mode.
Step one
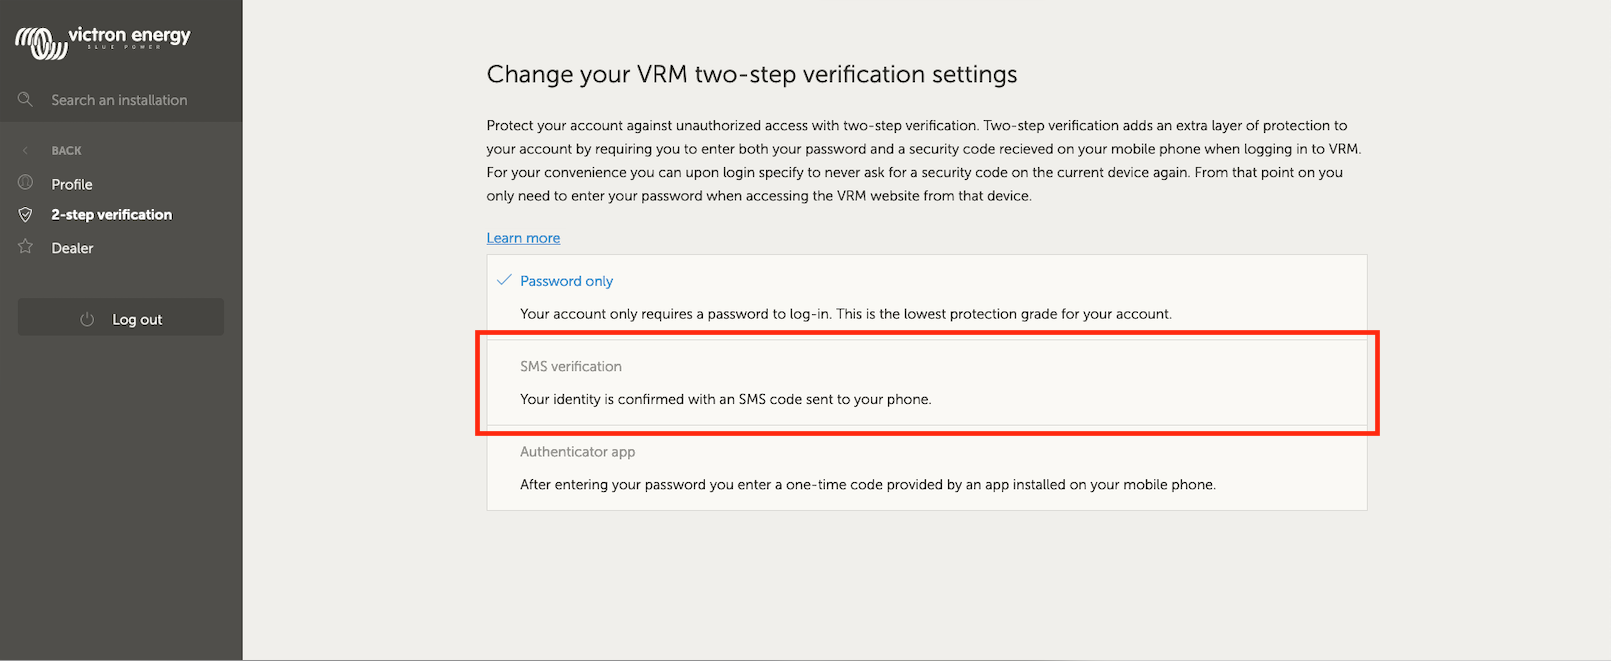
Navigate to the two-step verification settings menu and authorize making changes (see “Accessing two-step verification settings” section). To start setting up SMS verification, click the “SMS verification” labelled option on the menu. This is the red outlined option in the image below.
Step two
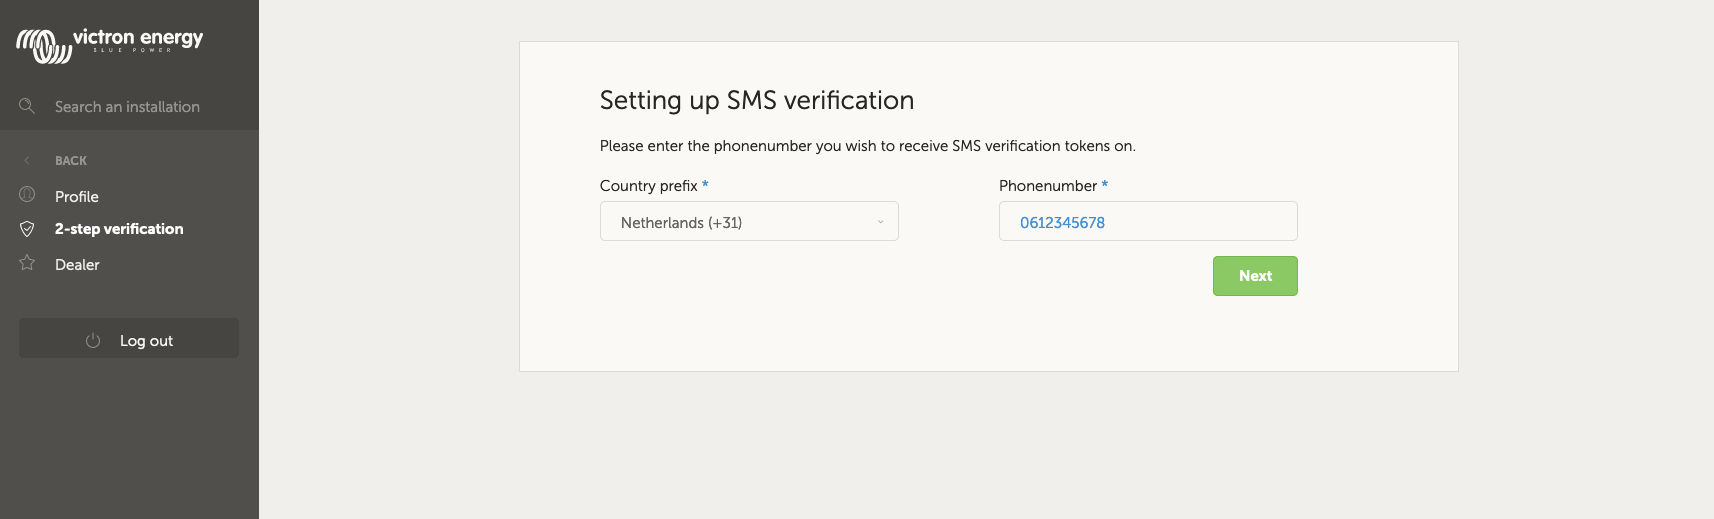
With the left dropdown select the prefix of your phone number, most likely this is the same as the country you reside in. Fill the remainder of your phone number into the “Phonenumber” input box.
After entering these you can proceed by clicking on the green “Next” button. This will cause a test SMS to be sent to the phone number you entered. Make sure you have access to the phone with the chosen phone number and that it is able to receive the test SMS.
Step three
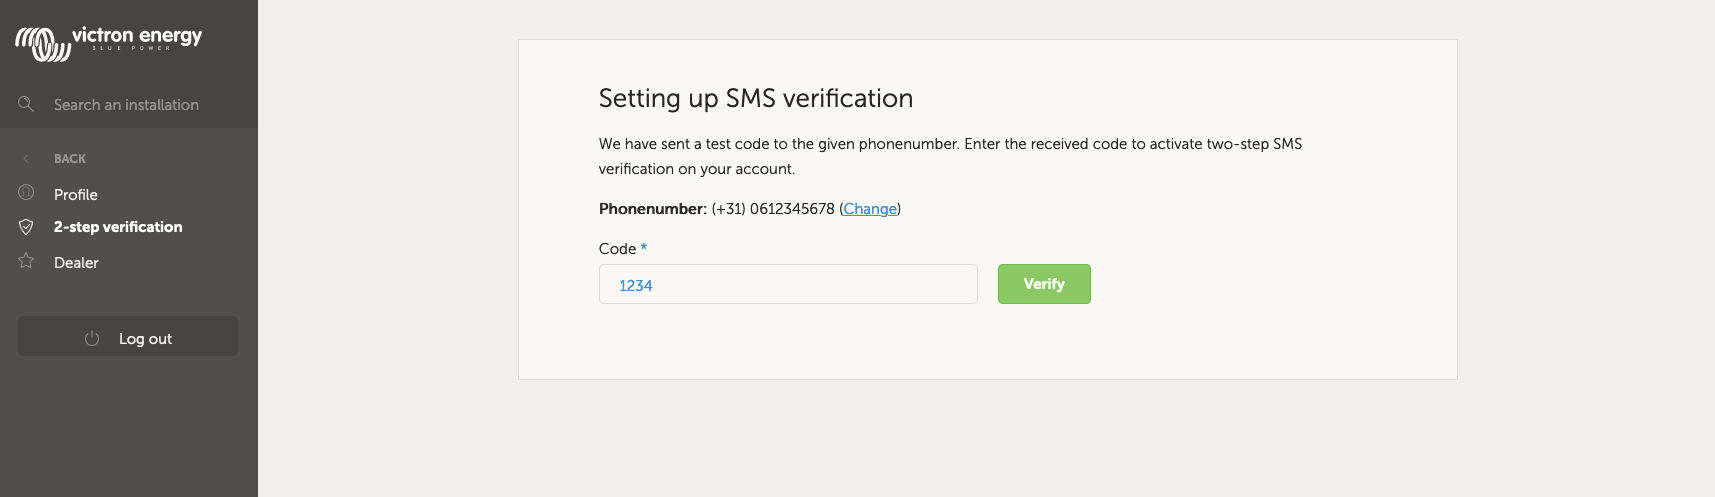
It may take a moment for the test SMS to be received, the SMS should contain the verification code to verify. Enter the code into the input box fully and select the green “Verify” button to confirm the code.
You can change the phone number by clicking on the “(Change)” link next to the phone number display. This will bring you back to the previous step, allowing you to send a new test SMS.
In the event of an error or failure to receive the SMS, double check the phone number on the screen.
Step four
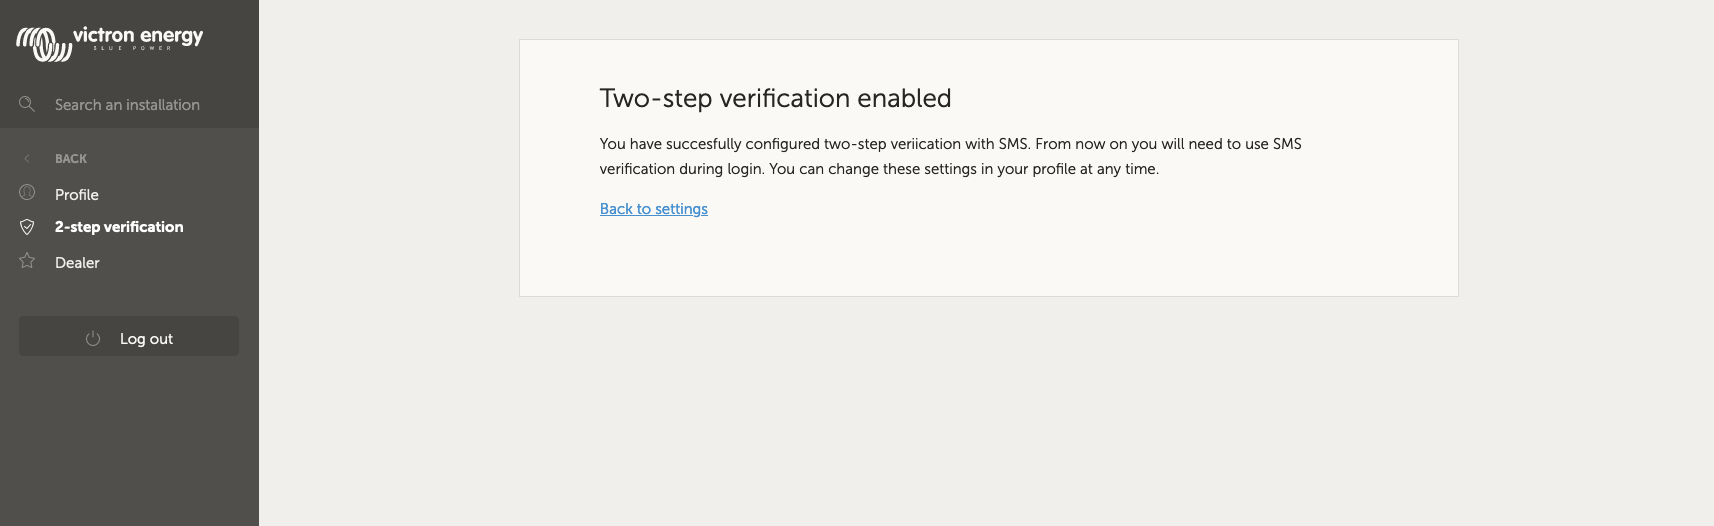
When the test code is verified the screen shown in the image below appears to indicate the completion of the SMS two-step verification setup. Immediately after this, any future login attempt will require you to enter an SMS code as part of the login sequence.
Change phonenumber
Once the SMS verification mode is activated you can change the phone number on which to receive the SMS verification using the button labelled “Change” next to the phone number display. The procedure to change the phone number follows the same steps as in the activation of the sms verification mode. Please refer to the activation section above for a detailed explanation on each step.
Mobile authenticator
Protect your account through an authenticator app. This is a mobile phone app that will generate security codes used during logins.
Activation
This section details the steps taken to link an authenticator app to your VRM account. The guide assumes that an authenticator app has been installed (by you) on the device you wish to use for two-step verification.
Step one
Navigate to the two-step verification settings menu and authorize making changes (see “Accessing two-step verification settings” section). To start setting up mobile authenticator verification, click the “Authenticator app” labelled option on the menu. This is the red outlined option in the image below.
Step two
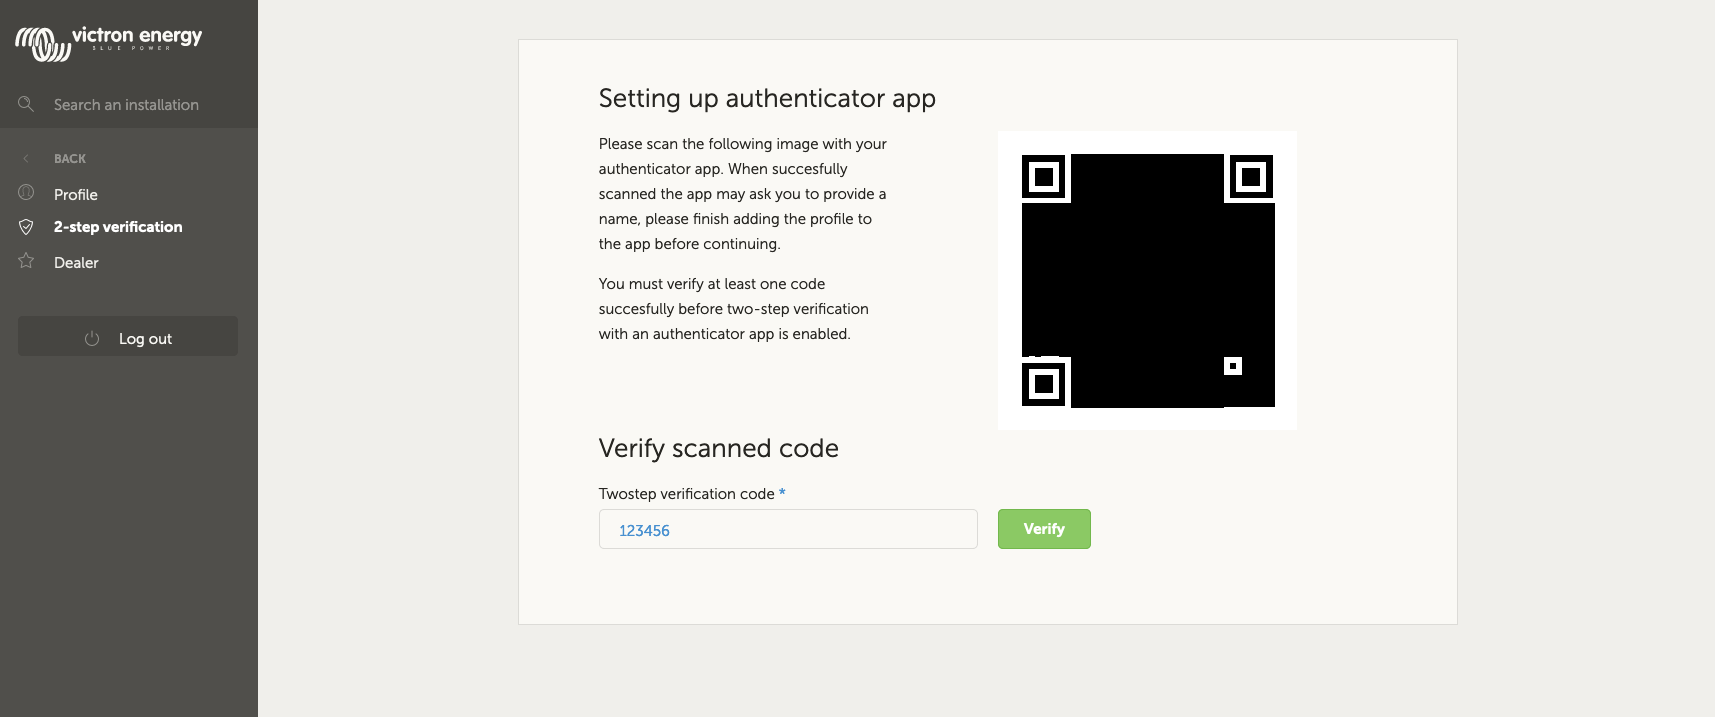
Open the authenticator app and select to add an account (this varies per app, in some cases it may also be labelled “Scan code”). Authenticator apps are linked by scanning a QR code, this must be done using the QR code on the setup page.
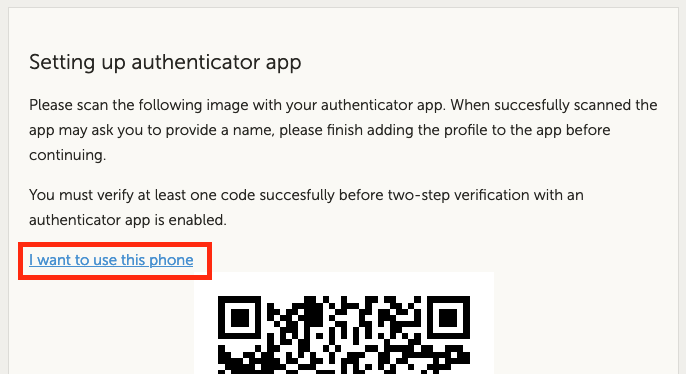
Should it be the case that you are visiting VRM on the phone that has the authenticator app, then you can tap the “Use this phone” link to activate the authenticator app directly. In the image below the link is outlined in red. Note: This requires the authenticator app to be installed on your phone.
Step three
Once the app has scanned the QR code finish creating the profile in the authenticator. Use the new profile to generate the first security code (6 digits) and enter it into the “Twostep verification code” labelled input box. If the security code is not immediately visible the app may require you to tap the profile or a similar interaction to generate the code. After entering the code, click the “Verify” button next to the input box to complete the link. The codes generated by the authenticator app are only valid for a short period of time (about 30 seconds), so if the verification fails it may be that the code already expired.
Step four
When the verification of the generated code passes the screen shown below is shown. From here you can immediately add more devices or go back to settings. You can also add more devices at a later point in time.
Adding another device
Once activated you can link more devices to use for two-step verification. You can use any single linked device for the two-step verification during login.
To add more devices use the “Add device“ button on the two-step settings page. The process thereafter is the same as for the initial activation sequence (see activation section for steps).
Removing devices
It may be the case that you want to remove a linked device such that it can no longer be used for two-step verification. To do this you will have to use the “Revoke devices” button on the settings page, this will revoke *all* devices to your account. The revoke process is carried out by successfully making a new link to a device, this invalidates all previously linked devices. You can reuse an already linked device during the revoke process. The process thereafter is the same as for the initial activation sequence (see activation section for steps).
Disabling two-step verification
You can completely disable two-step verification on your account by clicking on the “Password only” option on the two-step verification settings page.
Disabling two-step verification removes the two-step verification data for the other methods you setup. Meaning that switching back to a different verification mode afterwards will require you to go through the entire setup process again for that verification mode.
Step one
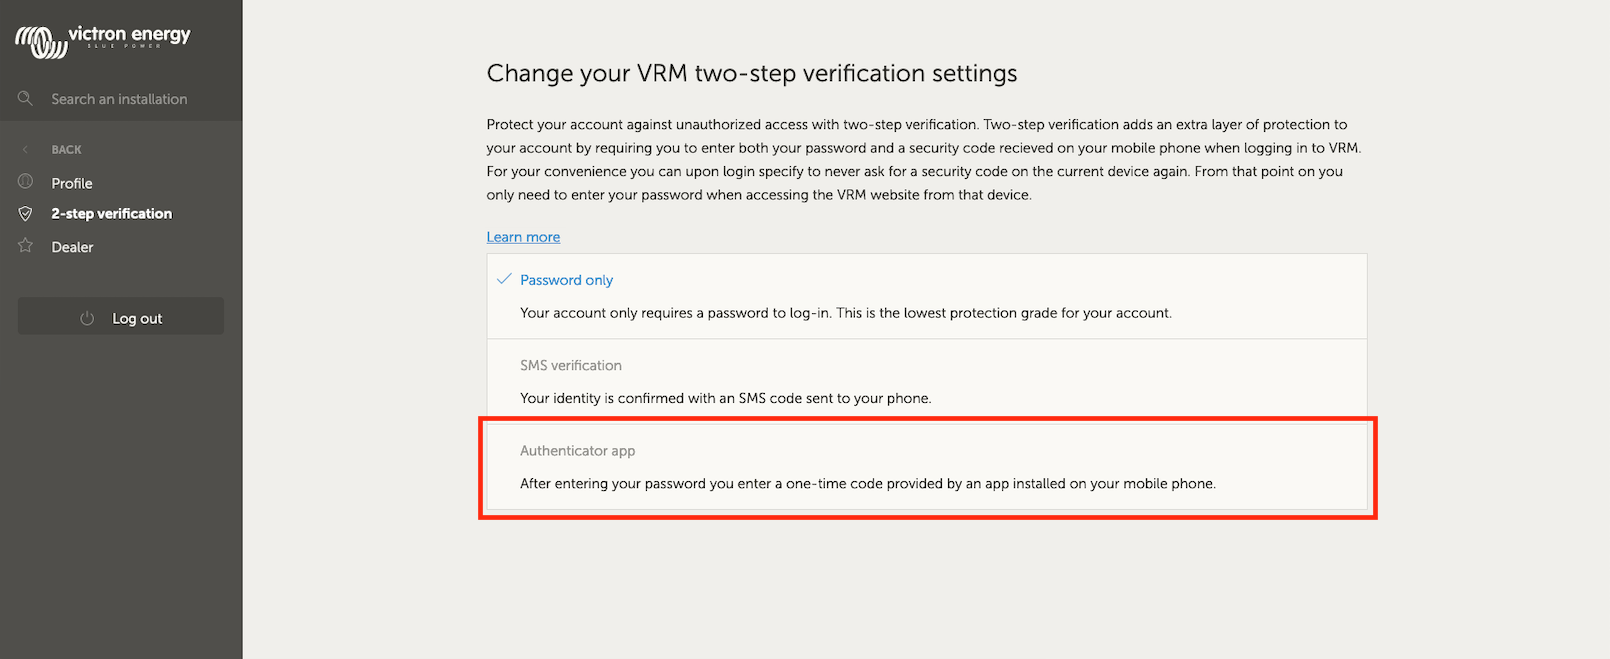
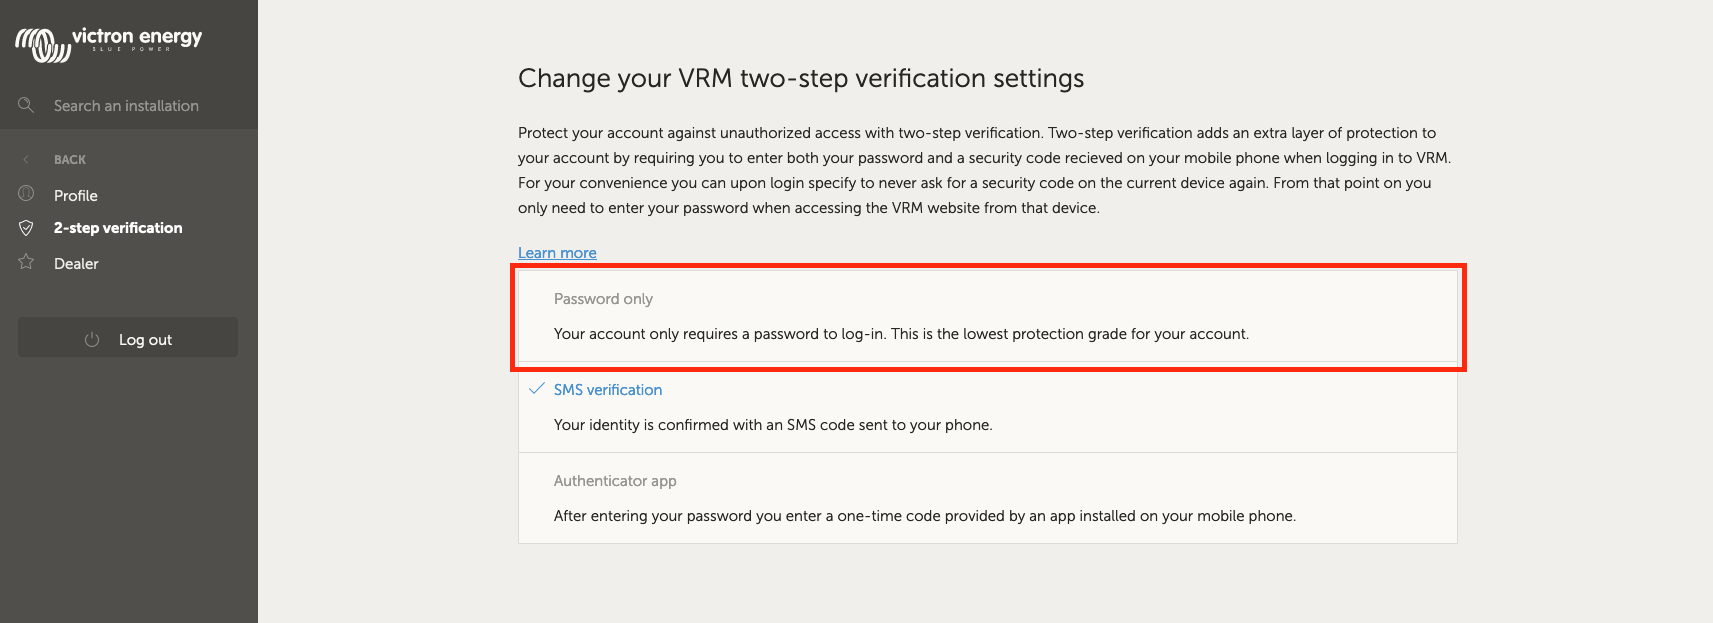
Navigate to the two-step verification settings menu and authorize making changes (see “Accessing two-step verification settings” section). To disable two-step verification, click the “Password only” labelled option on the menu. This is the red outlined option in the image below. If this option has a blue checkmark then two-step verification is already disabled.
Step two
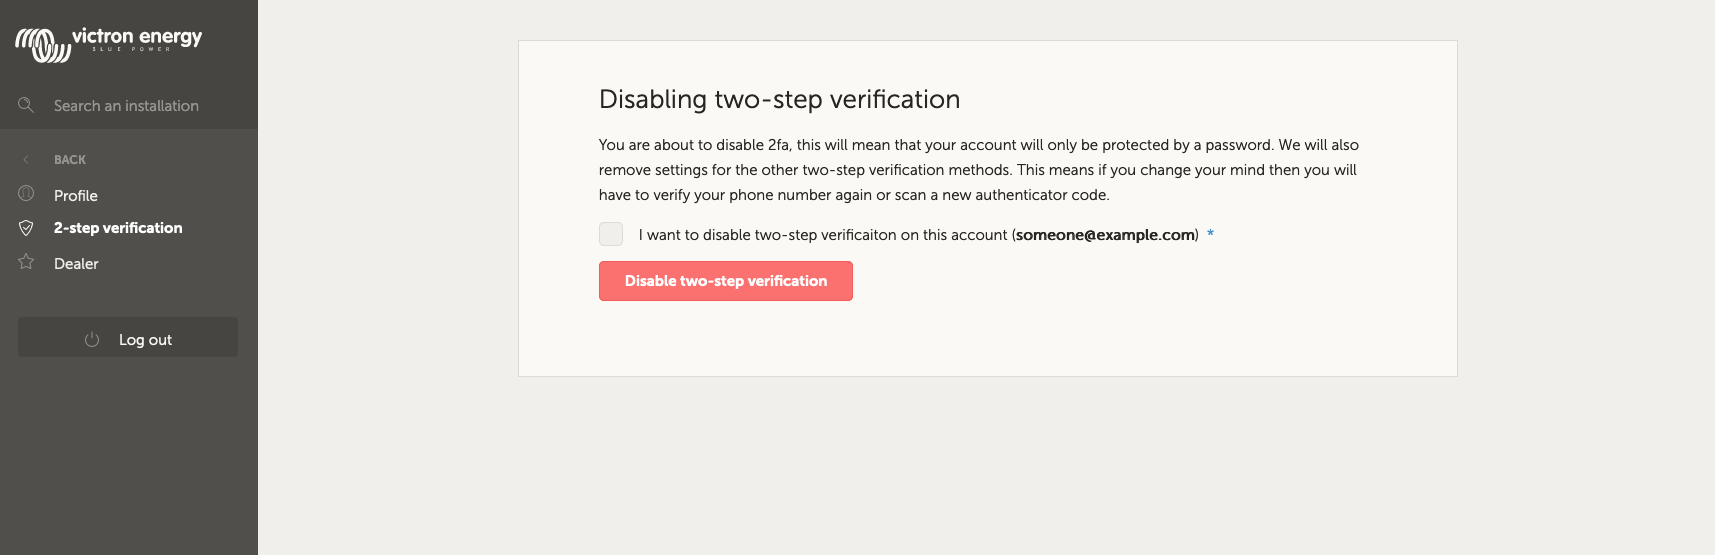
Mark the checkbox to indicate you want to proceed with switching back to password only protection on your account. Then you can click the red confirmation button, immediately afterwards any future login attempts will only require you to enter a password.
Resetting 2FA
When trying to log-in, after entering the password, below the 2FA box there is an option to “Reset 2 Factor Authentication”
You can disable 2FA by following these steps:
- Fill in email & password
- Click the “Reset two-factor authentication” text/link
- Fill in your email (again)
- An email is sent to that mail account with a hyperlink
- Clicking the link resets 2FA
