2. Quick start guide
Connect the DC cables to the battery or batteries; ensure that there is a good electrical connection and keep the terminals away from any surrounding objects that could cause a short circuit.
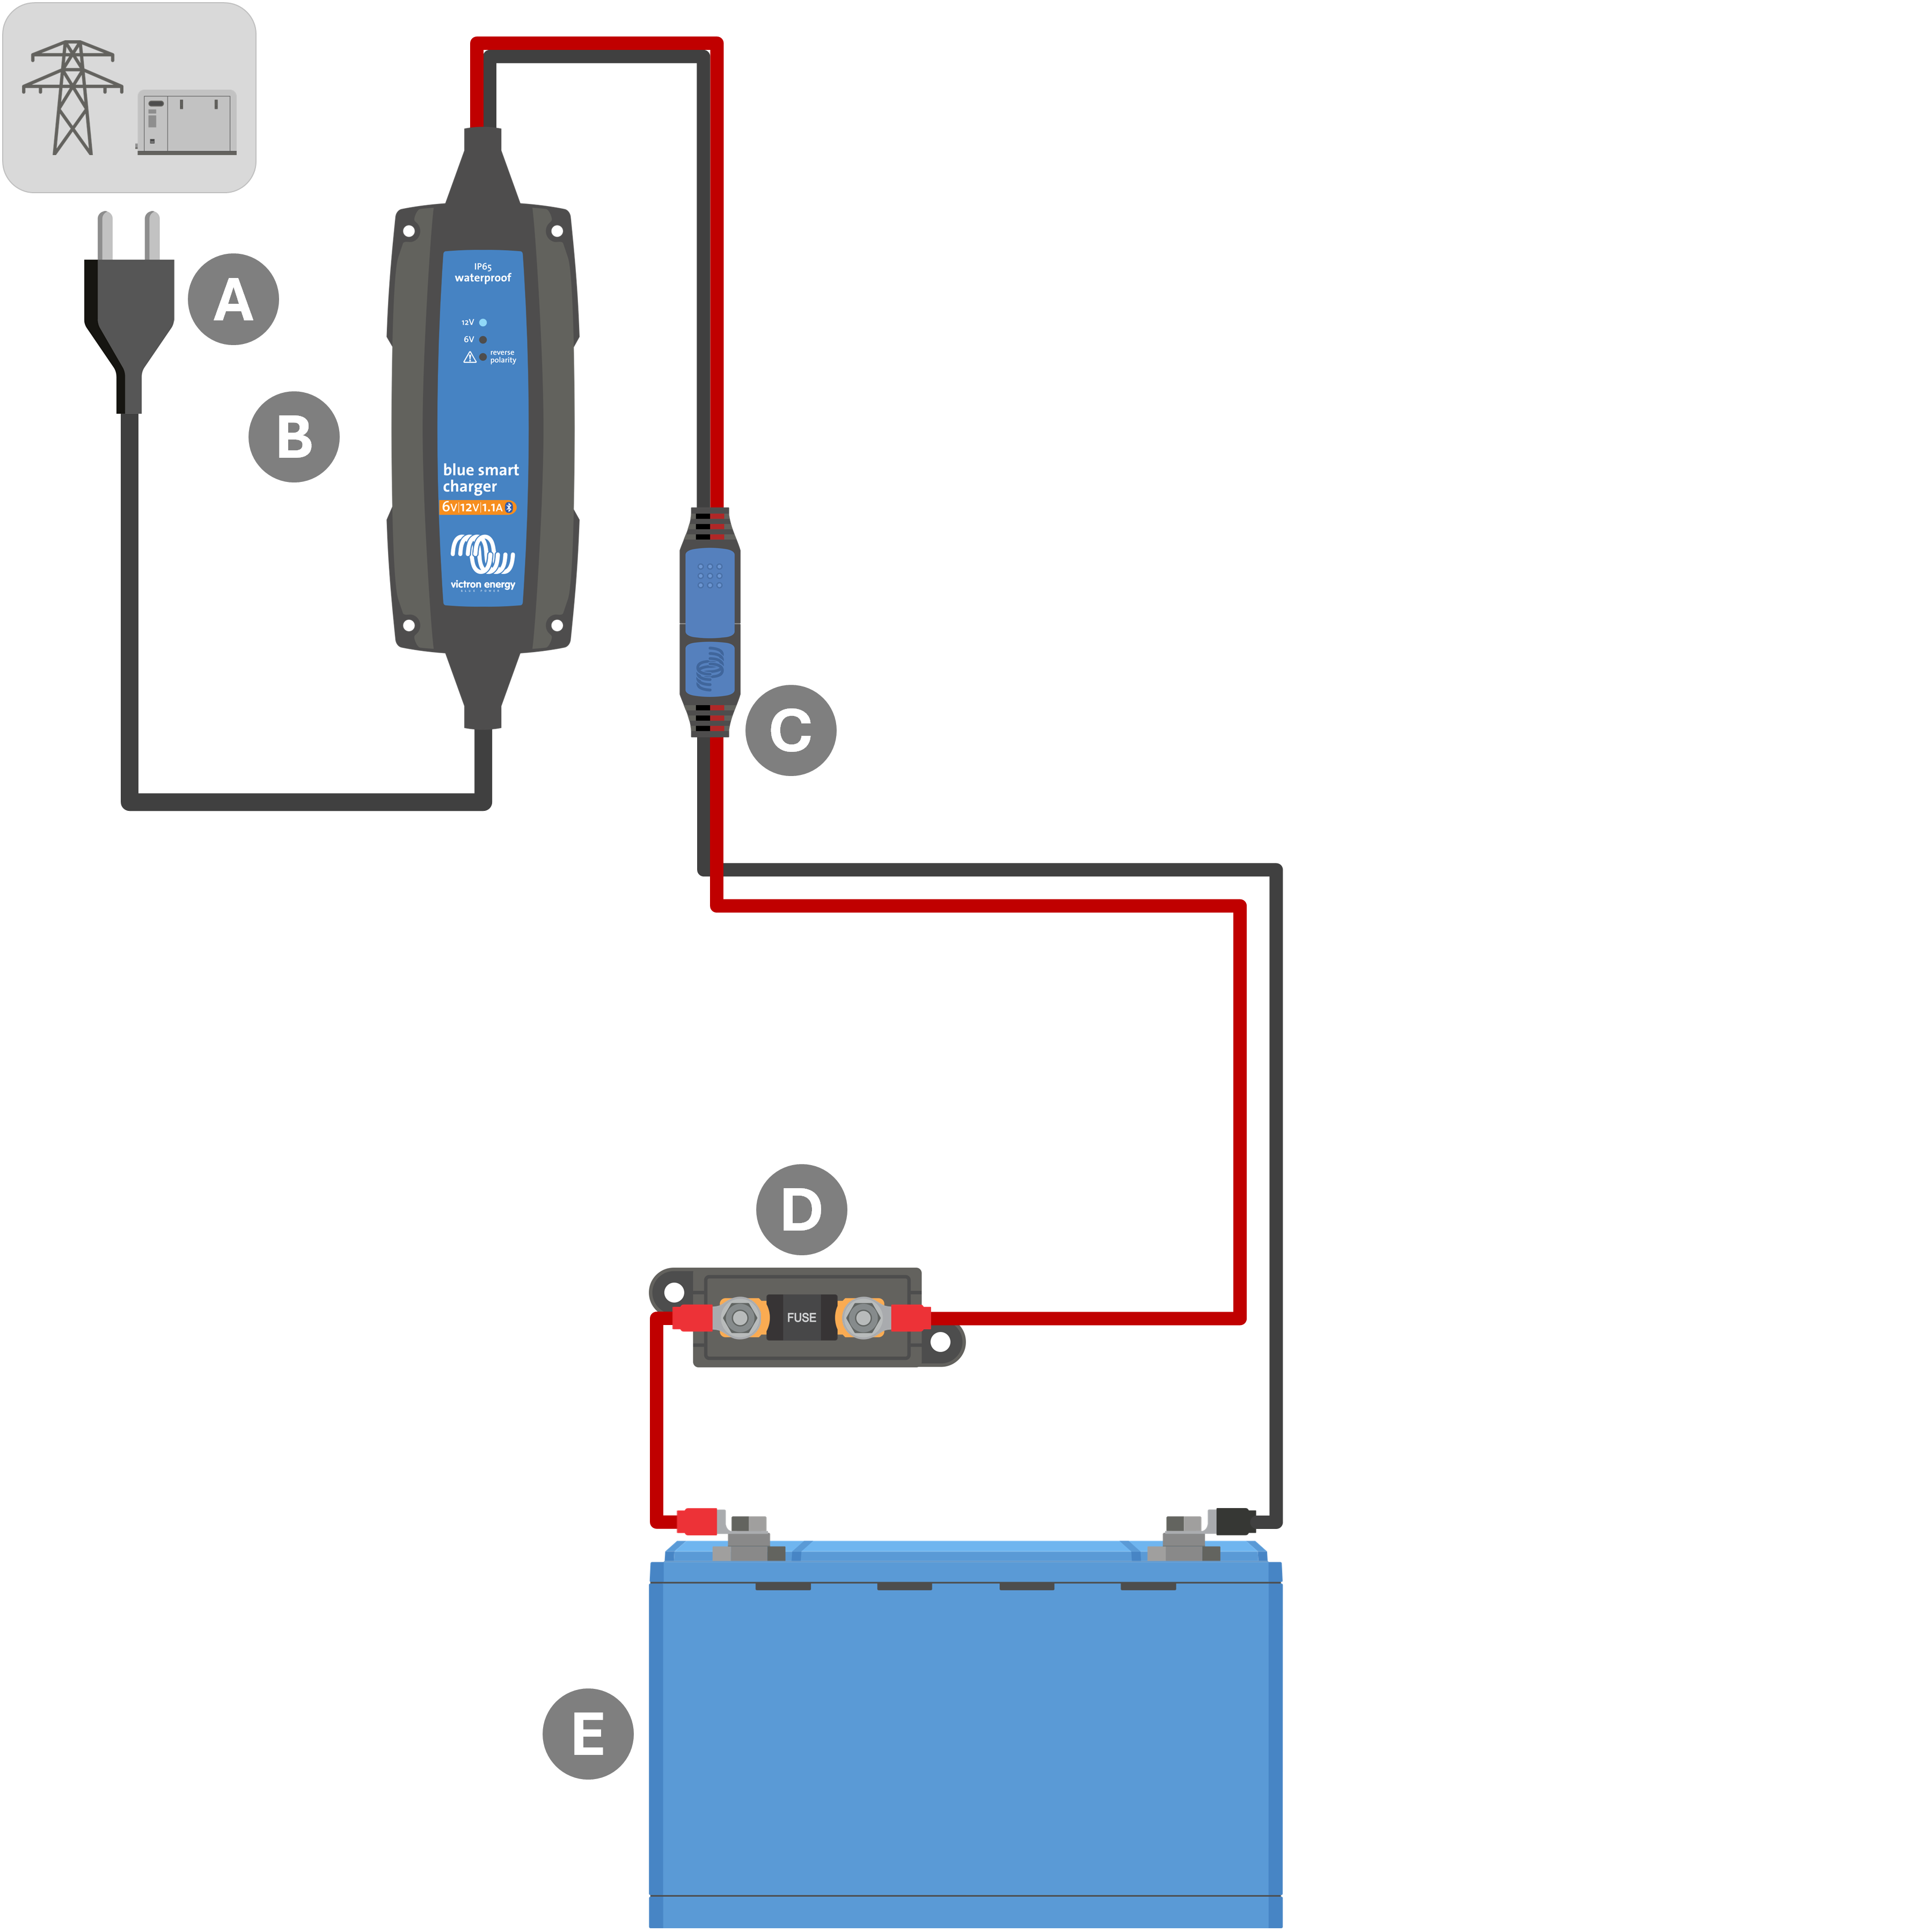
Connect the AC power cable to a mains power outlet; the '12V' (green) and '6V' (yellow) LEDs will briefly illuminate when the blue smart charger is powered up.
The battery voltage is automatically detected and set prior to the test stage (based on the voltage of the battery connected); when the '12V' (green) or '6V' (yellow) LED is blinking fast, the battery voltage has been automatically set and the charger is in test or bulk stage.
Note that for severely depleted batteries, automatic battery voltage detection may be incorrect; in this case the battery voltage must be manually set using the VictronConnect app and a Bluetooth enabled device (such as a mobile phone or tablet).
If the '12V' (green) and '6V' (yellow) LEDs are blinking slow the charger is in standby mode and cannot detect presence of a battery; in this case the AC mains power source should be disconnected before checking the DC wiring/connections and rectifying the issue.
If the 'reverse polarity' (red) LED is illuminated a reverse polarity DC connection has been detected; in this case the AC mains power source should be disconnected before checking the DC wiring/connections and rectifying the polarity.

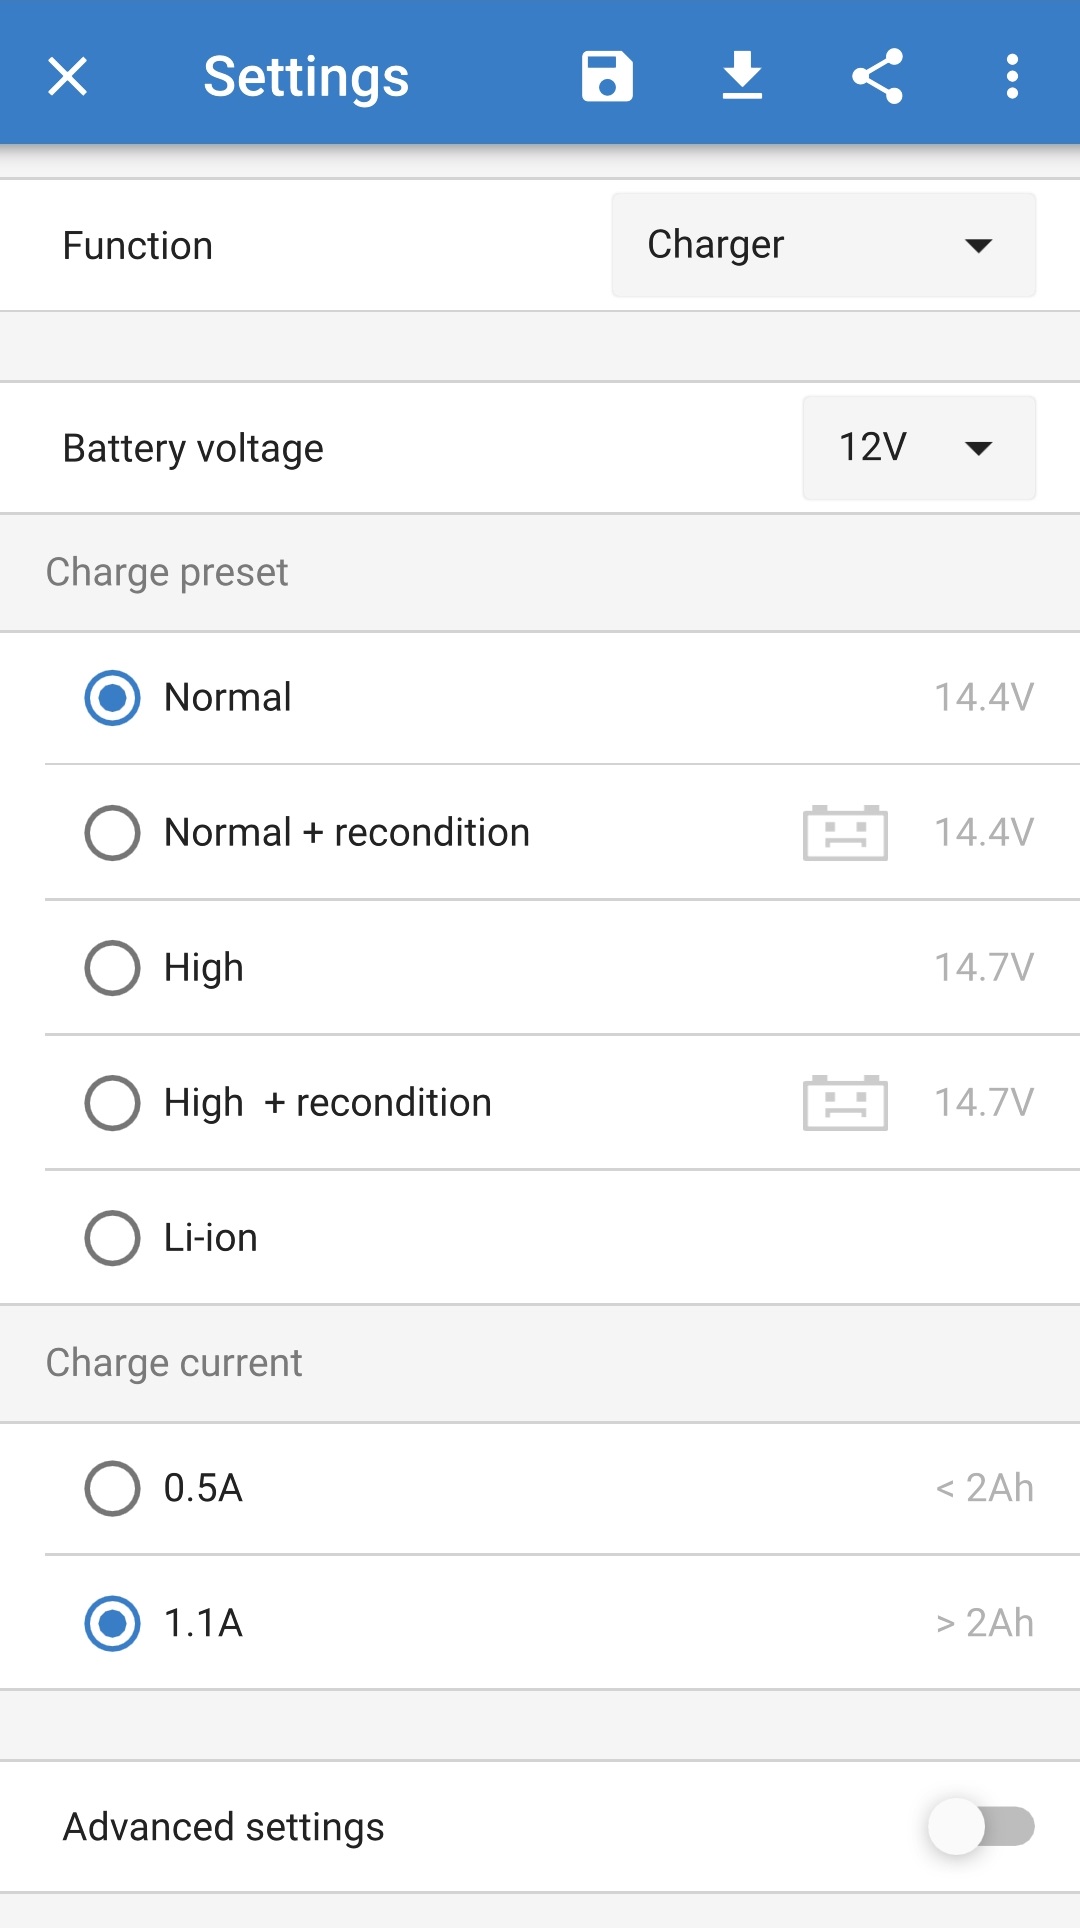
Configure the charge settings as required for the battery type and capacity; using the VictronConnect app, review and select the appropriate 'Battery voltage', 'Charge preset' and ‘Maximum charge current’ (standard or low) directly from the settings page – see section 5.2 ‘Using VictronConnect’ for more information.
The charger will automatically store the selected settings and recall it for future charge cycles (even after being disconnected from power).
Notice
Note: The default charge preset ('Normal' mode) and adaptive charge logic is well suited for most common battery types; such as flooded lead-acid, AGM and Gel. For these battery types, settings configuration with the VictronConnect app may not be necessary.
When the '12V' (green) or '6V' (yellow) LED is blinking slow the charger has moved into absorption stage (bulk stage is complete); the battery will be approximately 80% charged (or >95% for Li-ion batteries) and may be returned into service if required.
When the '12V' (green) or '6V' (yellow) LED is illuminated the charger has moved into float stage (absorption stage is complete); the battery will be fully (100%) charged and is ready to be returned into service.
Disconnect the AC power cable from the mains power outlet at any time to stop charging.