4. Installation
Physical installation:
Install the Filax in a dry and well-ventilated area.
Mount the Filax using the 4 holes at the base of the casing.
Open or close the casing by removing the 4 screws at the top of the casing lid.
Electrical installation
Caution
Electrical installation safety warnings:
Ensure that all AC powered sources are switched off or have been disconnected during the installation.
The AC inputs and AC output wiring must be protected by fuses or miniature circuit breakers (MCB) which are suitable for the applied wire cross section.
Ensure that both the priority and the alternate AC inputs are protected against current levels higher than 16A.
External earth leakage switches (RCD or RCCB) must be integrated in the Filax electrical system.
Connect the priority AC source to the PRIORITY: L, N and PE terminals.
Connect the alternate AC source to the ALTERNATE: L, N and PE terminals.
Ensure that both the priority and alternate AC inputs are protected against current levels higher than 16A.
Connect the AC load to the OUTPUT: L, N and PE terminals.
 |
Electrical connections
Configuration
Wire links:
If the AC load is less than 850W, remove the LINK+HIGH POWER: L and N wire links.
If the AC load is more than 850W, keep the LINK+HIGH POWER: L and N wire links in place.
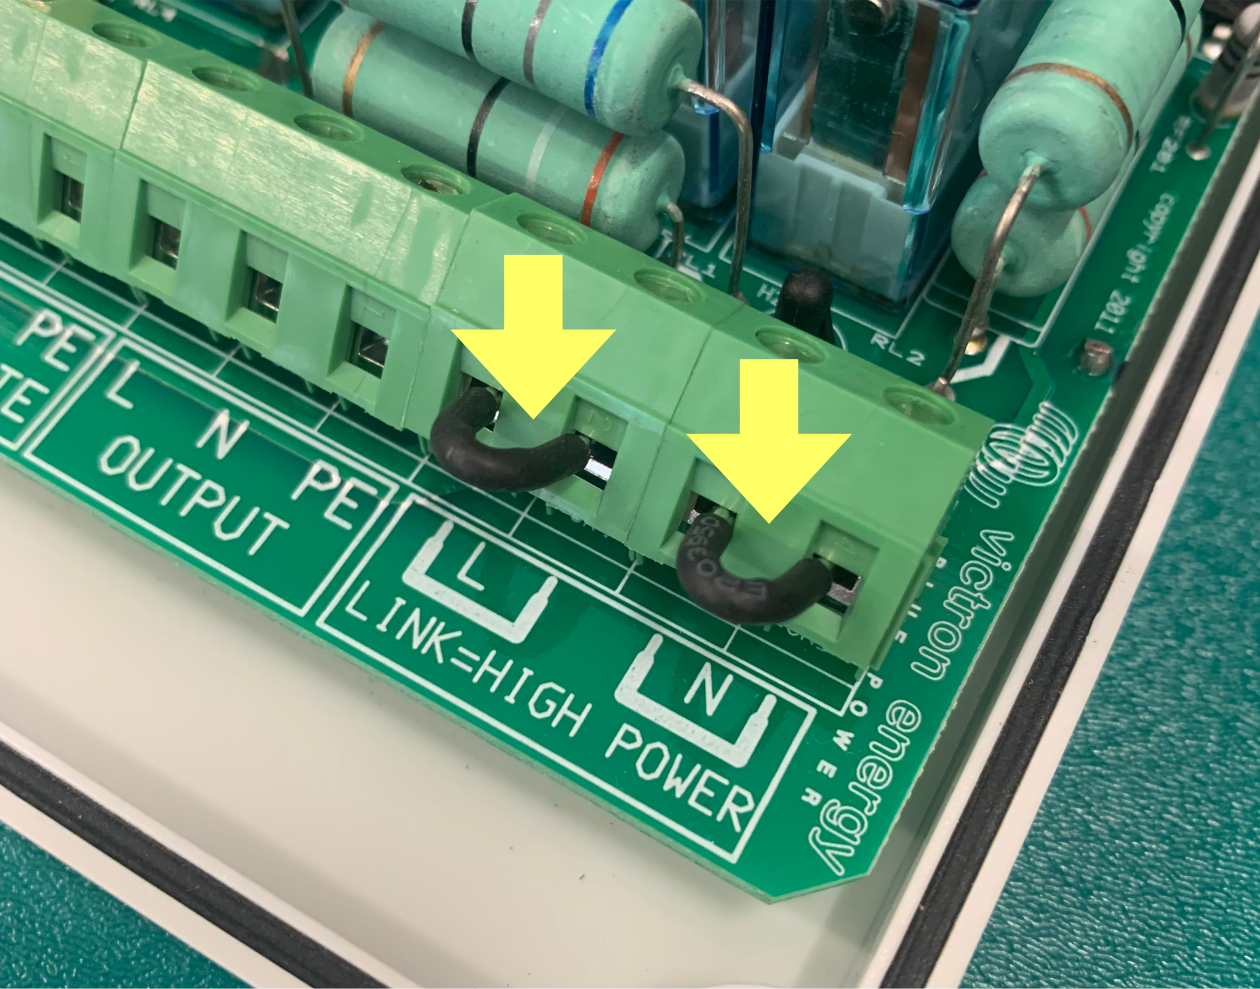 |
Remove both links if the load is less than 850W
Frequency jumper:
If the installation frequency is 50 Hz, remove the frequency jumper, or place it on only one of the pins (this is the default setting).
If the installation frequency is 60 Hz, place the jumper on both pins.
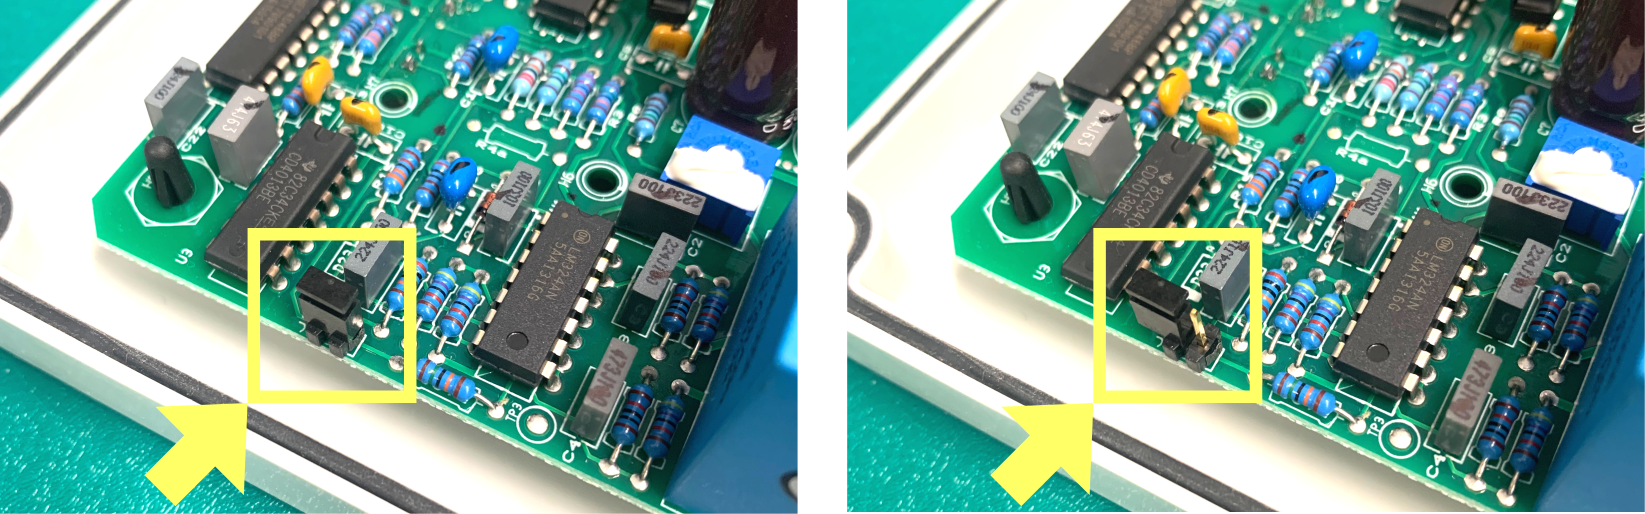 | |
Jumper placed = 60Hz | Jumper not placed = 50Hz |