5. Setup, configuration & operation
5.1. First use setup via VictronConnect
Note
Note that operation via VictronConnect requires Bluetooth to be enabled. Bluetooth is disabled on devices shipped with firmware version 1.23 or earlier. In order to enable Bluetooth for these devices, it is mandatory to first go through the First setup via Wifi access point procedure and then activate it via the Networks menu menu. Devices shipped with firmware version 1.24 and higher have Bluetooth enabled by default.
The initial setup is required when the EVCS is new and has yet to be configured or after it has been reset to factory defaults.
Preparation
|
|
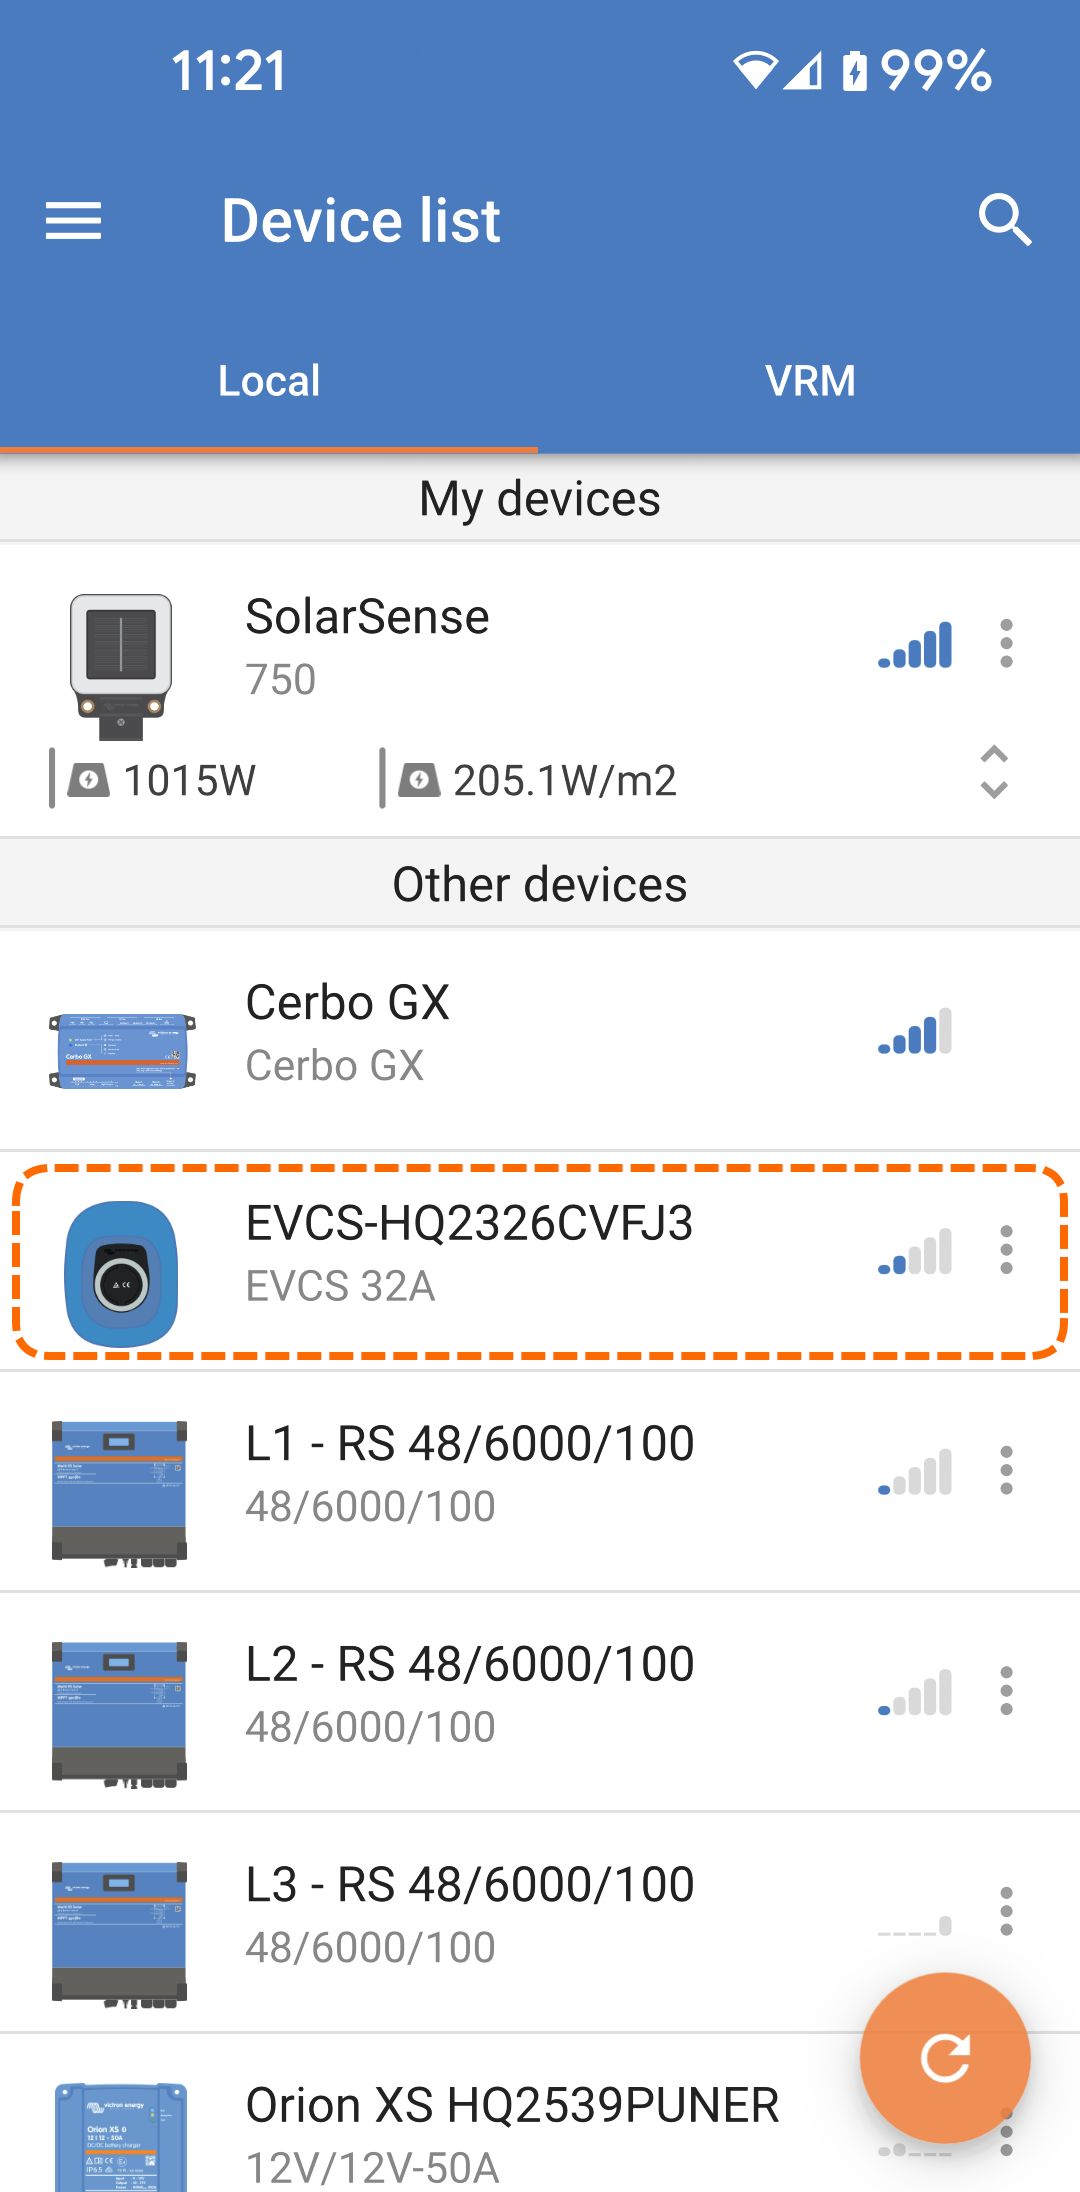
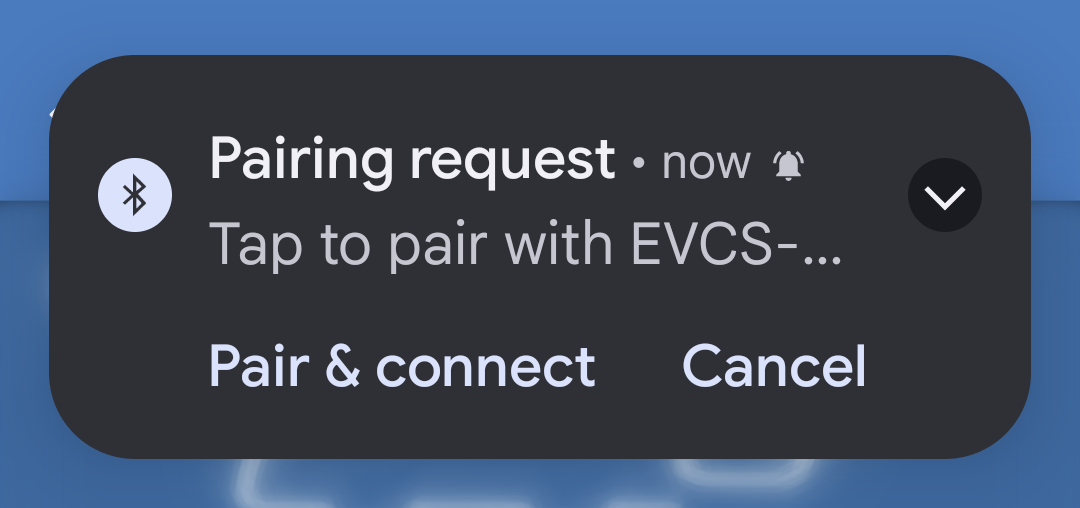
Start initial setup If the pairing was successful, the status page would appear. A warning notification will pop up stating "Initial setup not completed". Tap the cog wheel icon in the upper right to open the Settings page so that the initial setup can be performed. |
|
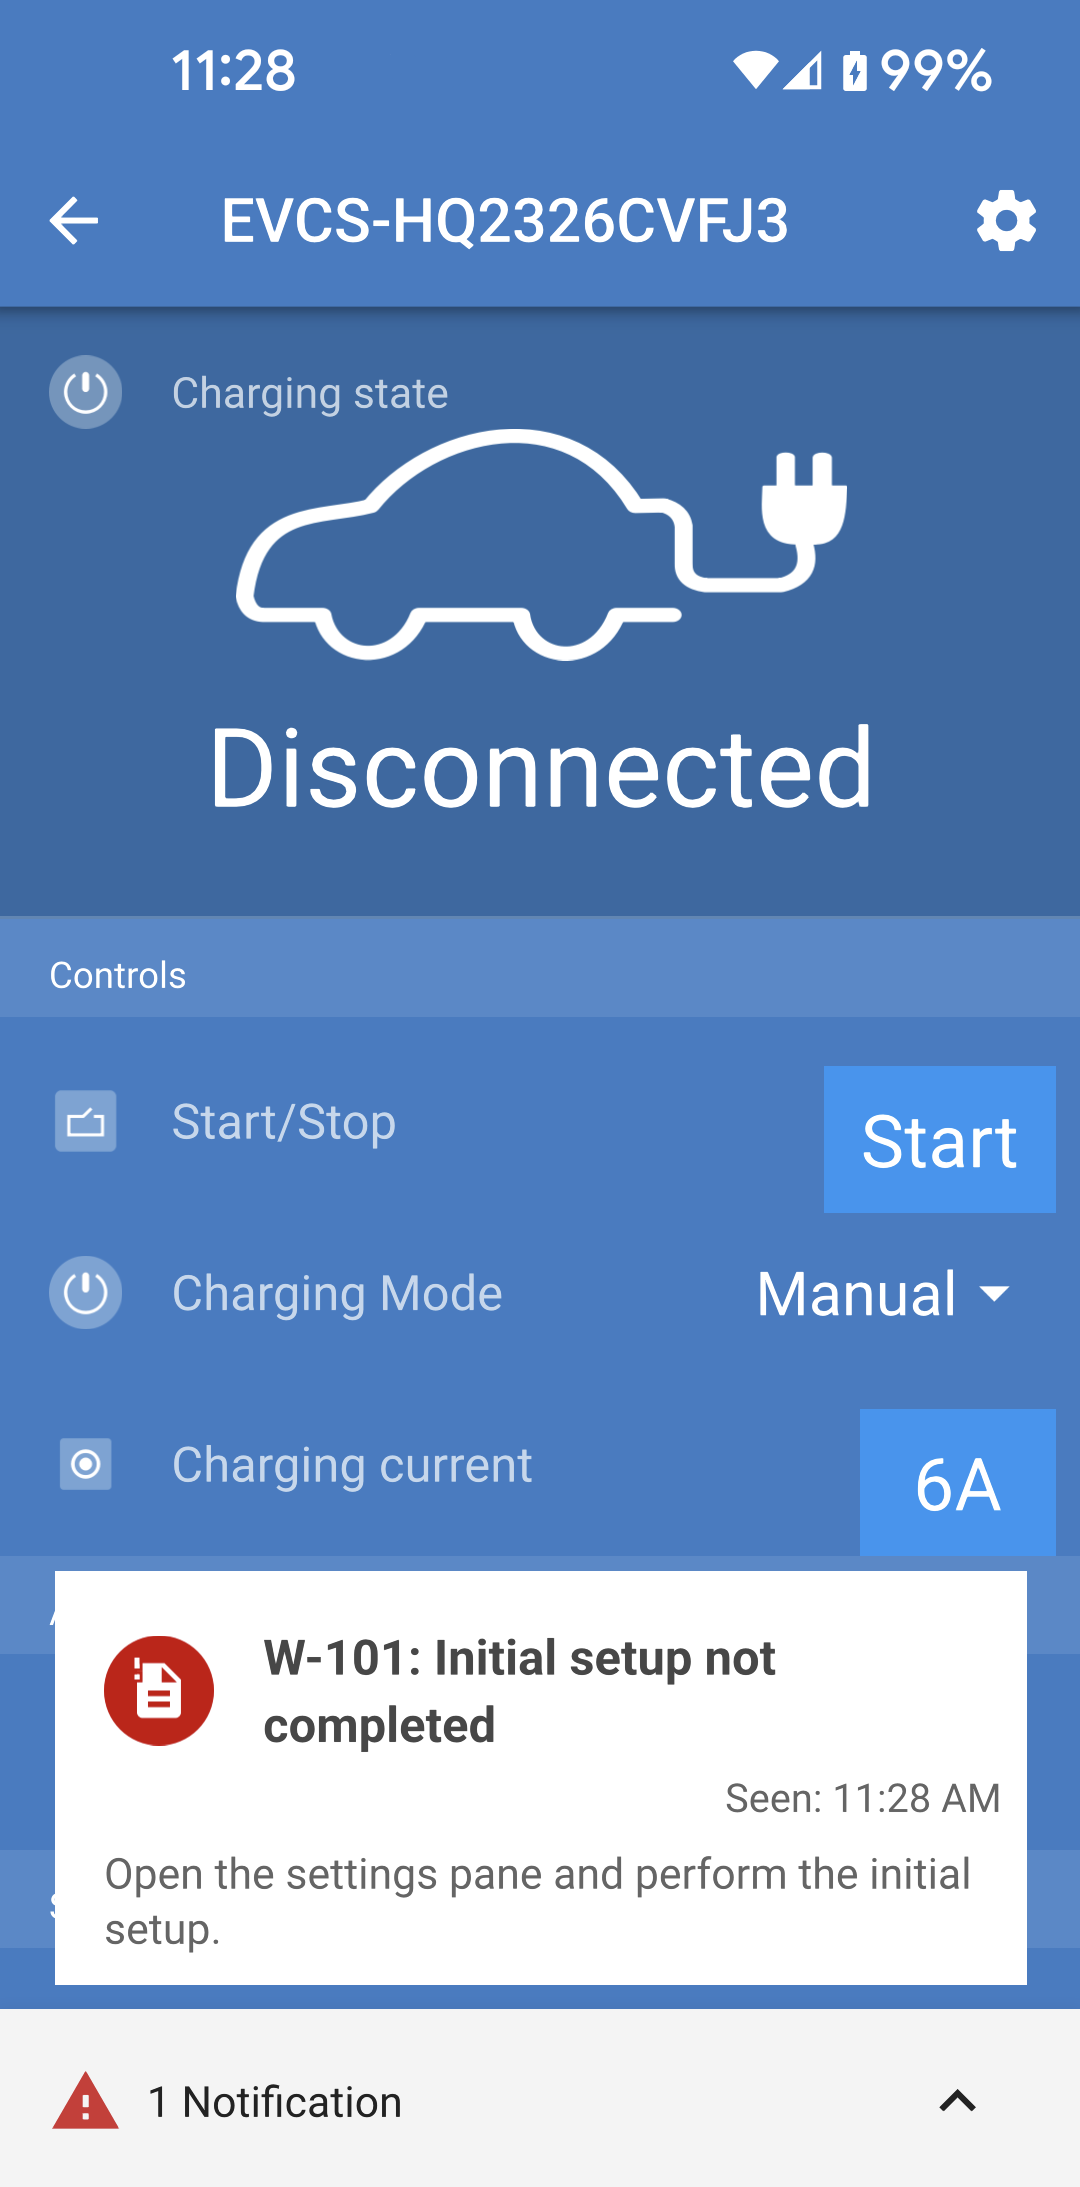
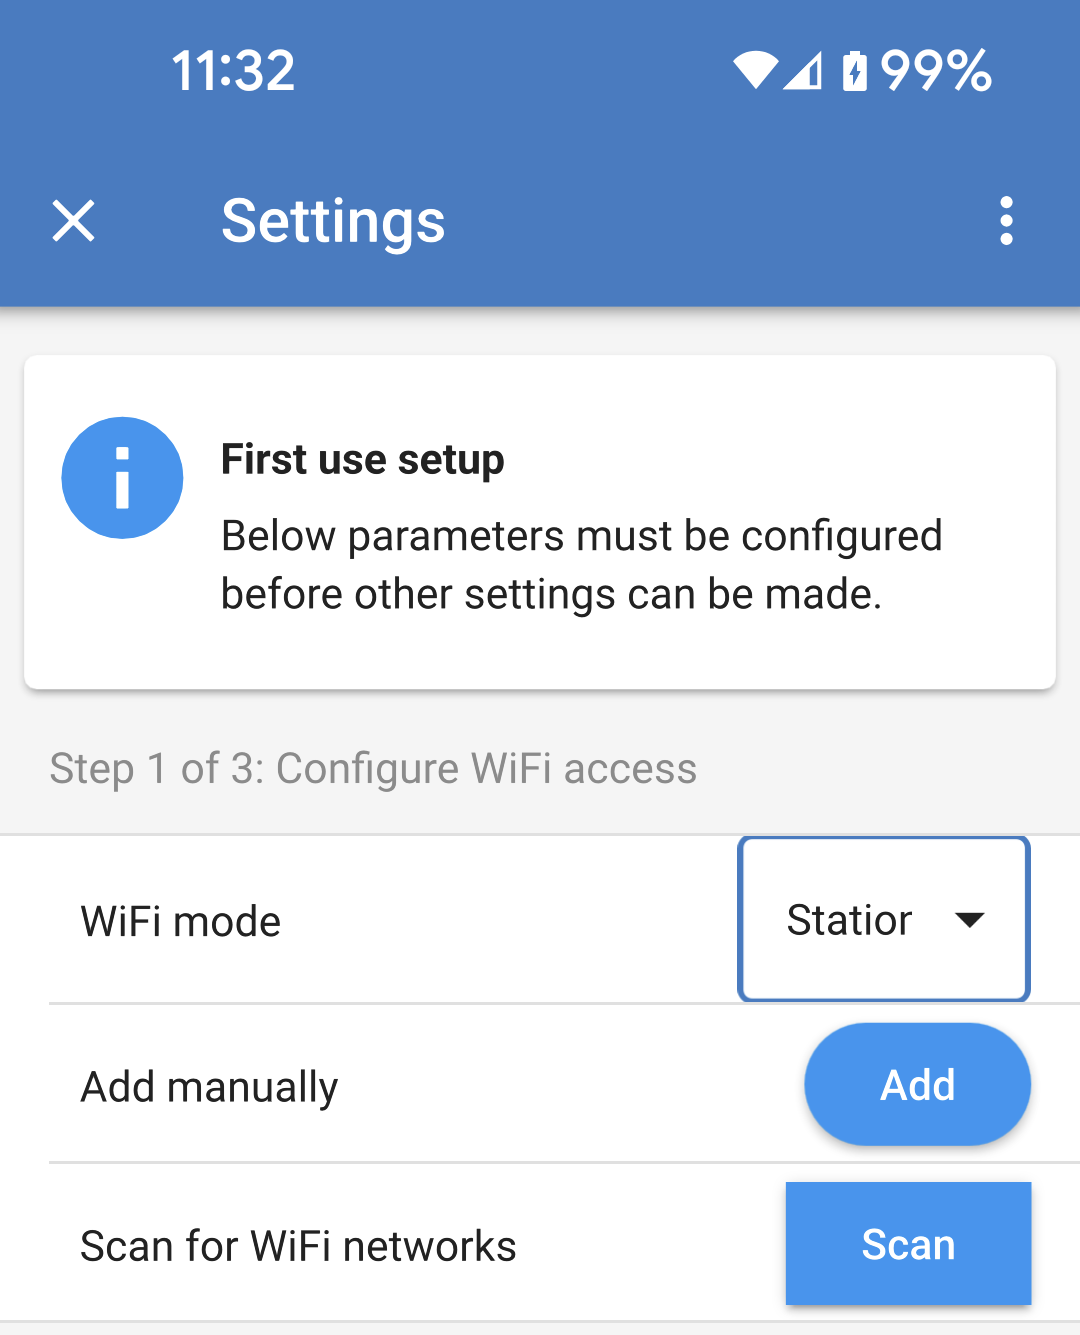
Step 1 of 3: Configure WiFi access One of the following parameters must be changed to complete the first setup and start using the EV:
|
|
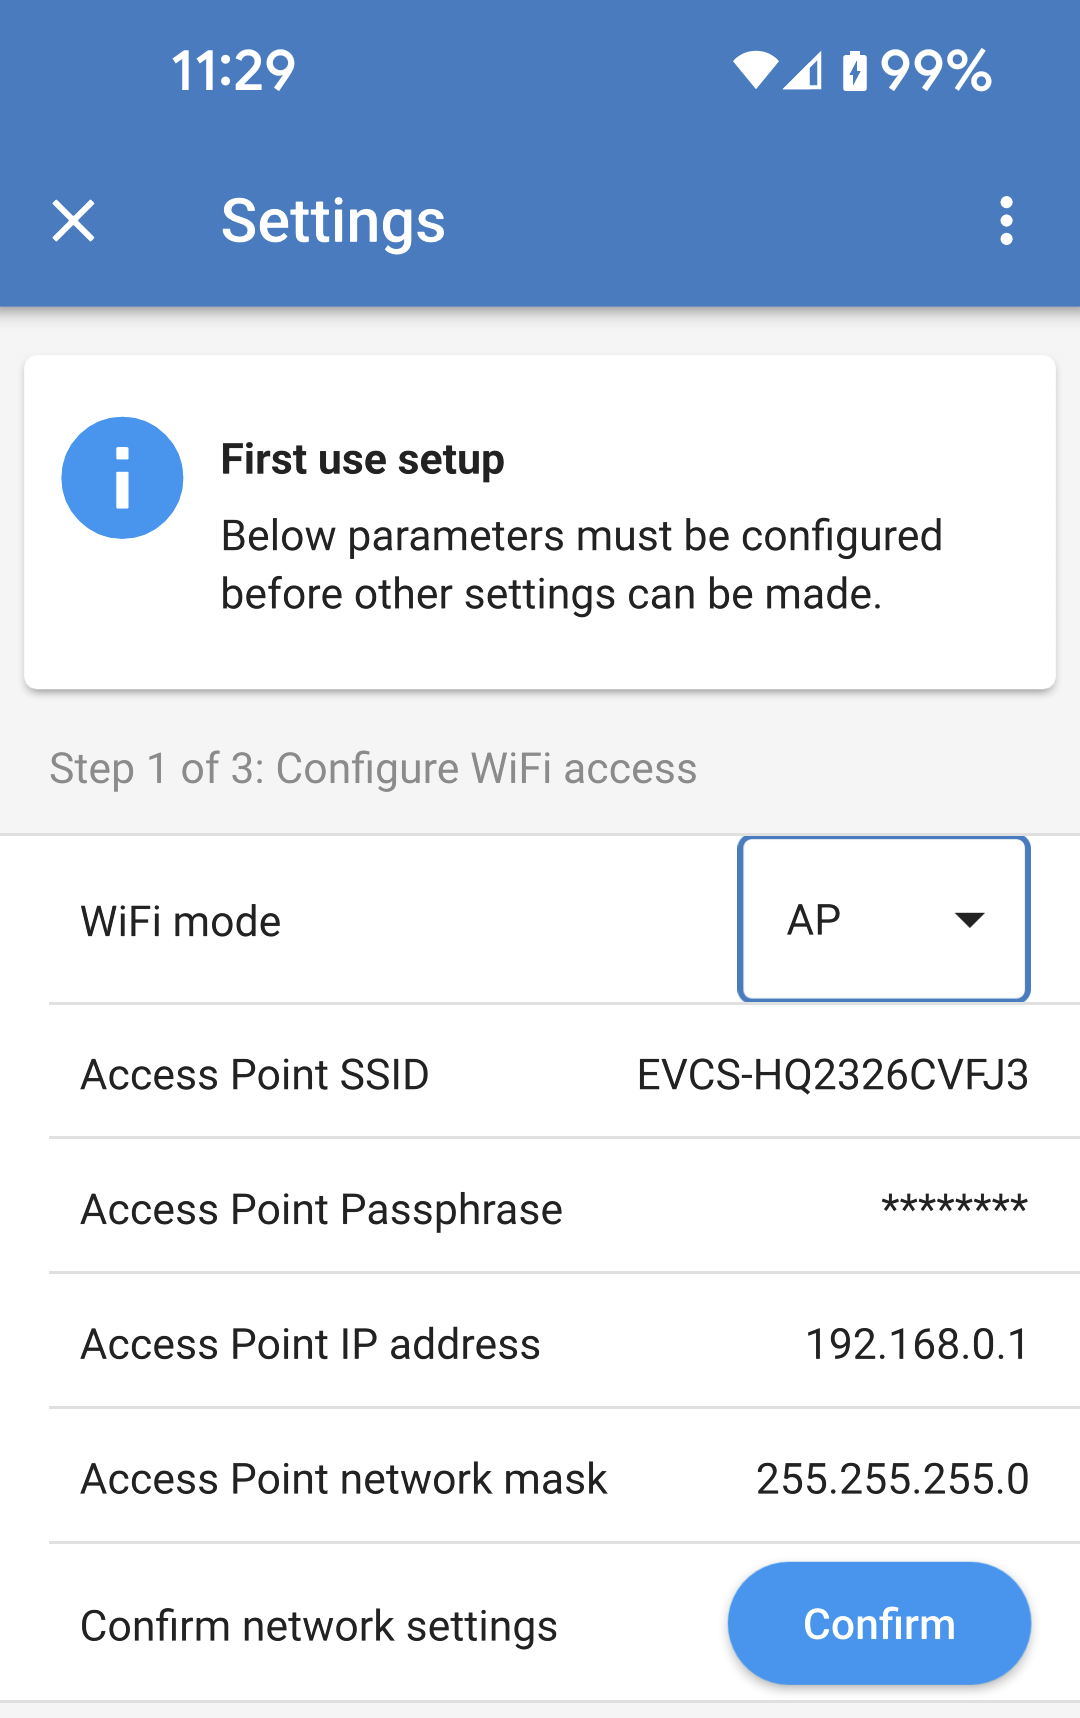
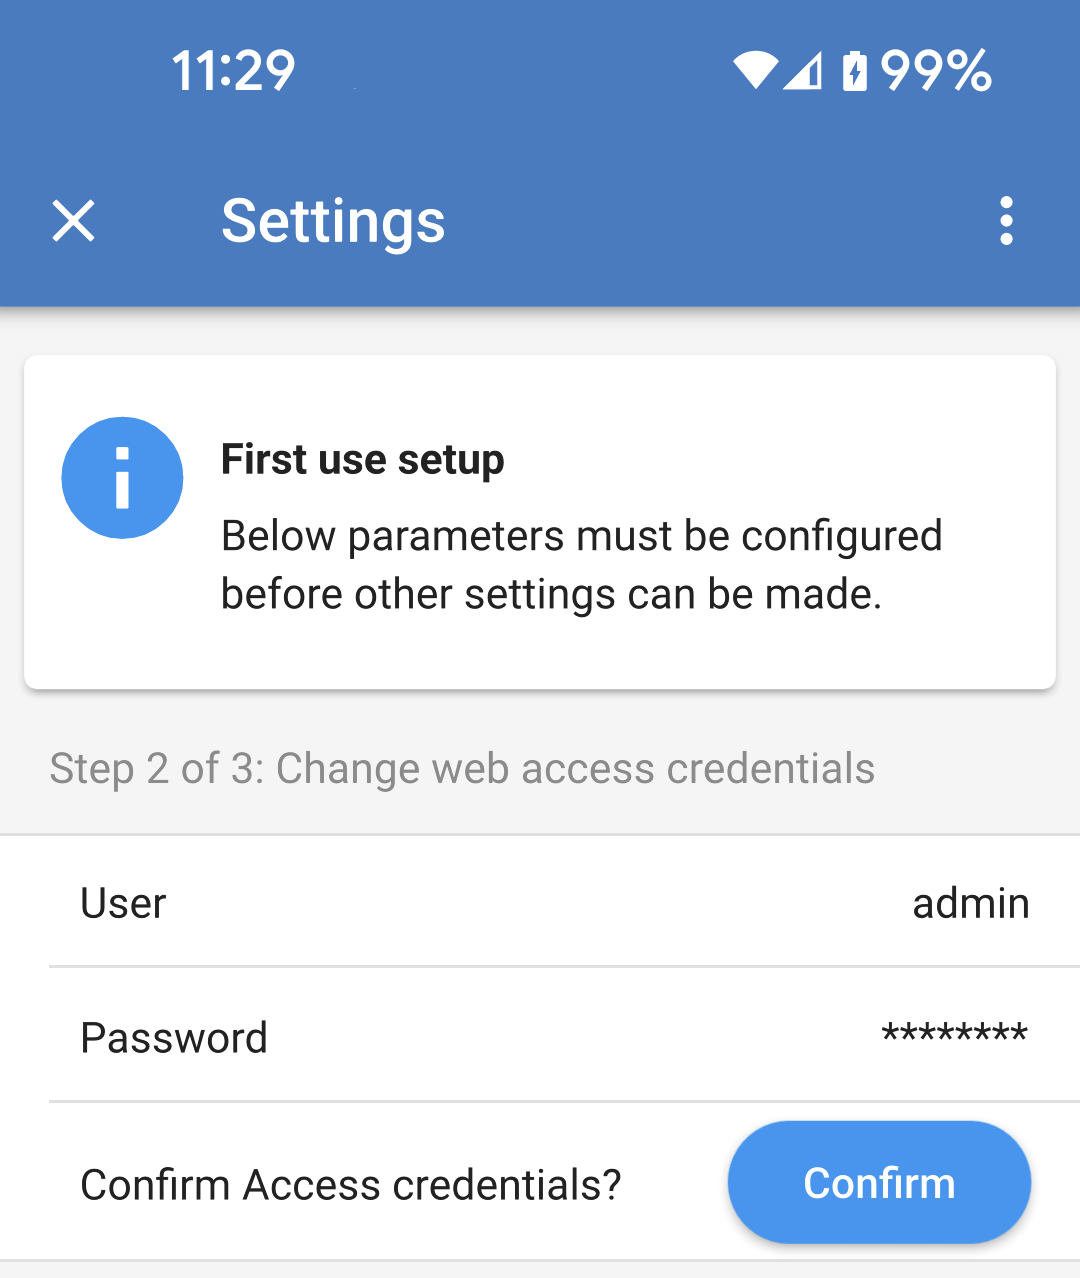
Step 2 of 3: Change web access credentials This step is necessary to ensure secure access to the web interface. The default username is "admin". The default password corresponds to the one on the sticker inside the EVCS. We recommend setting up your own password and username. |
|
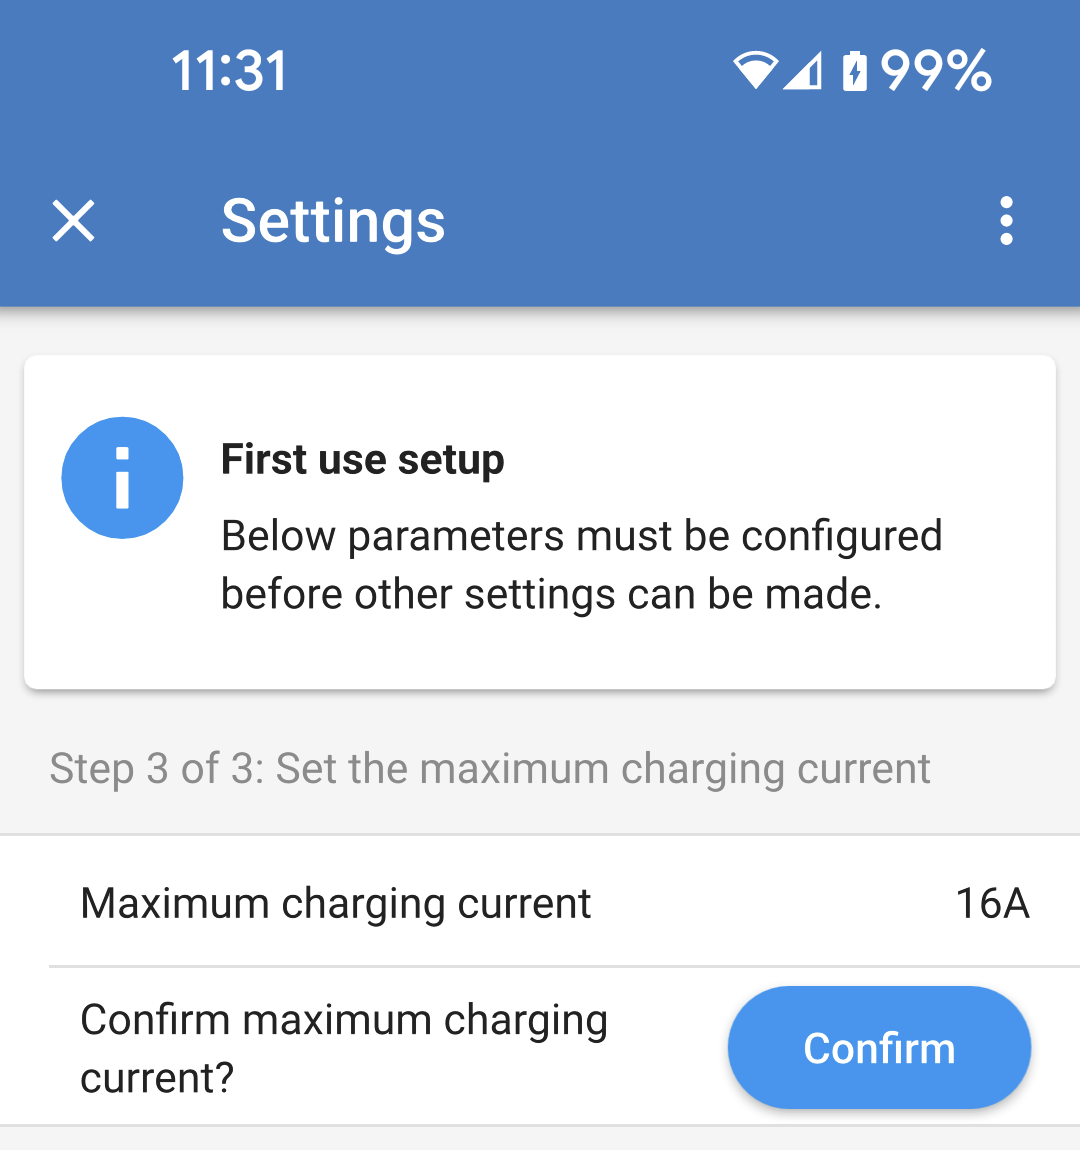
Step 3 of 3: Set the maximum charging current Set the maximum charging current with which the EVCS is allowed to charge (range: 6A - 32A). |
|
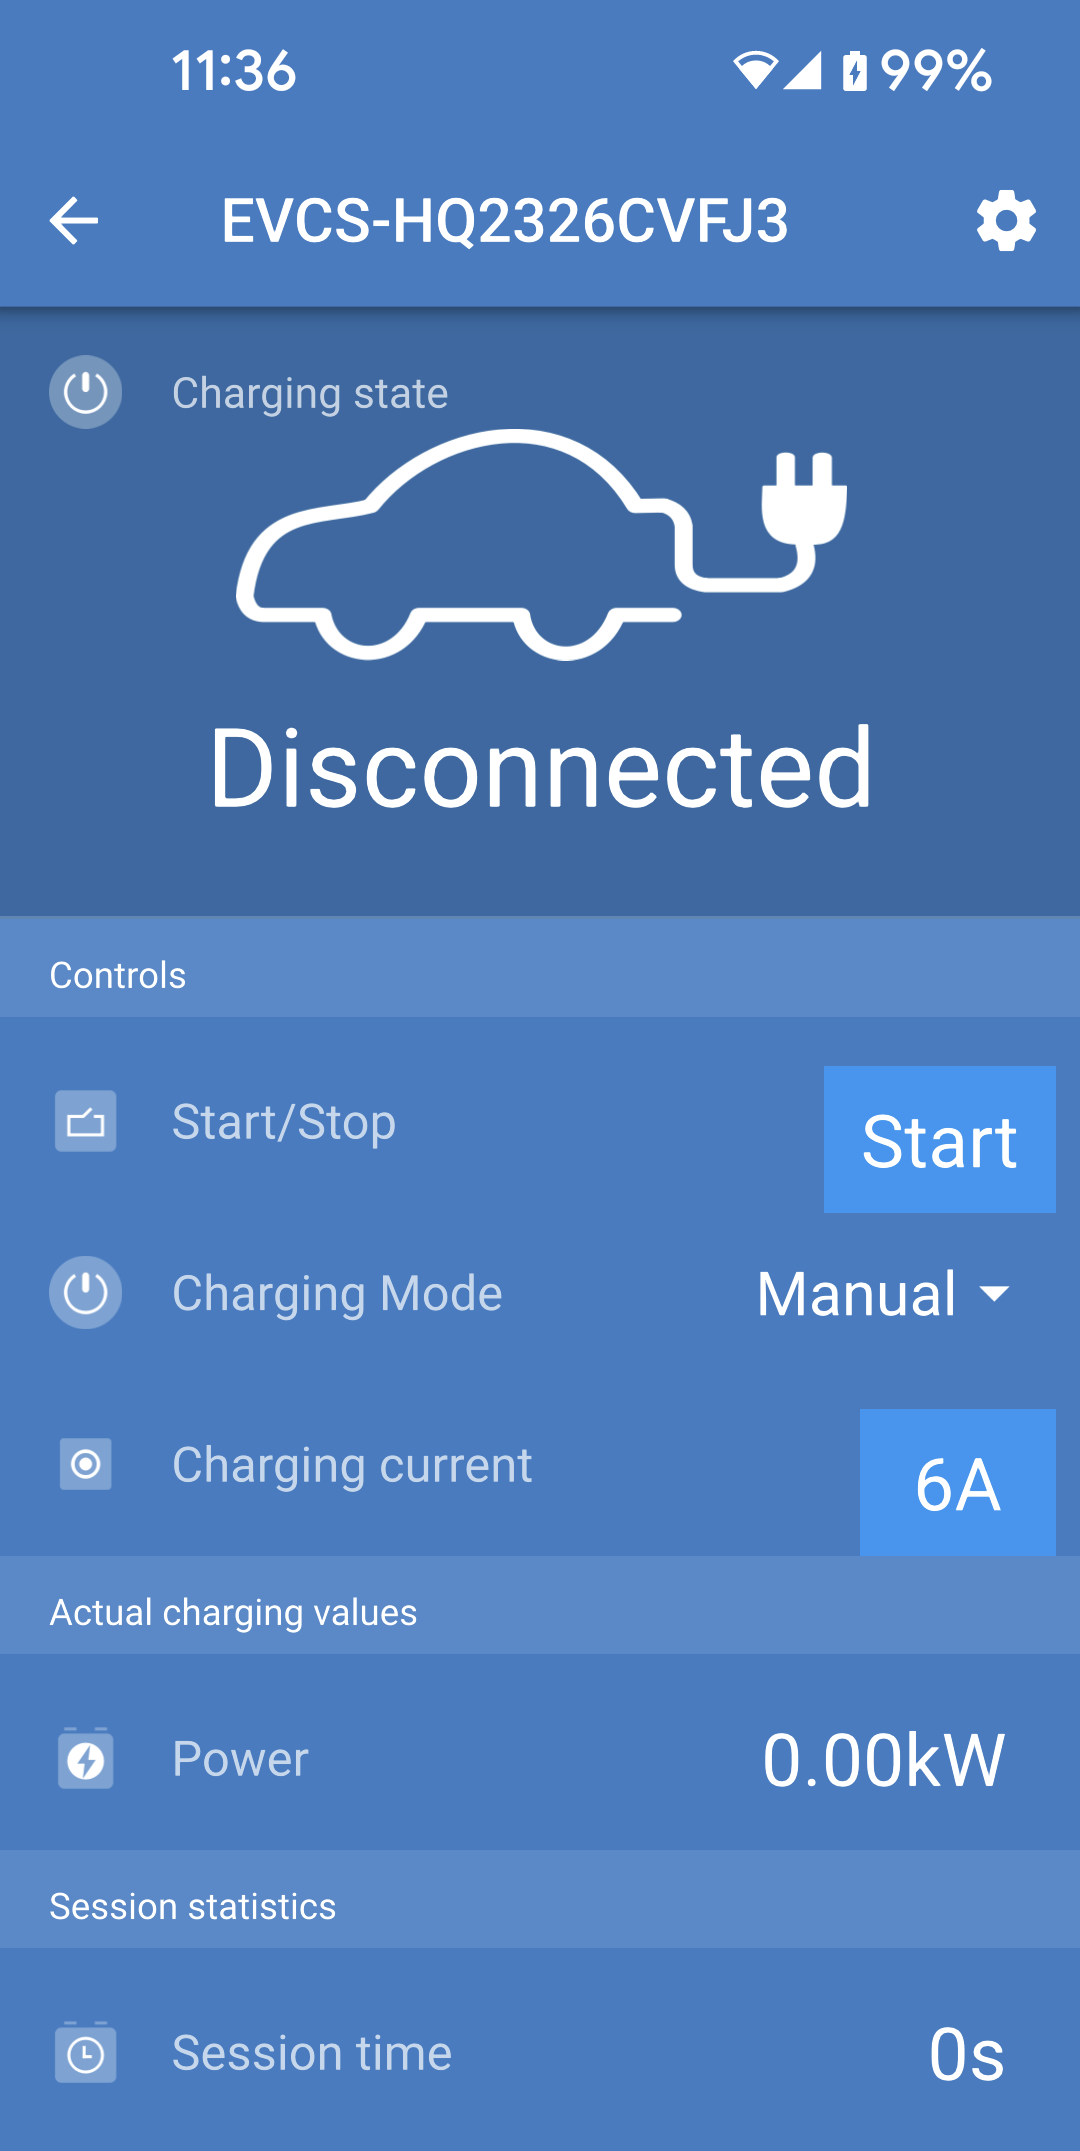
Initial setup complete You'll be returned to the Status page and the warning notification will have cleared. You can now start using the EV Charging Station. |
|
5.2. First use setup via WiFi access point
The charging station broadcasts its own WiFi access point as soon as the charging station is powered for the first time. The following steps describe the first setup to prepare the charging station for operation.
Connect to the WiFi access point:
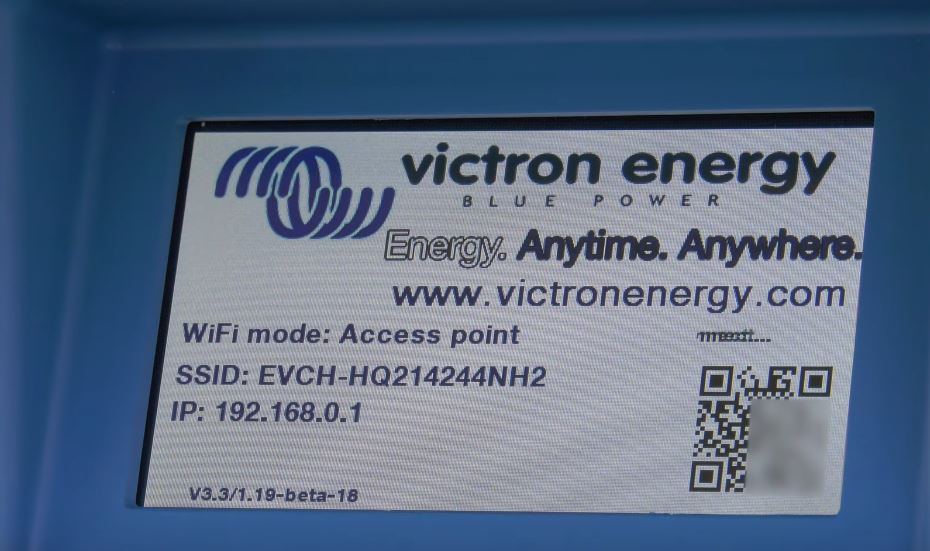
Scan the QR Code on the internal label.
Or go to the WiFi menu of your mobile device or laptop and manually add the access point that automatically broadcasts its SSID. SSID and Password are noted on a sticker inside the case.
Or scan the QR code shown on the display during the first setup phase. Note that after the first setup, another QR code will appear on the display, linking to the Victron website.
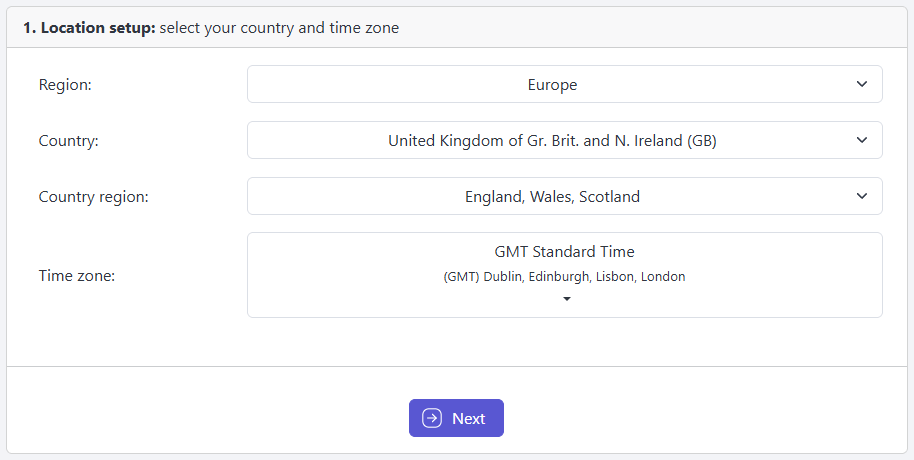
Location setup:
Once connected to the access point, enter the default IP address 192.168.0.1 into a web browser. The default username is "admin". The default password is printed on the sticker inside the unit. The First setup process will then start:
Select the location and time zone where the EV Charging Station is being installed. Daylight savings time will automatically be applied accordingly.
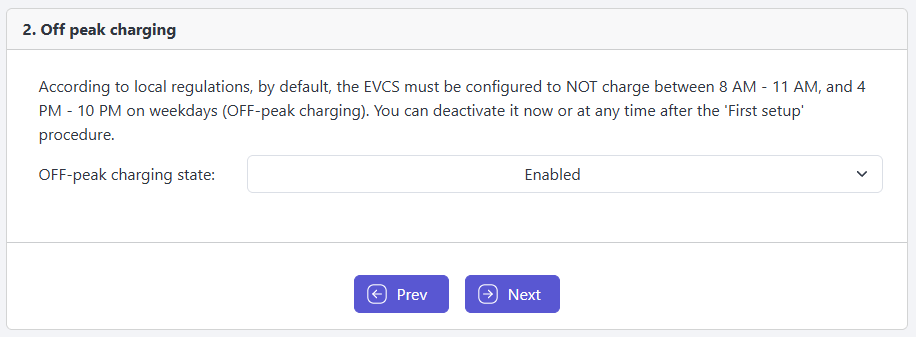
Off peak charging
Depending upon what location was chosen in the previous step, you may need to enable Off-peak charging.
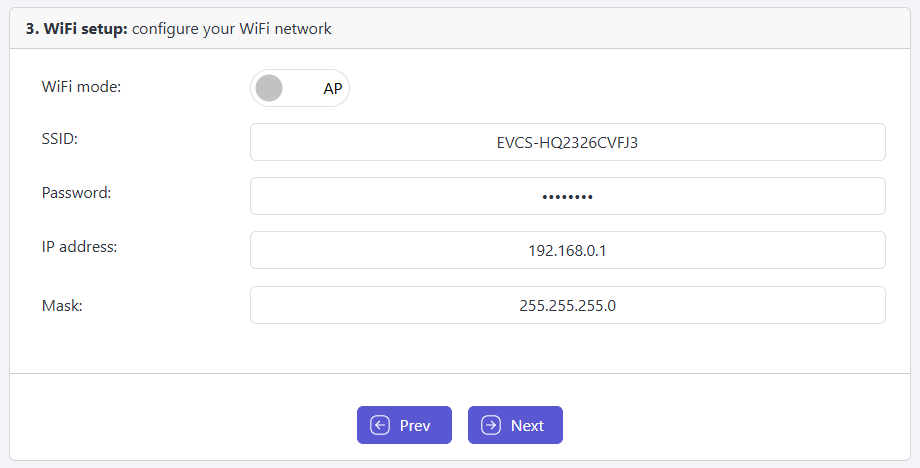
WiFi setup: Configure the WiFi network by choosing the WiFi mode
Access point: The unit creates its own WiFi access point. This is either for setting up the unit or in the absence of a separate WiFi network including a GX device.
Set SSID, IP address and Netmask according to your needs.
Station: Connects the device to a local WiFi network that includes other Victron devices like a GX device or VRM.
Change the WiFi mode from AP to Station.
Click the Scan button to search for other WiFi networks or add manually a known AP by clicking the Add button. Note the WiFi standards: 802.11 b/g/n (2.4Ghz only).
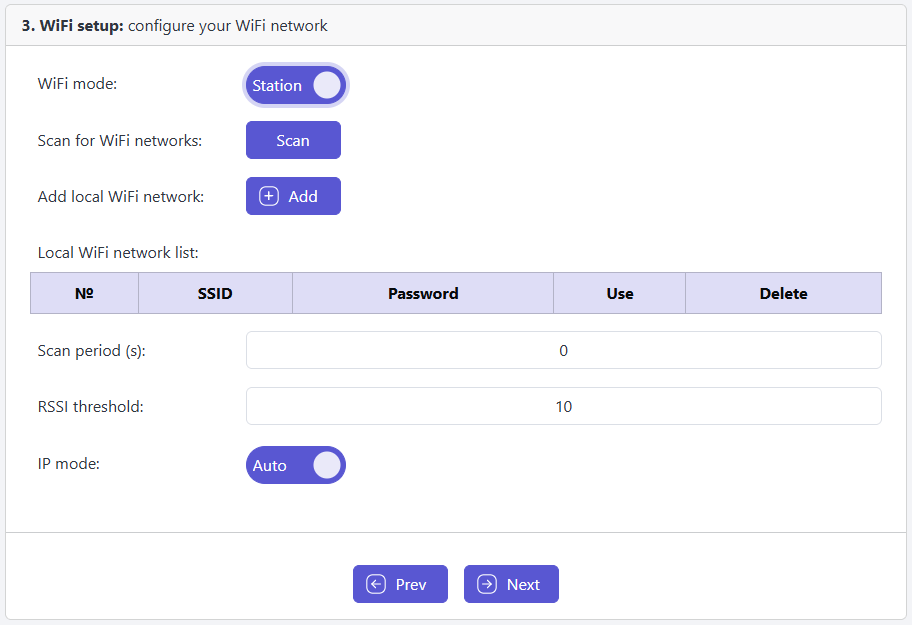
Tick the network you wish to connect to and then click Apply.
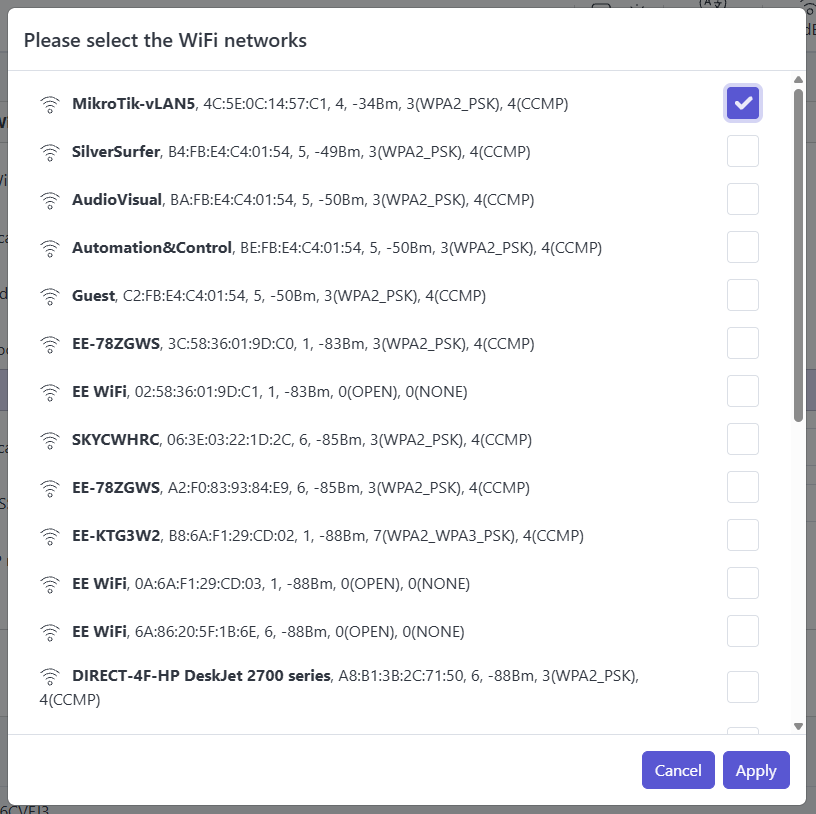
In the Password box, enter the external WiFi password and click Next.
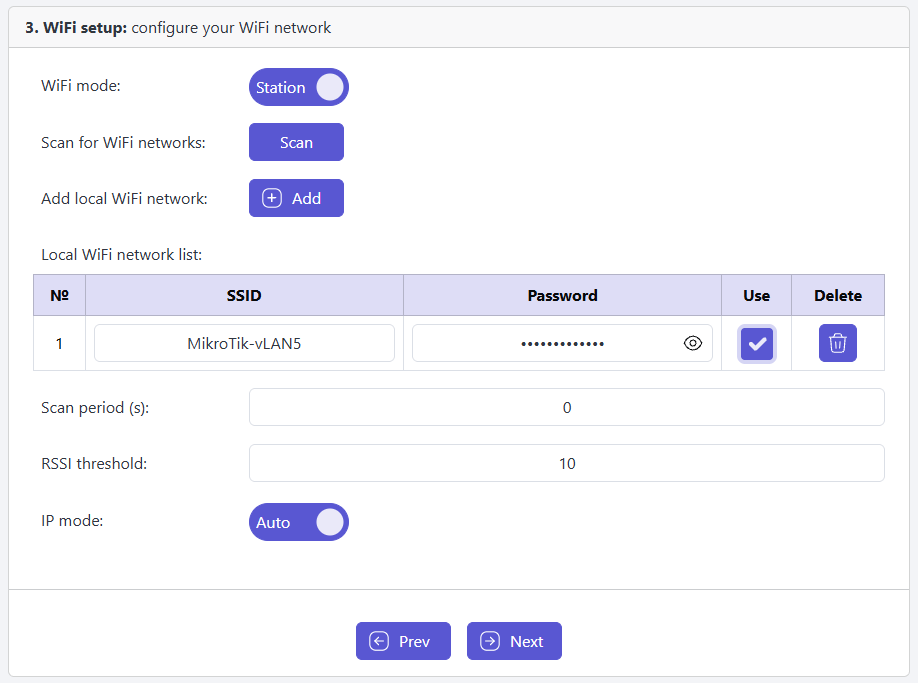
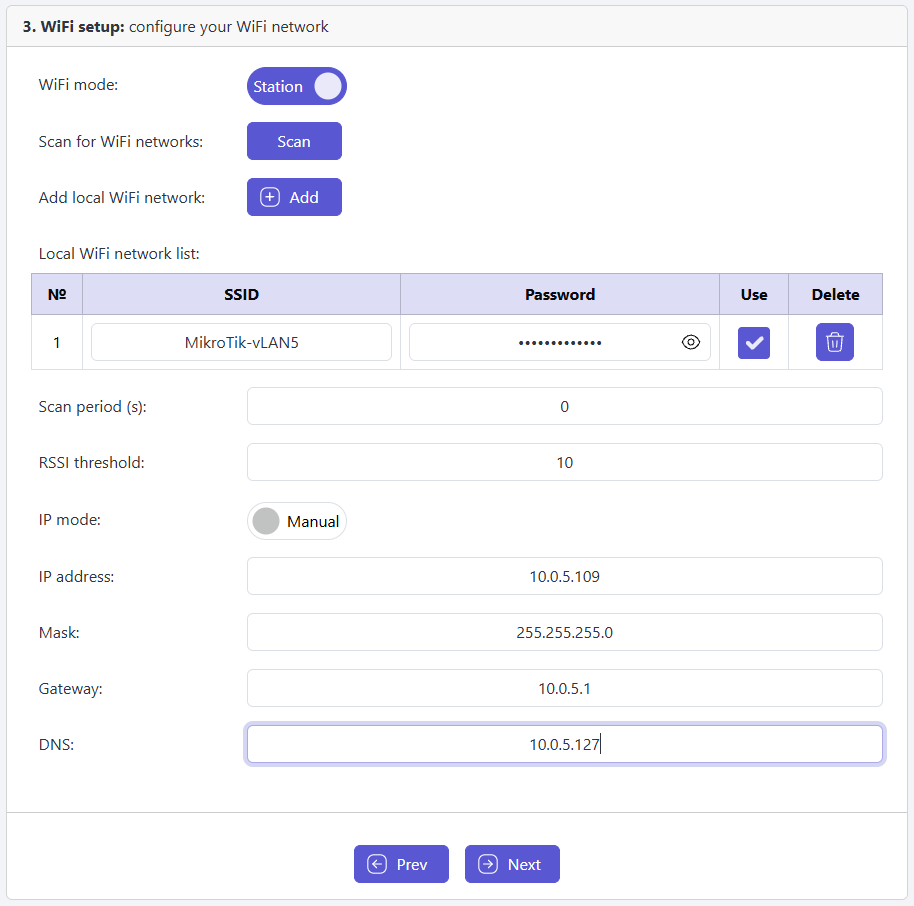
In case you need a static IP rather then DHCP, change the IP mode button to Manual and fill in the static IP address, Mask, Gateway and DNS.
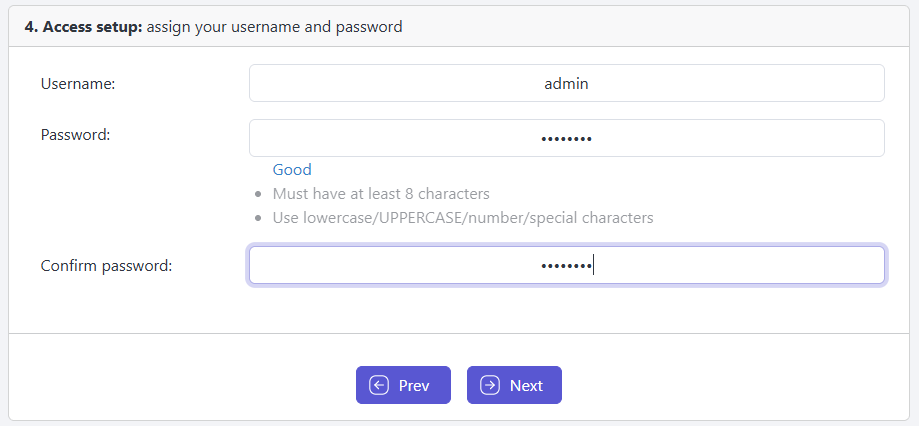
Access setup:
Click into the Username field and type in your own username. The default username is 'admin'.
Click into the Password field and change the password to a new one with at least 8 characters, containing lower, upper and special characters. The default password is printed on the sticker inside the unit.
Confirm your new password.
Click Next.
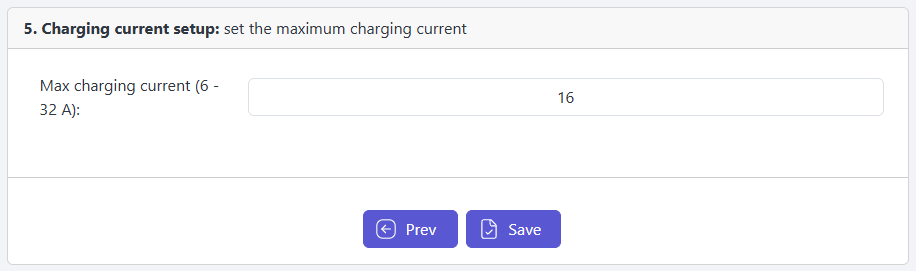
Charging current setup:
Set the maximum allowable charging current (6 - 32A).
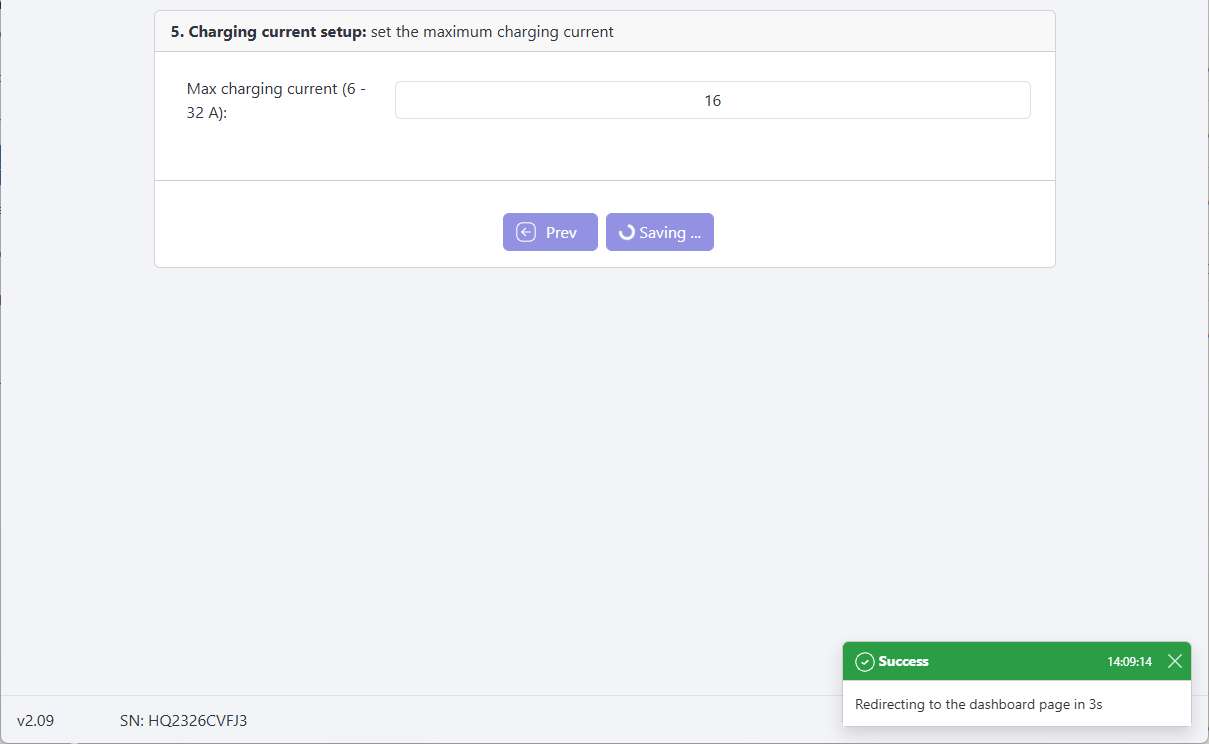
First setup completion:
After clicking Save, the EV Charging Station will restart.
Log in with the credentials that you entered in step 3.
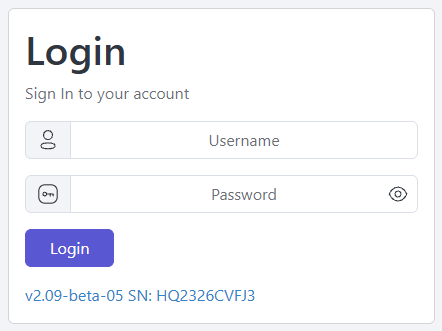
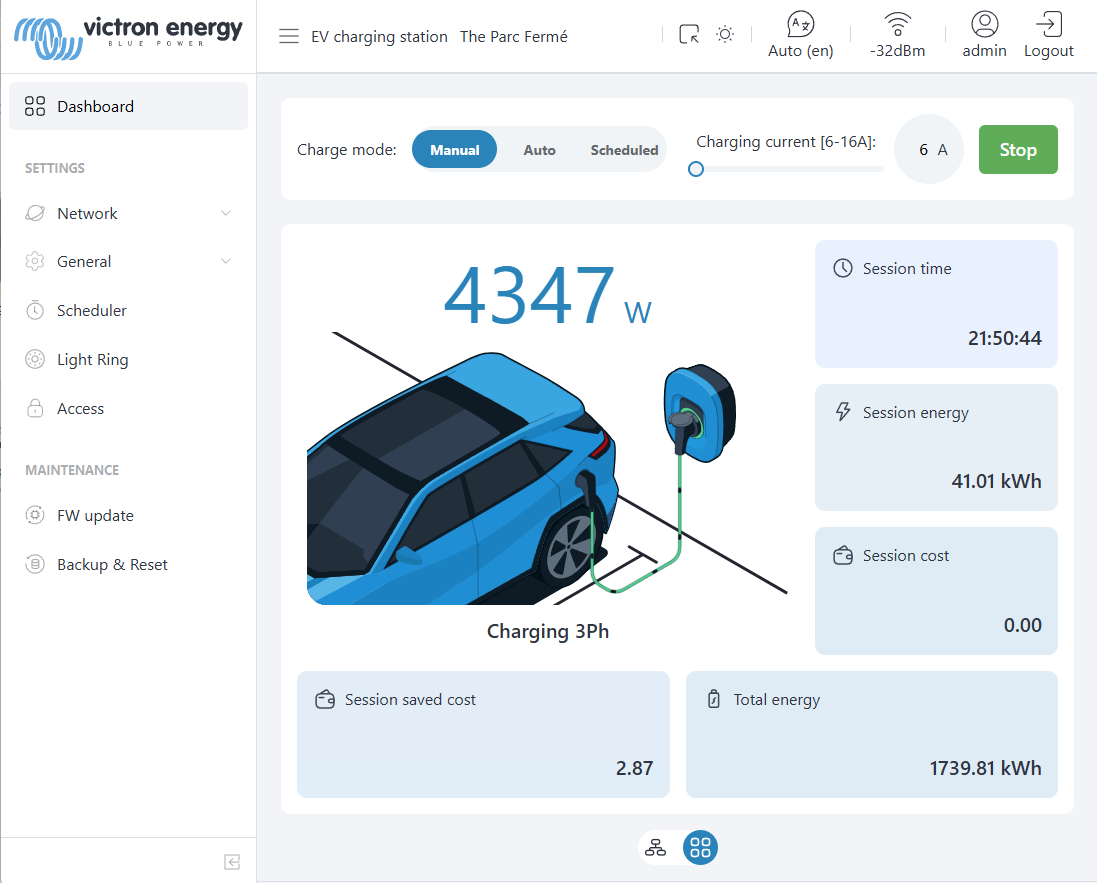
The main Dashboard page will be displayed and the EV Charging Station is ready to use.
5.3. MQTT activation
This is the recommended method of connecting the EV Charging Station to a GX device.
Communication with a GX device was previously based on Modbus TCP. MQTT is more flexible and gives the EV Charging Station access to a larger GX dataset, so the two devices exchange more information and work together better.
The EV Charging Station can be reached from anywhere with VictronConnect-Remote.
Warnings and errors are shown on the GX device.
The GX device can control charging for GX Opportunity Loads and Dynamic ESS.
It is the foundation for future features.
Modbus TCP remains available as an alternative.
Note
The EVCS firmware must be version 2.09 or later.
The GX device must be running version 3.80 or later.
VictronConnect must be version 6.41 or later.
The EV Charging Station and the GX device must be paired before they will communicate with each other.
The GX device must first be set to pairing mode where it will listen for a pairing request from the EV Charging Station.
5.3.1. Activate pairing mode
Either from the GX device touchscreen or its web interface, navigate to Settings → Integrations → MQTT Devices. Tap the Activate button to enable pairing mode on the GX device. |  |
A popup will show briefly at the bottom of the page informing you that pairing mode has been enabled. Additionally, the Activate button will be replaced by a countdown timer showing the remaining time that pairing is active. NoteIf you run out of time, you can simply tap the activate button again. | 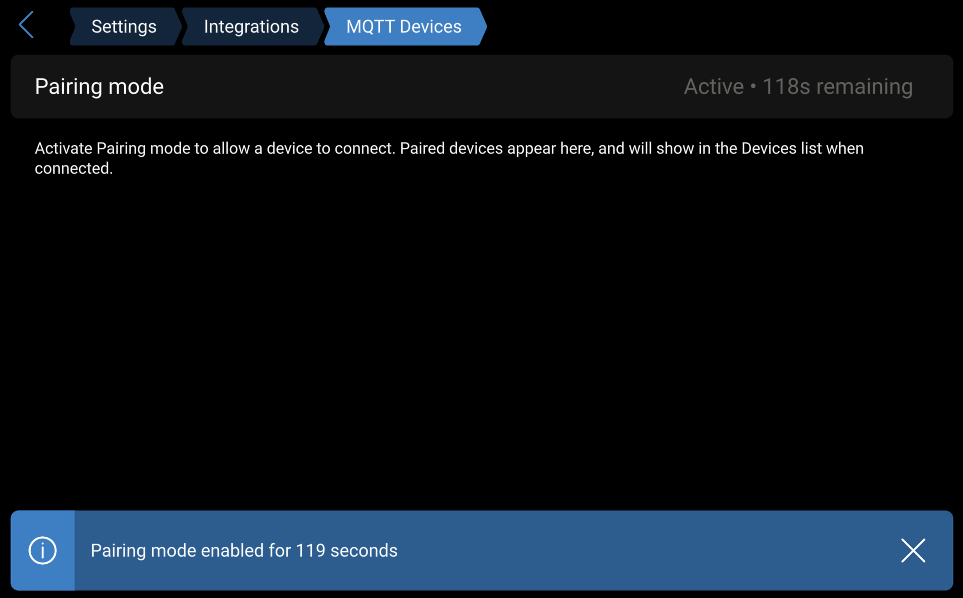 |
As an alternative to the above two steps, pairing mode can also be activated using the physical button on certain GX devices that are equipped with one. Double press the button with a pointed object, like a pen. The blue LED on the front of the GX device will flash steadily when pairing mode is active, and will time out after two minutes. | 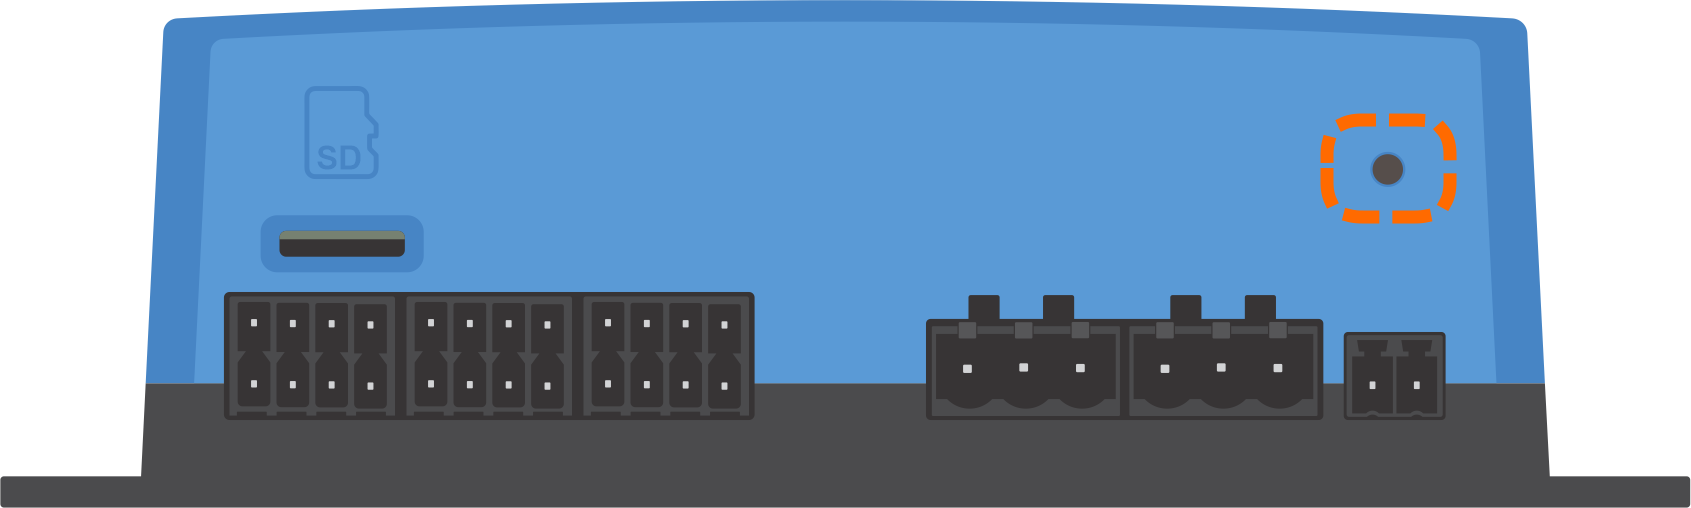 |
5.3.2. Pairing via EVCS web interface
From the EV Charging Station web interface, navigate to General → GX device. Ensure that Communication is set to Enabled. Set the communication type to MQTT. Tap the "Discover" button to find GX devices on the network. NoteThe EV Charging Station and the GX device need to be on the same network subnet. | 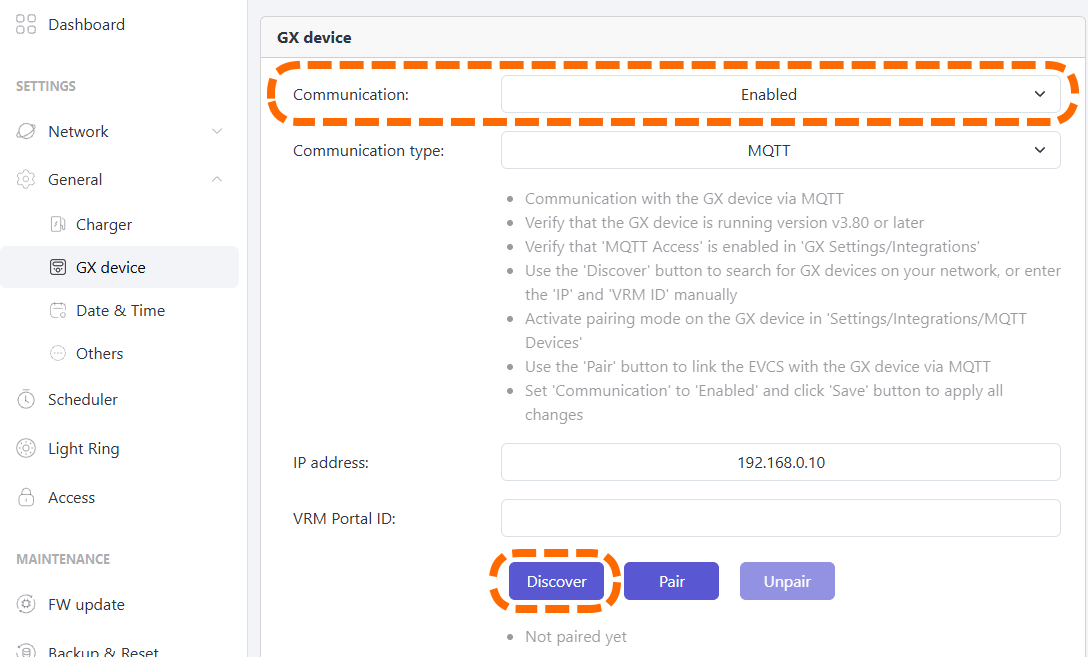 |
A popup box will show all GX devices which have been discovered on the network. Tap or click on the GX device you want to pair with. | 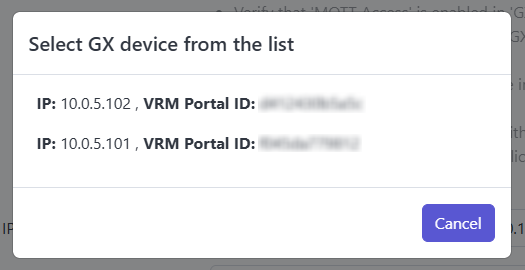 |
The IP address and VRM Portal ID of the selected GX device will be populated in the respective fields. NoteEnsure that Pairing mode is still active of the GX device. If it has timed out, activate it again. Tap the Pair button to begin the pairing process. | 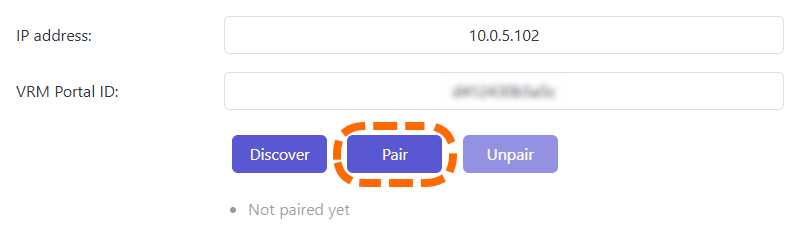 |
Once successfully paired, a message will pop up at the bottom of the page. The details of the paired GX device will be written below the buttons. | 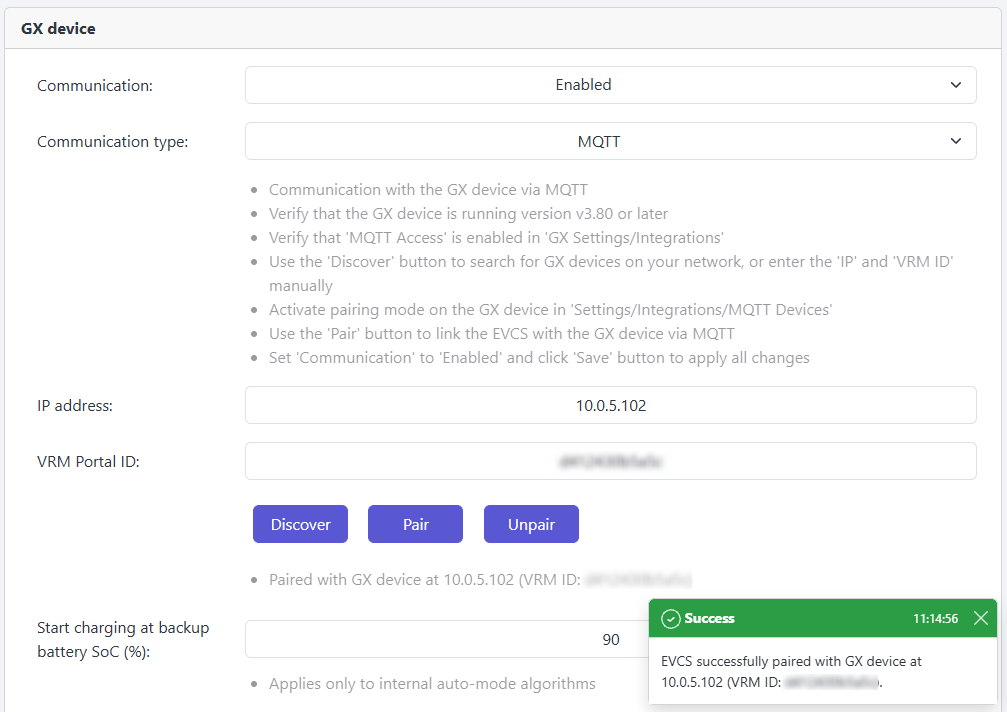 |
Finally, click the Save button at the bottom of the page |  |
Additionally, on the GX device, the EV Charging Station will be listed as a paired device. The EV Charging Station appears in the device list, with a brief description of its status. | 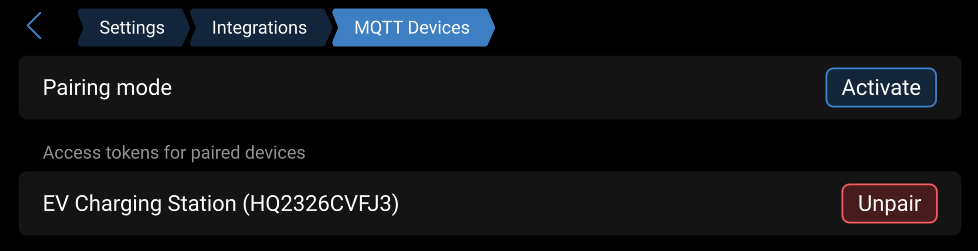 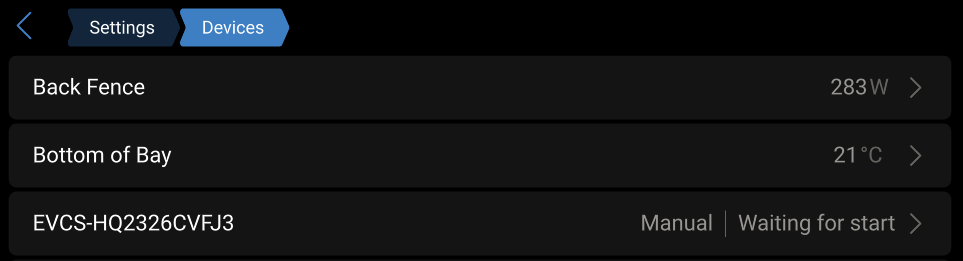 |
The EV Charging Station shows on the main Overview page of the GX device. | 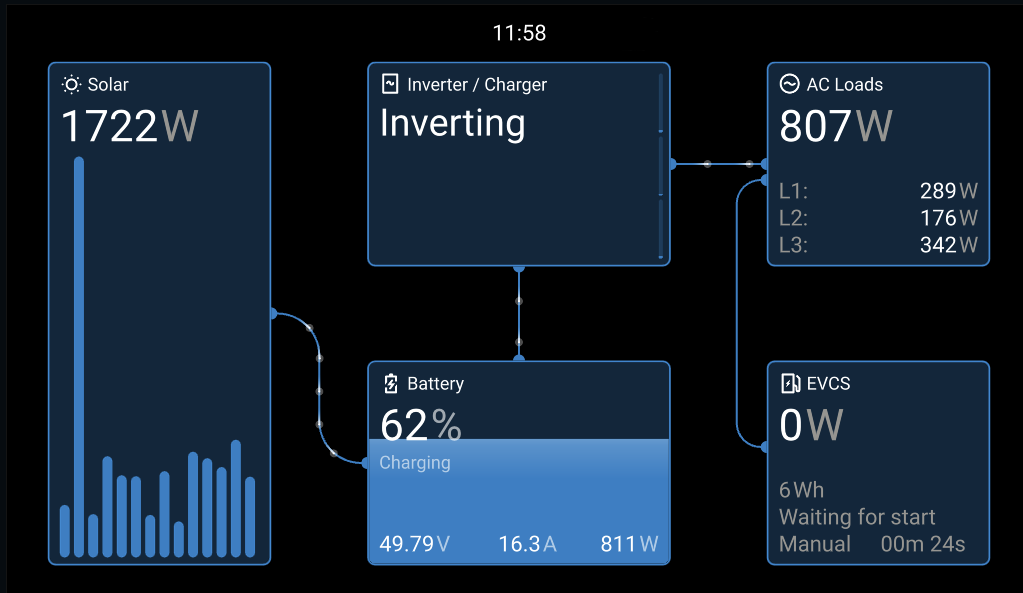 |
5.3.3. Pairing via VictronConnect
This method is an alternative to the web interface method described previously. The pairing process here uses VictronConnect instead.
If you have already completed the pairing process using the web interface, and communication is established, then you can skip this section.
Note
VictronConnect version 6.41 or later is required.
Connect to the EV Charging Station using the VictronConnect app.
Navigate to Settings → General → GX Device. Tap Selected GX (None). | 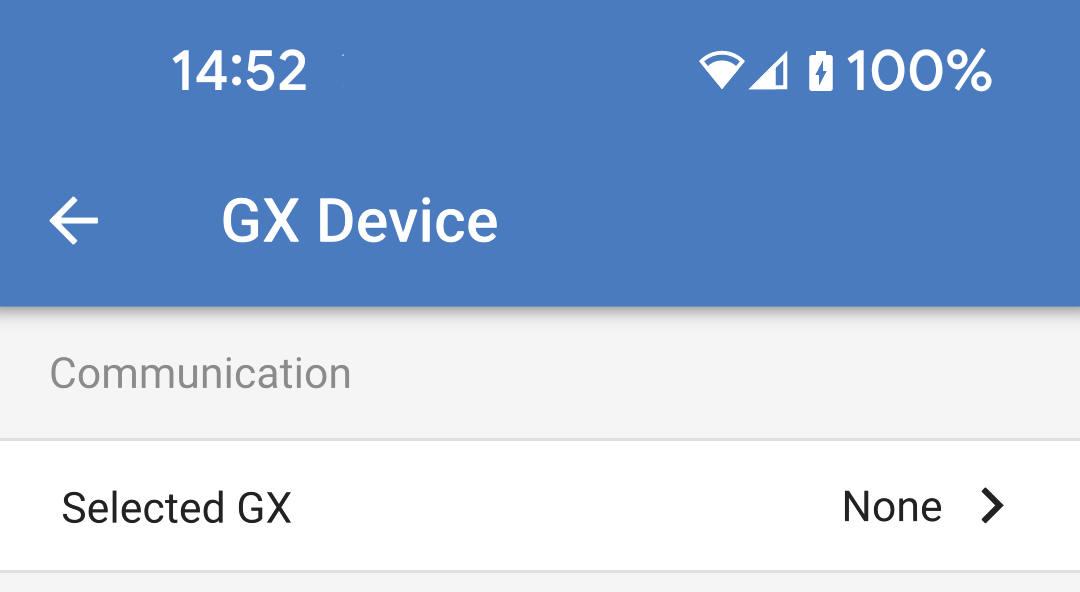 |
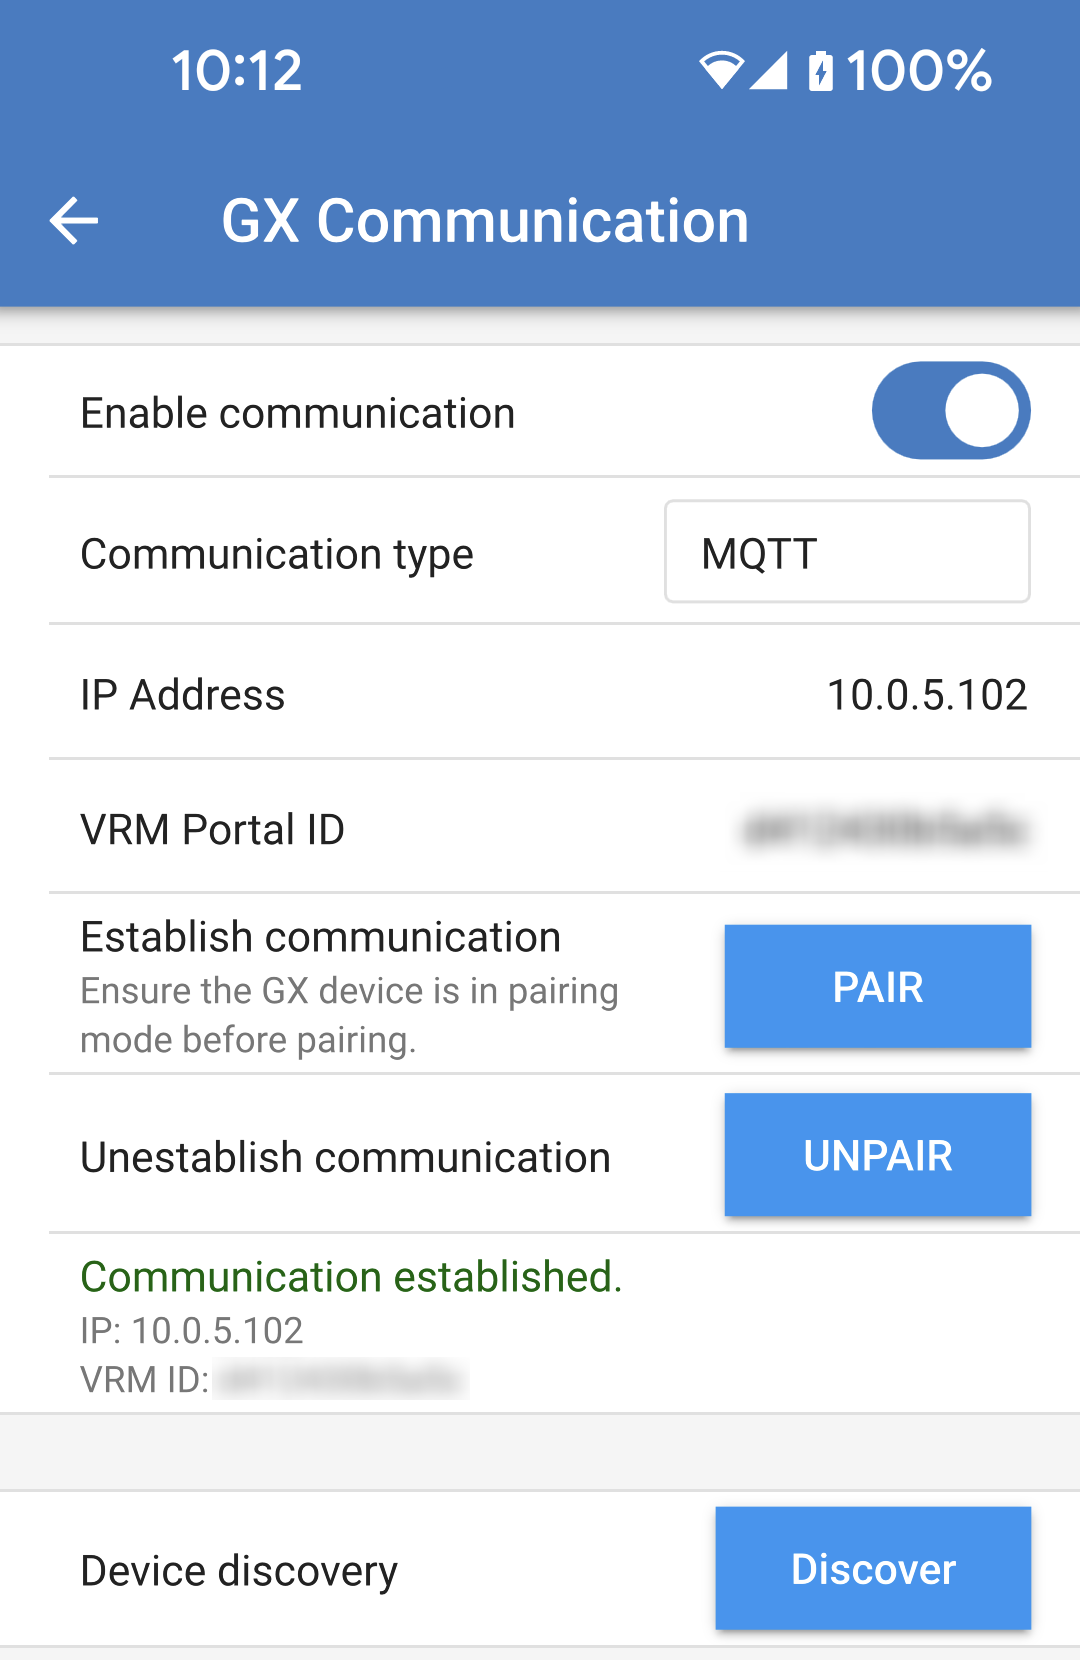
Turn "Enable communication" on. Set the "Communication type" to MQTT. Tap the "Discover" button to find GX devices on the network. NoteThe EV Charging Station and the GX device need to be on the same network subnet. | 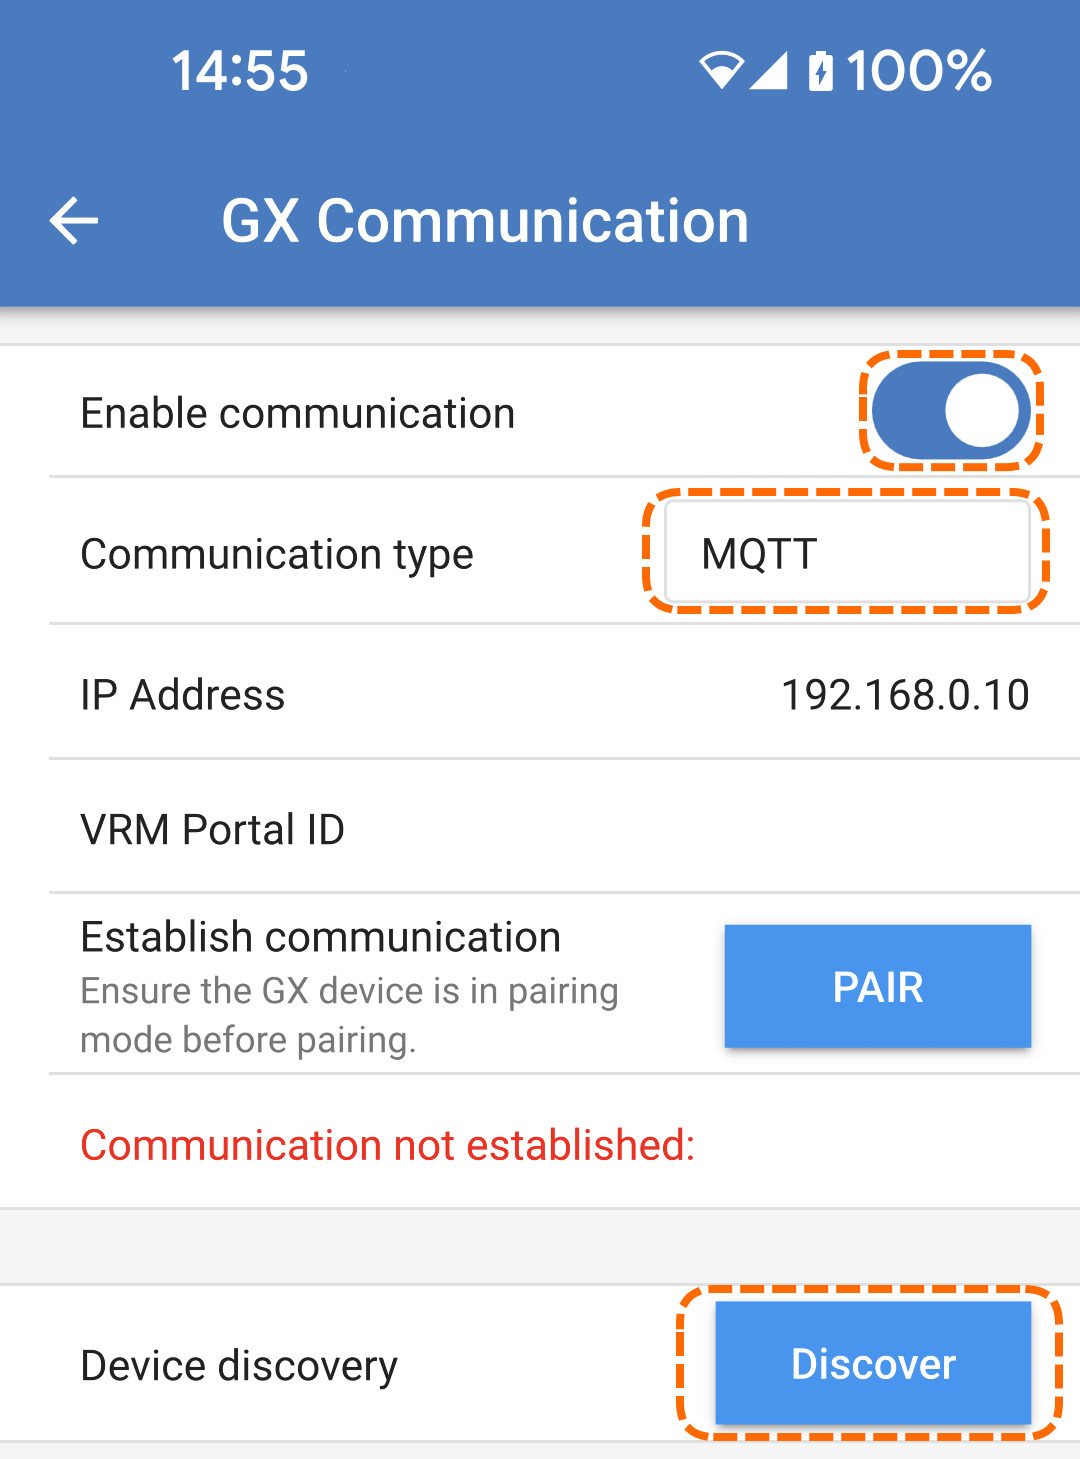 |
Any discovered GX devices will appear in a list. Tap "Select" to choose the GX device you want to pair with. | 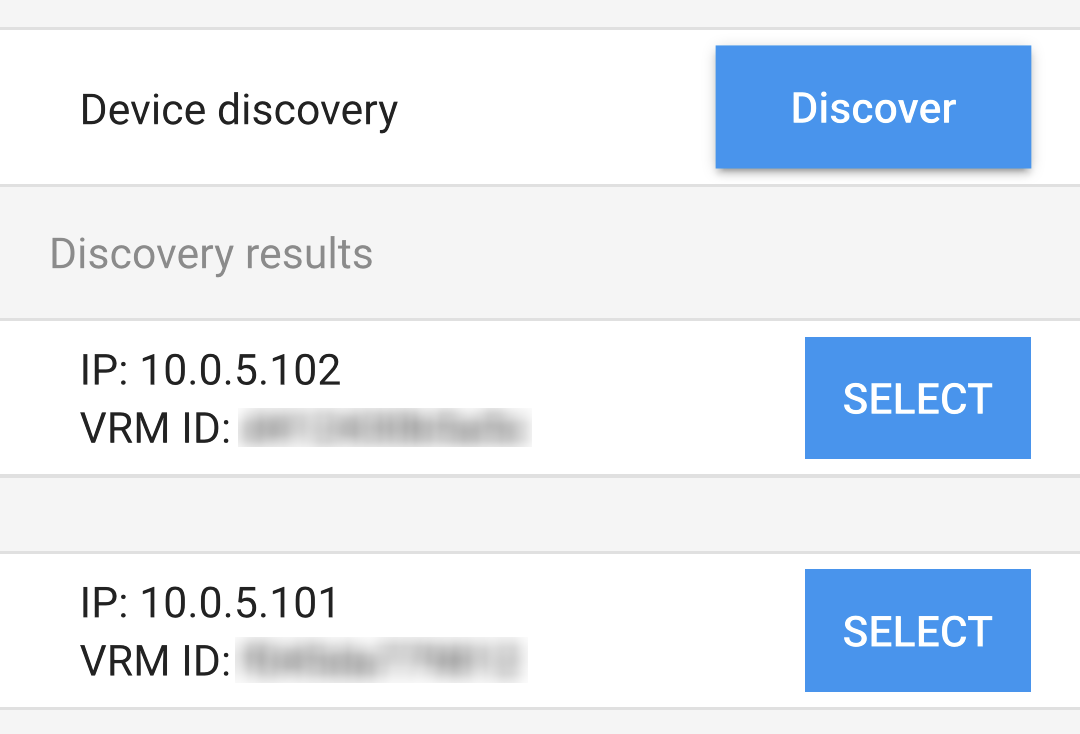 |
The IP address and VRM Portal ID of the selected GX device will be populated in the respective fields. NoteEnsure that Pairing mode is still active of the GX device. If it has timed out, activate it again. Tap the "Pair" button to begin the pairing process. | 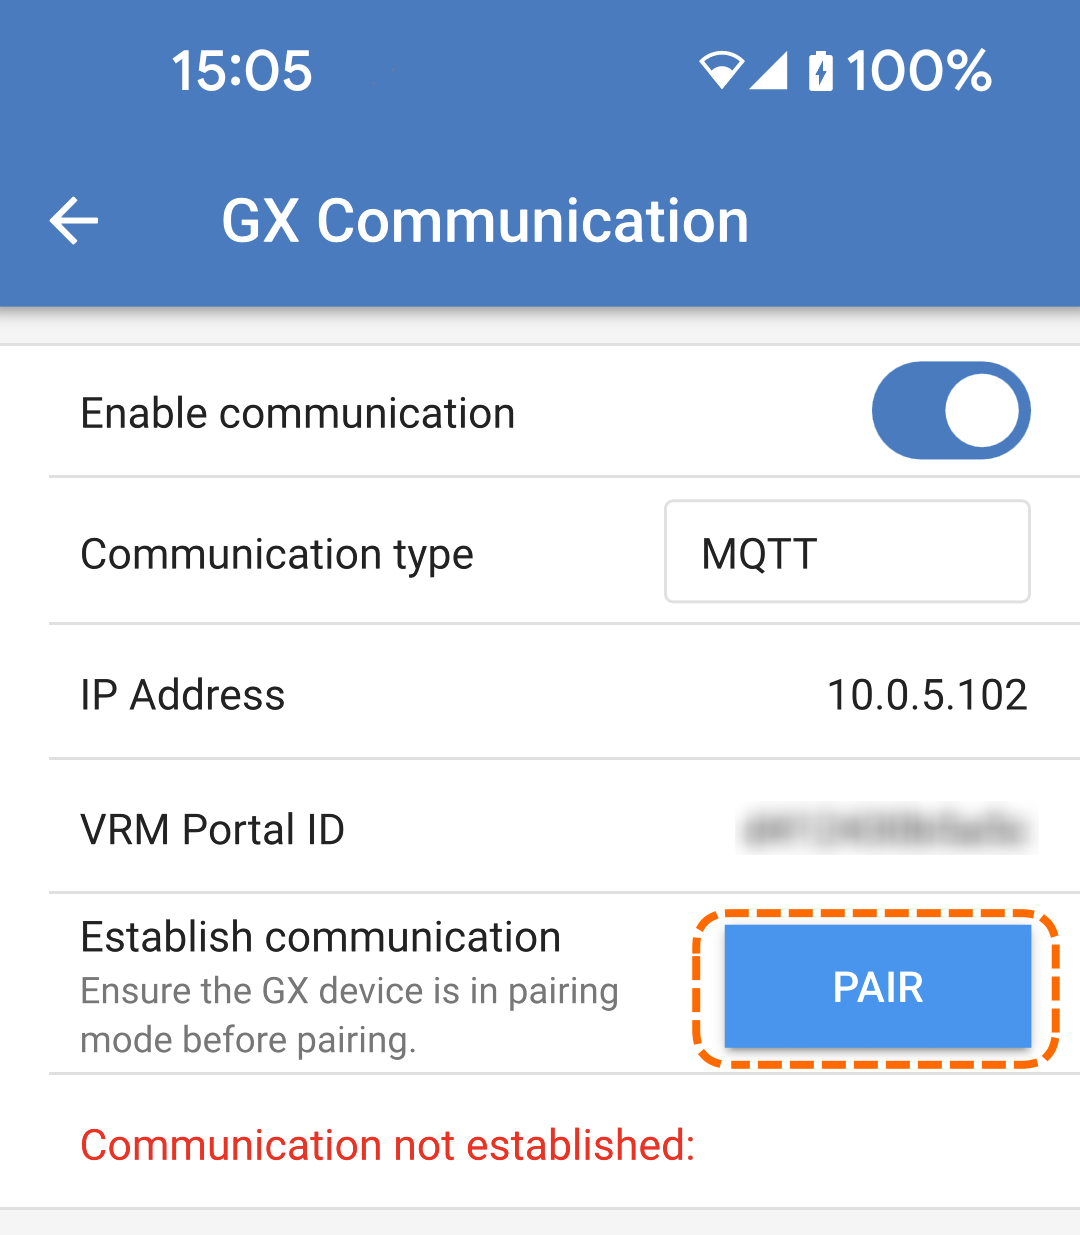 |
Once successfully paired, the status should change to "Communication established" in green, along with the IP address and VRM ID of the GX device. | 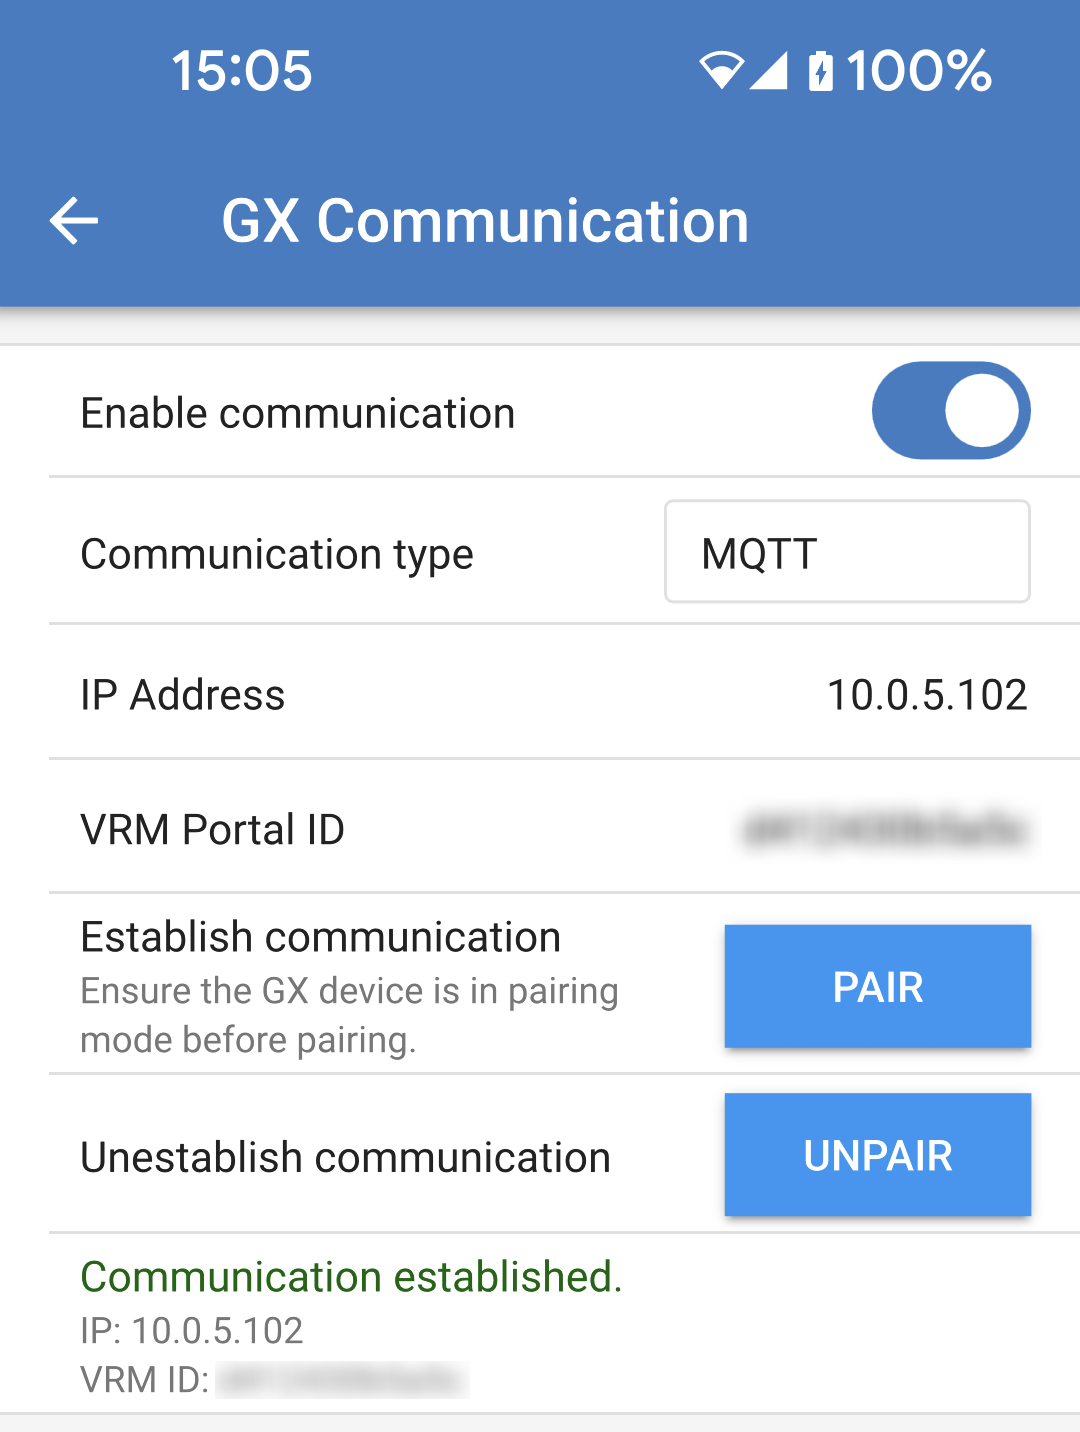 |
Additionally, on the GX device, the EV Charging Station will be listed as a paired device. The EV Charging Station appears in the device list, with a brief description of its status. | |
The EV Charging Station shows on the main Overview page of the GX device. | |
5.4. GX device setup, configuration and operation
5.4.1. Setup menu and options
As soon as MQTT communication has been activated, the named EVCS appears in the device list and displays the current mode and charging status. | 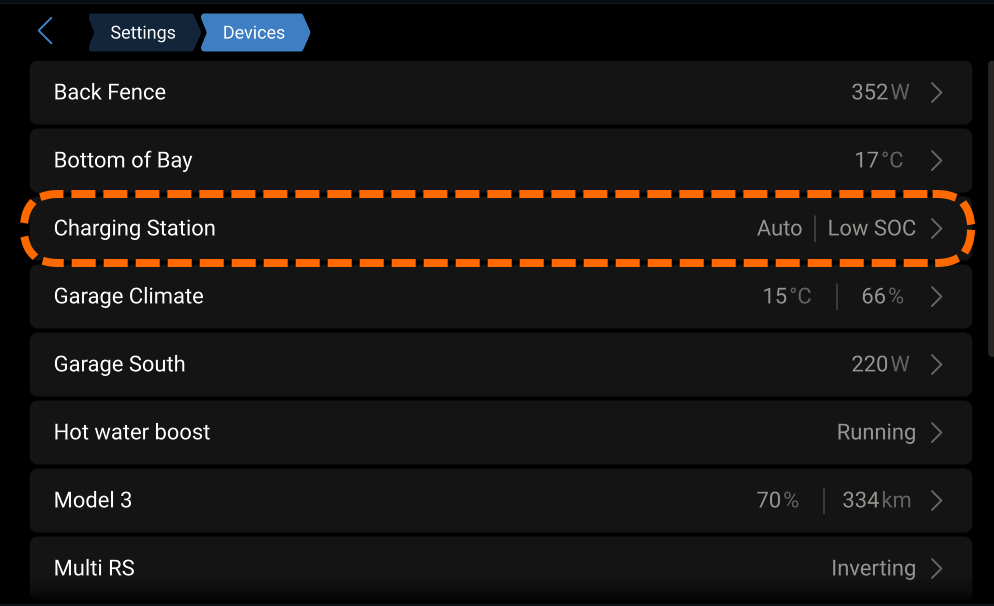 |
This sub menu displays the current charging session with charging power per phase. The charging mode can be changed along with any other parameters related to a particular charging mode. | 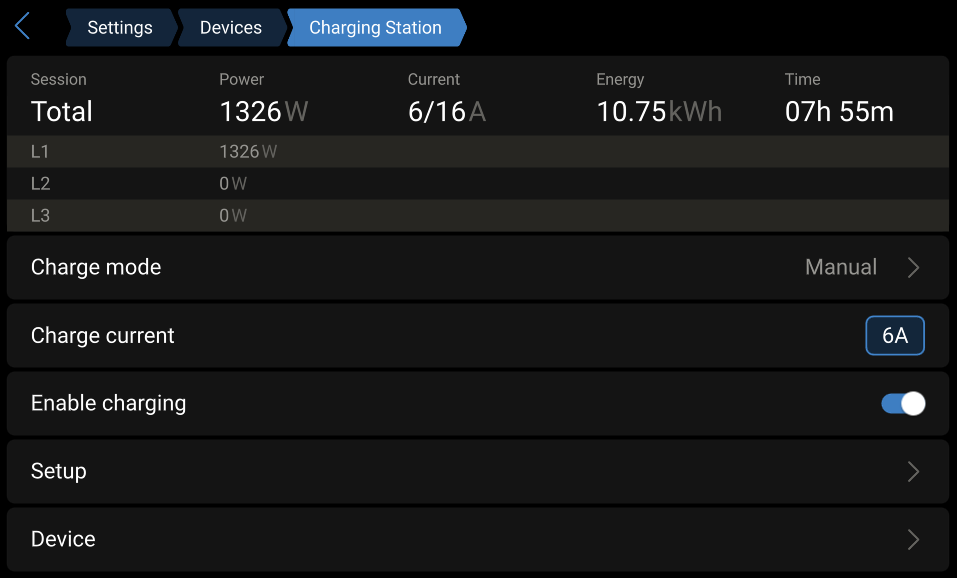 |
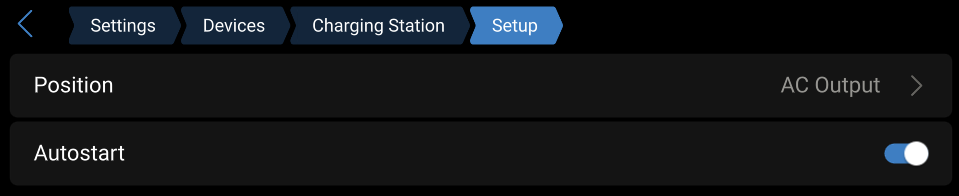
The Setup menu allows some settings to be configured, including the position that the EV Charging Station is installed at. Autostart will enable charging as soon as the vehicle is plugged in. NoteWhen charging is enabled, it does not necessarily mean that the vehicle will start charging right away. It means that the EV Charging Station will be ready to start once a schedule becomes active, for example. |
|
The Device sub menu displays the EV Charging Station parameters. The name of the EV Charging Station can be changed. | 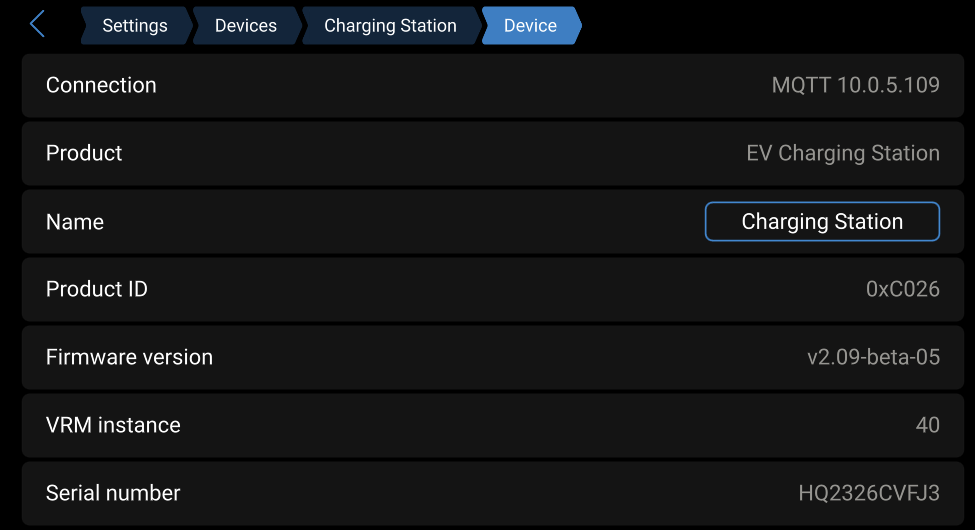 |
5.5. VictronConnect setup, configuration and operation
5.5.1. Setup
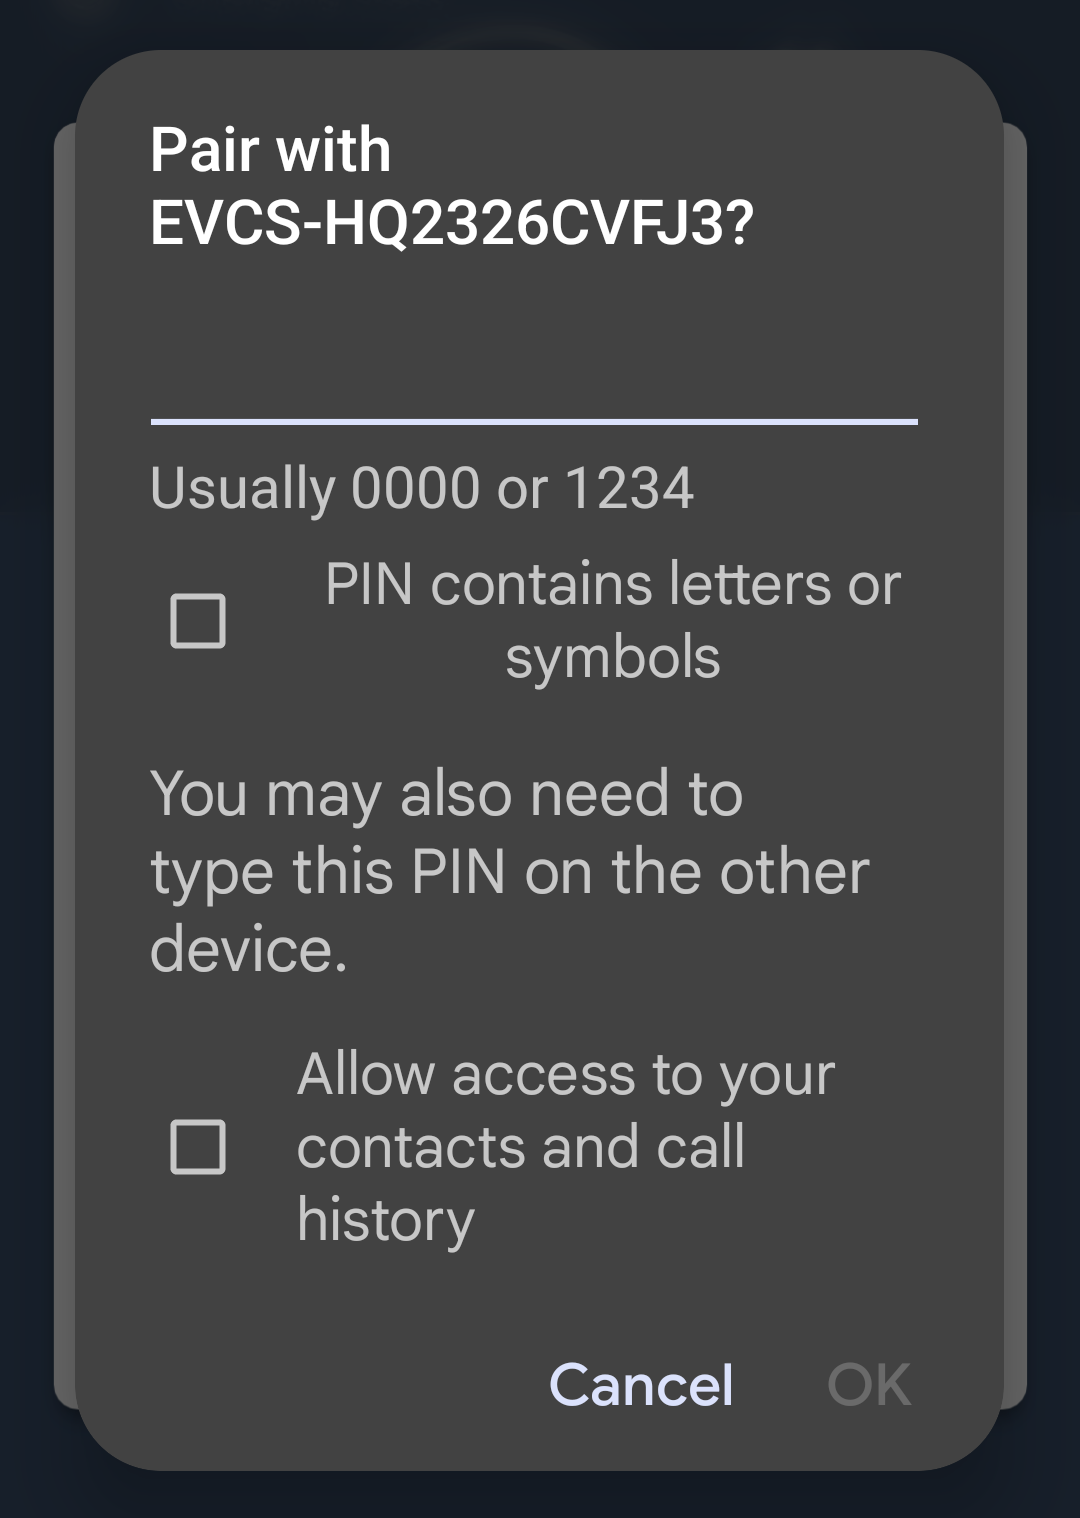
The following steps are necessary to successfully connect to the EV Charging Station via Bluetooth and VictronConnect:
|
|
5.5.2. Overview page
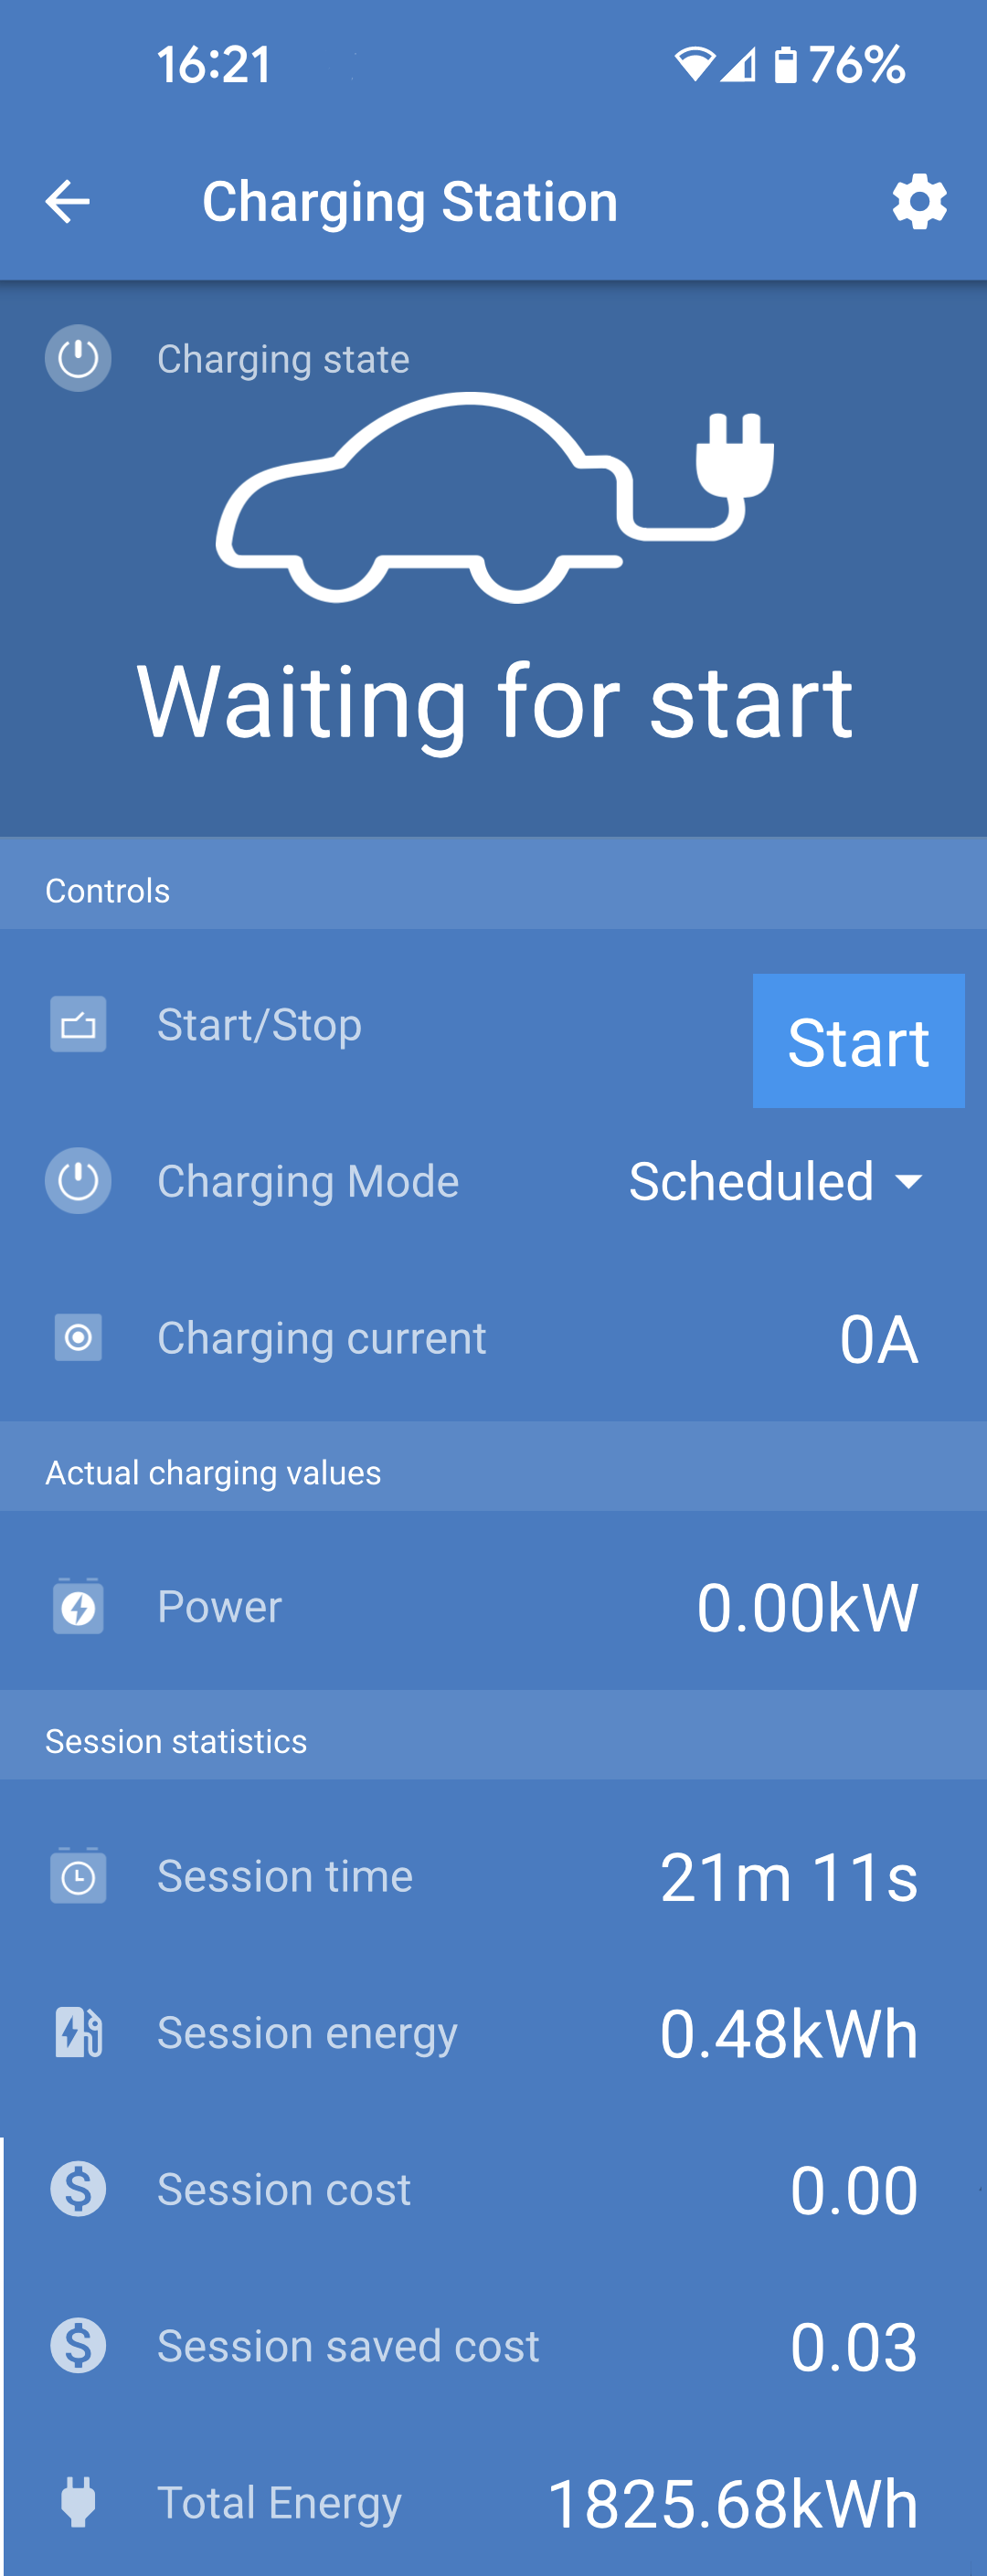
The overview page provides information about the charging state, controls to start/stop charging or changing the charging mode and charging current. Furthermore, the actual charging values and session statistics can be monitored.
Controls:
Actual charging values:
Session statistics:
|
|
5.5.3. Settings page
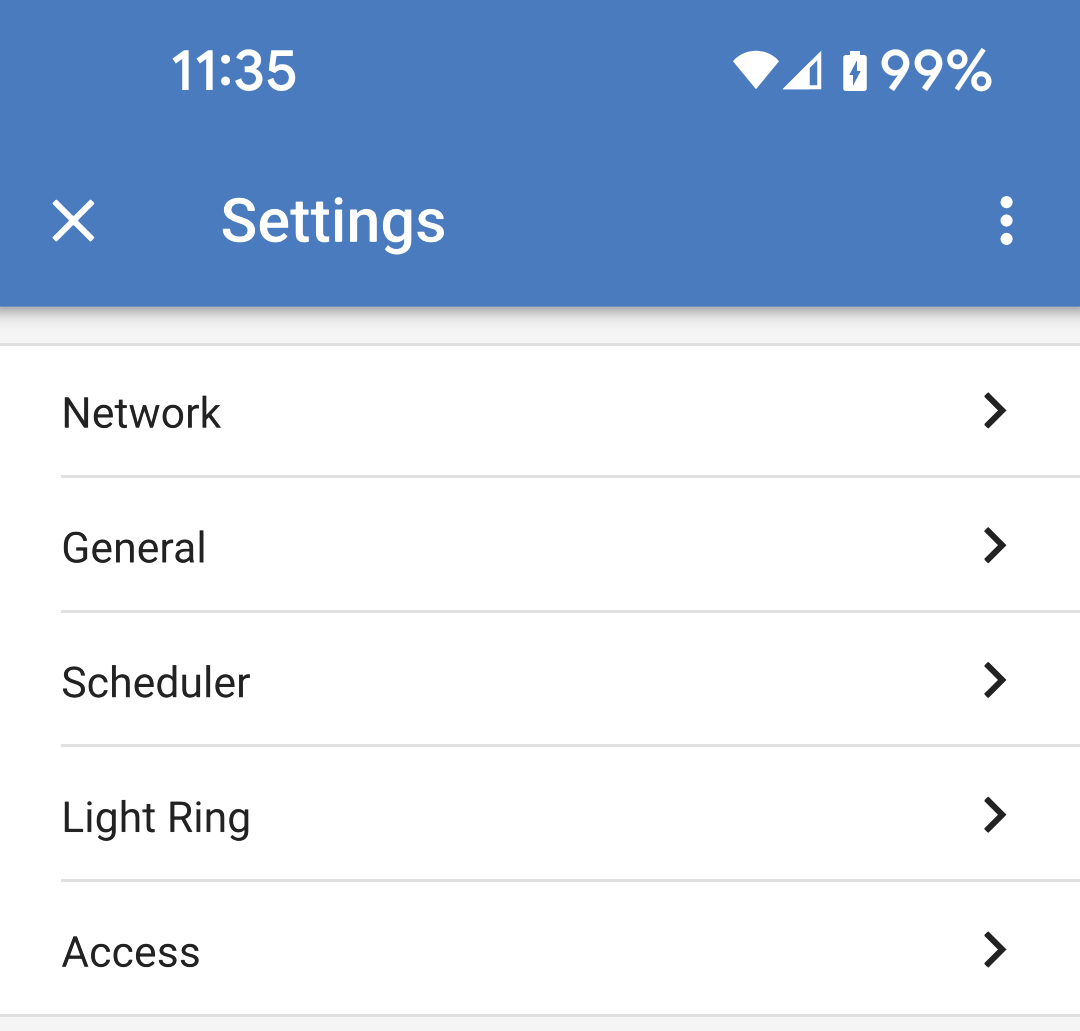
The Settings menu is accessible by pressing the cog wheel from the top right of the Overview page. The following menu options are available:
|
|
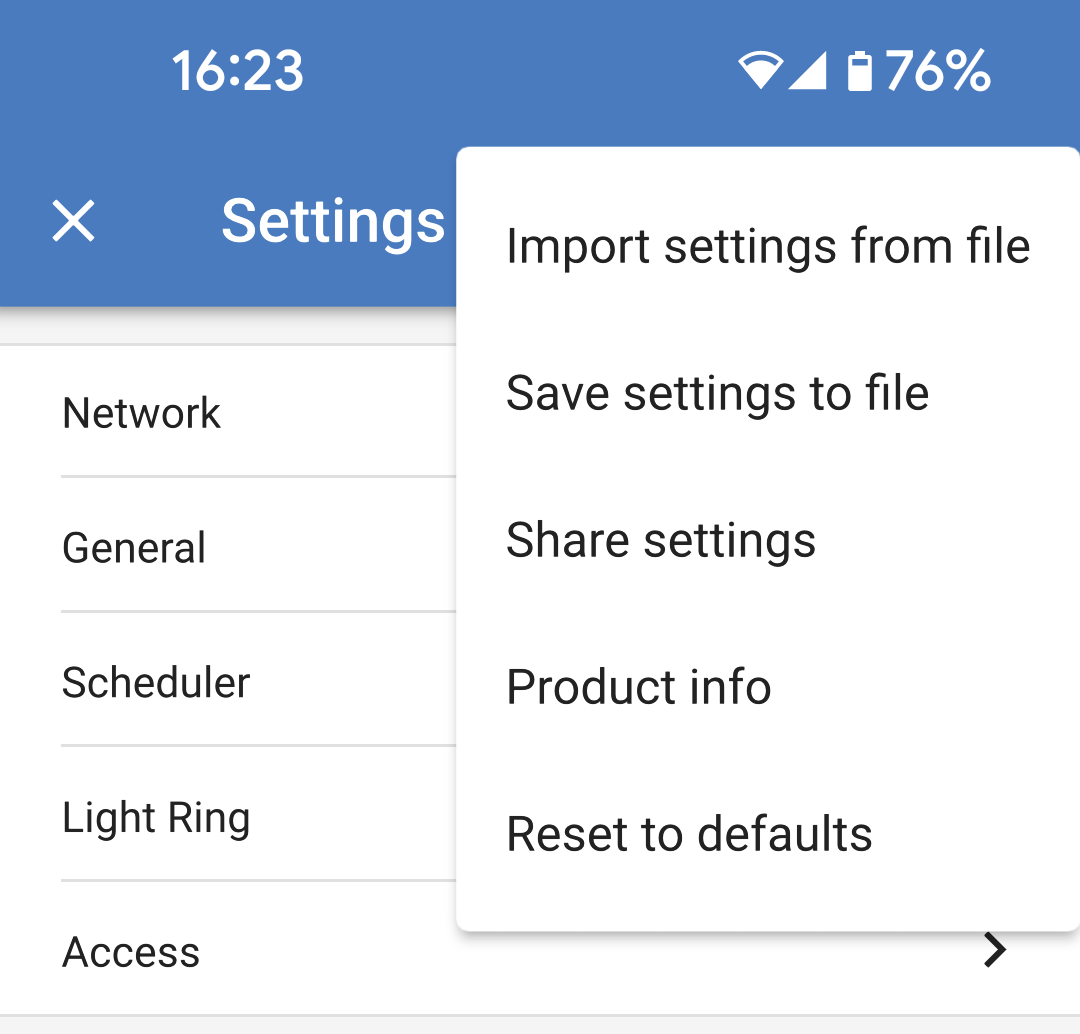
Tap the three vertical dots in the top right corner of the settings page to perform the following actions:
|
|
5.5.4. Product info page
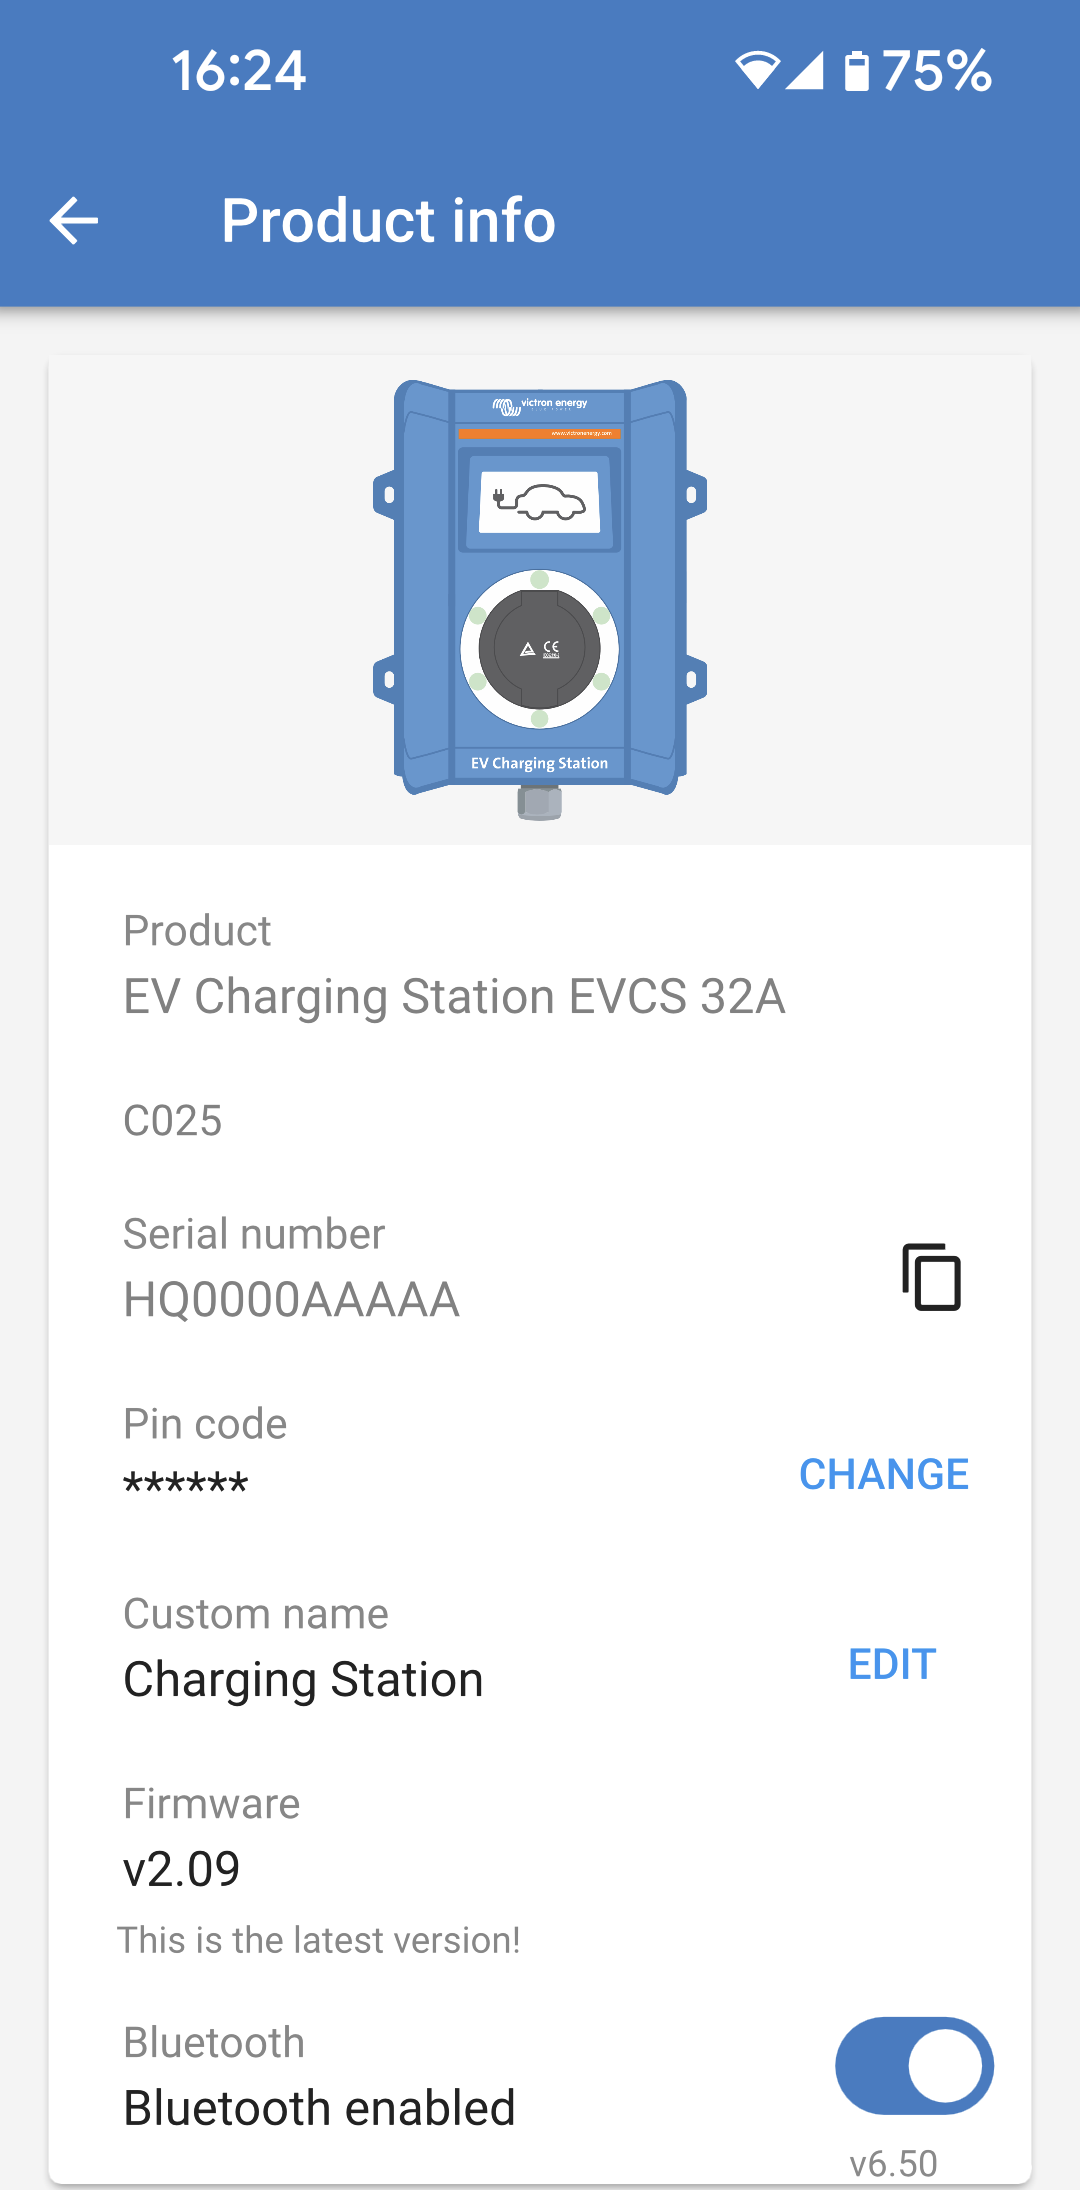
To get to the Product info page, tap the 3 vertical dots icon from the Settings page.
More about how to assign your own name to your EV Charging Station and how to deactivate and reactivate Bluetooth, please refer to the VictronConnect App manual. WarningNote that if you disable Bluetooth via VictronConnect, it will have to be re-enabled via the web interface Networks menu or by using the Reset to factory defaults feature, either via the web interface or the DEF button procedure. For older devices that have Bluetooth disabled from the factory, use the web interface's network menu to enable Bluetooth. |
|
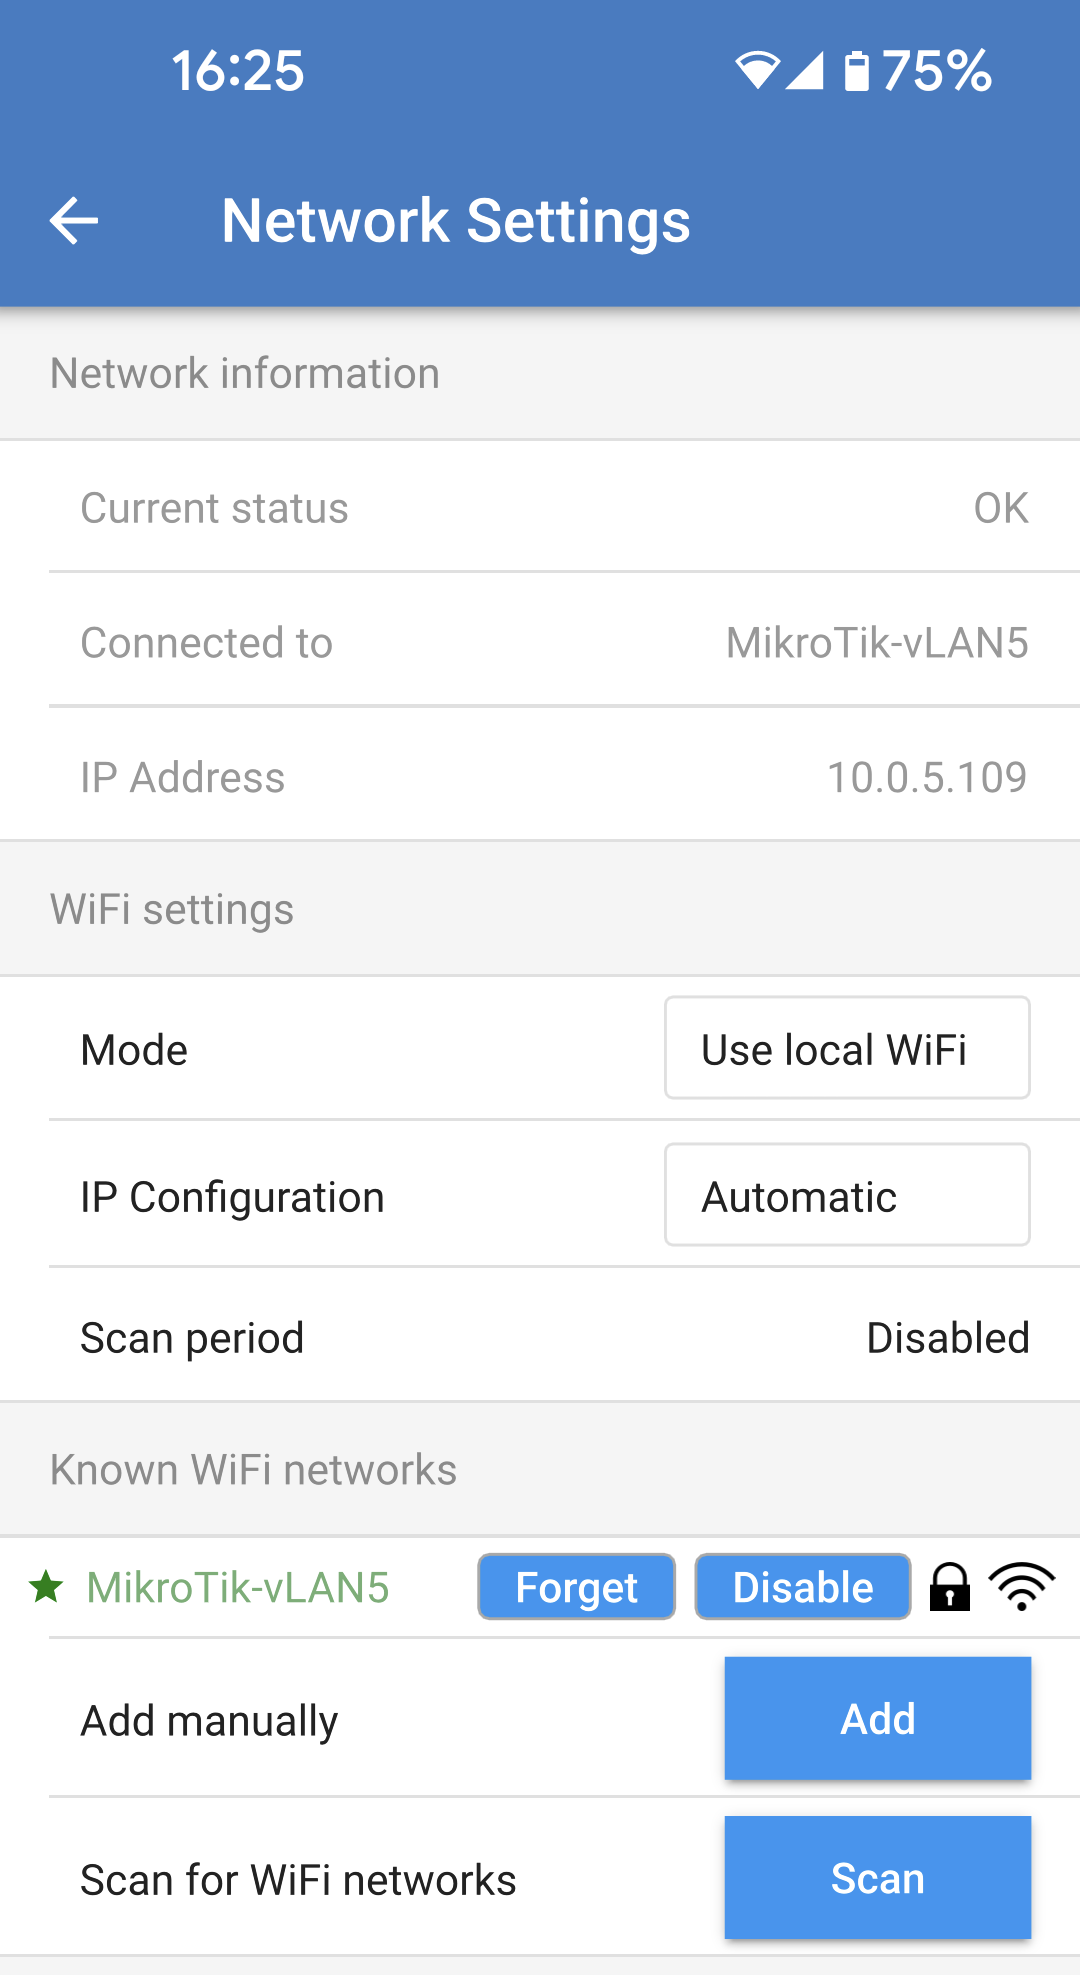
5.5.5. Network Settings
The Network information section shows:
The WiFi section allows configuration of the WiFi settings for the EV Charging Station.
The Access point list section shows discovered local WiFi networks or allows for a WiFi network to be added manually. The currently connected Access Point name is shown here in green along with "FORGET" and "DISABLE" buttons.
|
|
5.5.6. General Settings
The General settings page lists the options for the general configuration of the EV Charging Station. Charging settings section has the following options:
Other settings section provides:
Reboot EVCS:
|
|
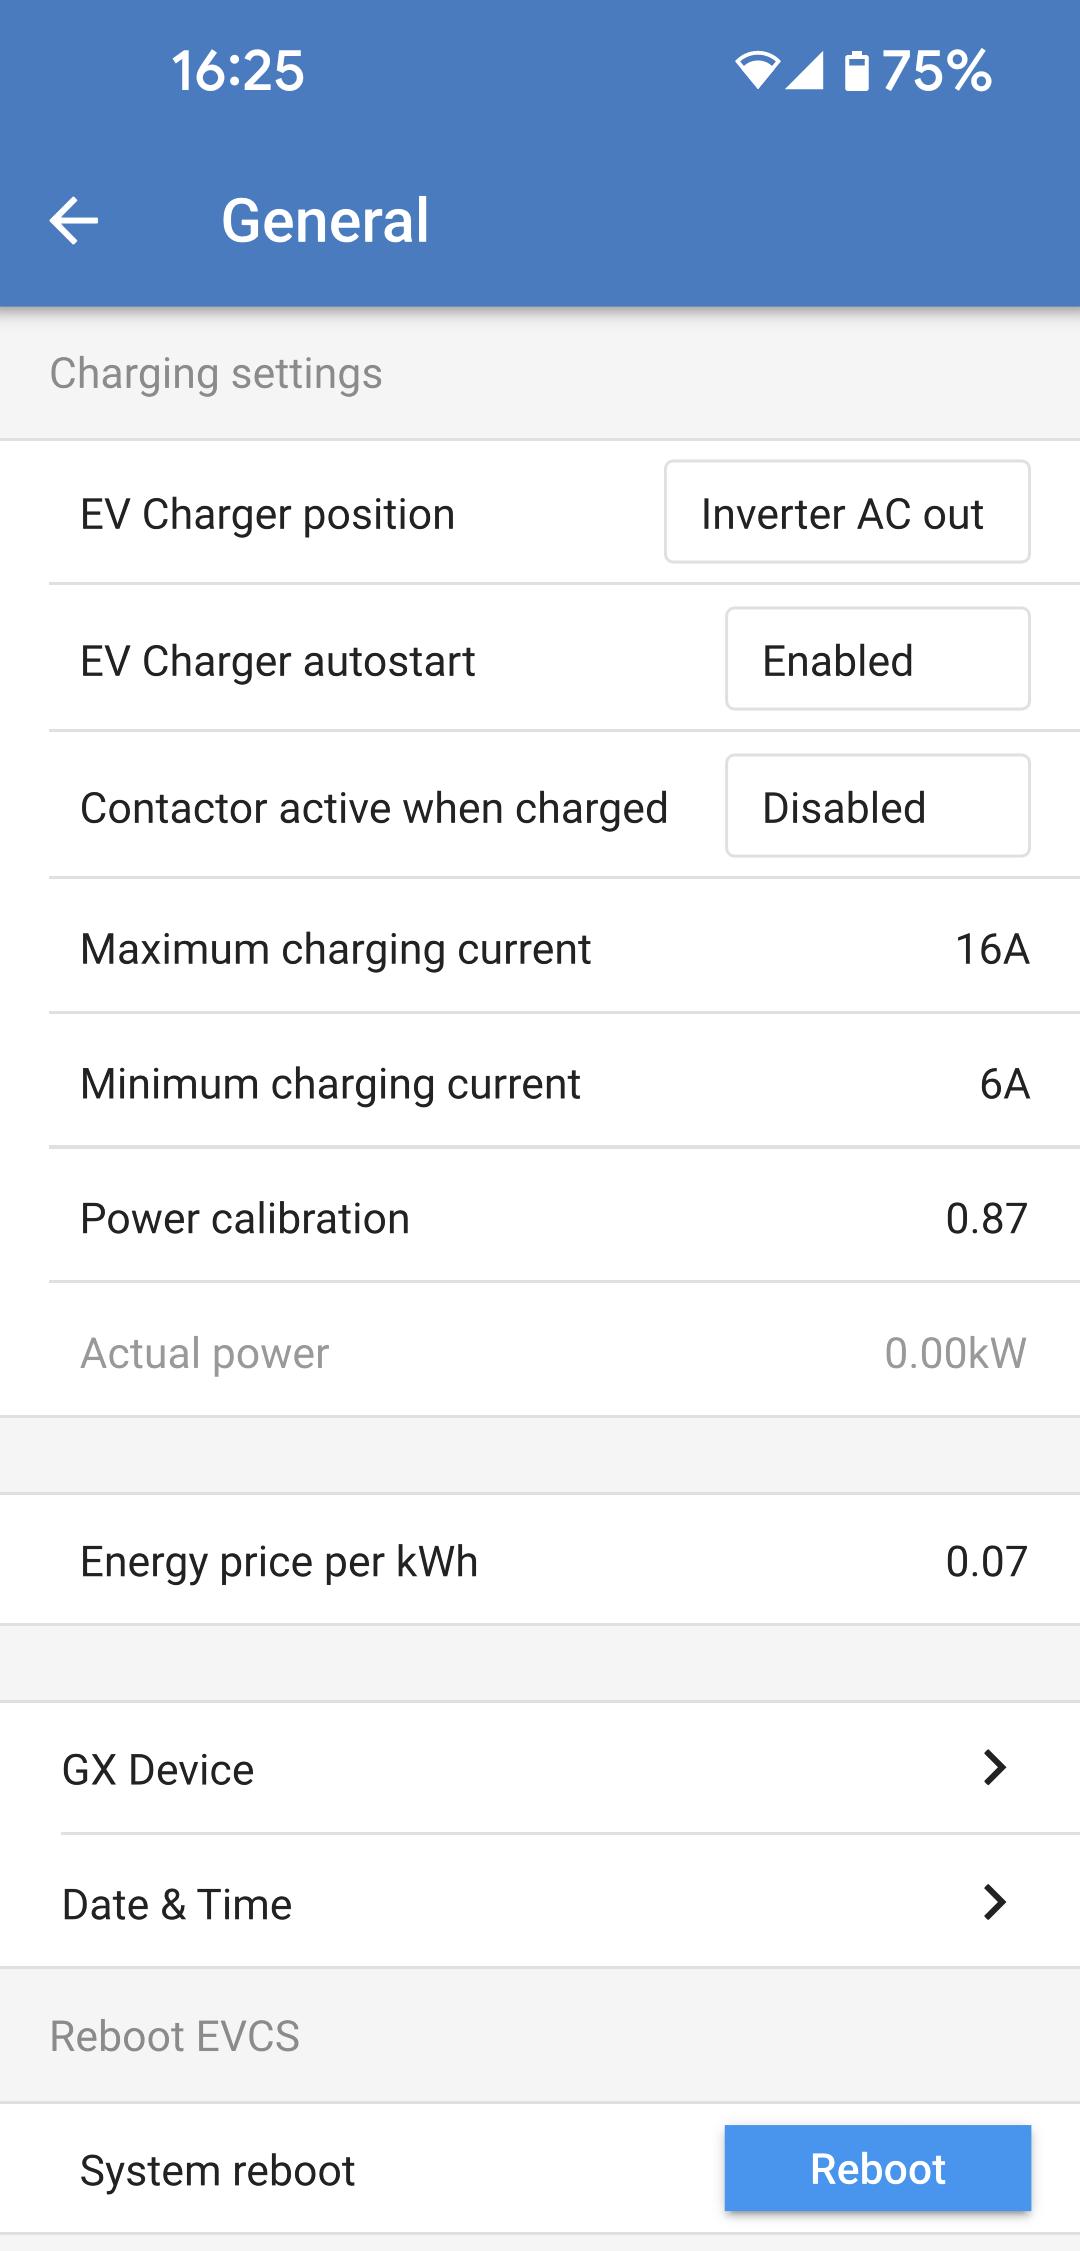
EV Charger position Select the position that the EV Charging Station is wired in the system. If the EV Charging Station is wired anywhere before the Inverter / Charger then select the "Inverter AC in" option. Alternatively, if the EV Charging Station is wired after the Inverter / Charger or is wired after an Inverter then choose the "Inverter AC out" option. |
|

EV Charger autostart Choose whether or not the EV Charging Station starts automatically when the charging cable is connected to the EV. Select "Enabled" to have charging start automatically when the charging cable is connected to the EV. Select "Disabled" if you don't want charging to start automatically. In this case charging needs to be started manually by pressing the "Start" button from the Overview page. This can help to prevent unauthorised use of the EV Charging Station. |
|

Contactor active when charged Choose whether or not the contactor within the EV Charging Station remains closed or opens when the EV is charged but the cable is still connected. Select "Enabled" for the internal contactor to remain closed when the EV is charged. For example, this can be useful if you would like to pre-condition the cabin air using electricity from the charging source rather then the EV battery. NoteSome vehicles may present an error if the EV Charging Station contactor remains closed after charging has stopped. Select "Disabled" if you want the internal contactor to open when the EV is charged. This has the effect of disconnecting the EV from the supply as if the charging cable is removed. |
|

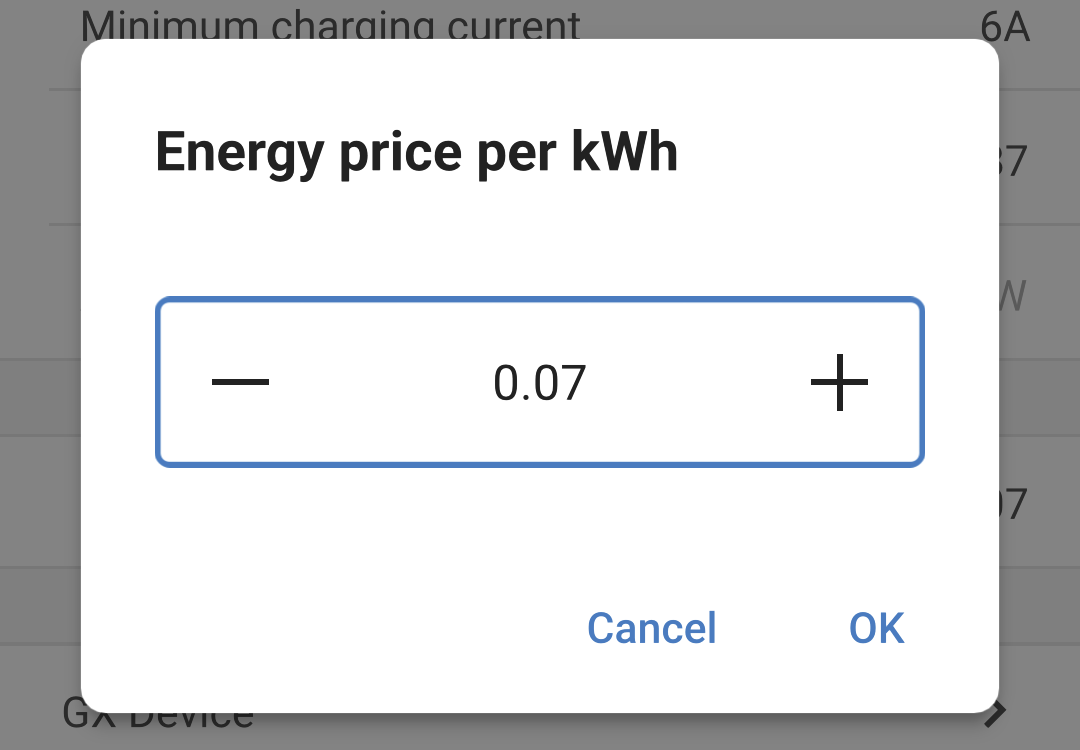
Energy price per kWh Enter the price of imported electricity per kWh. This will be used to calculate the session savings. |
|
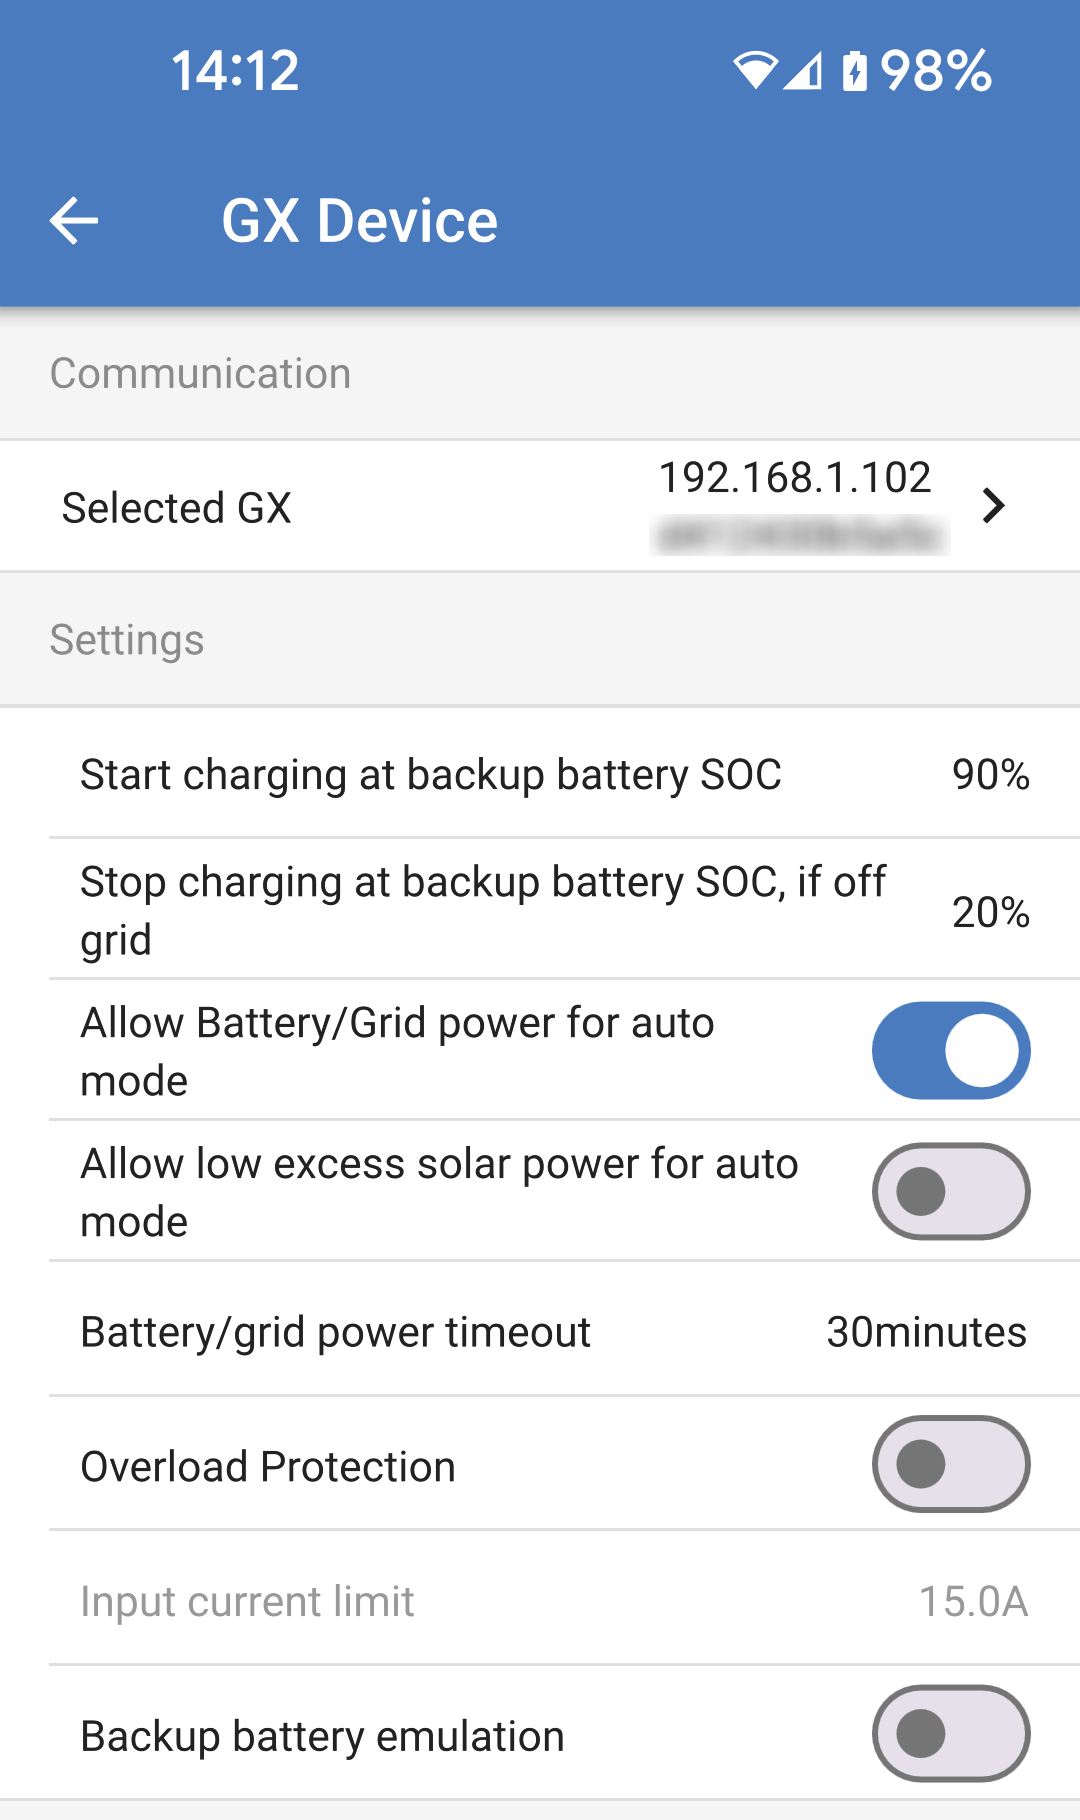
GX device communication The GX device settings page is accessible from the General settings page.
|
|
|
|
|
|
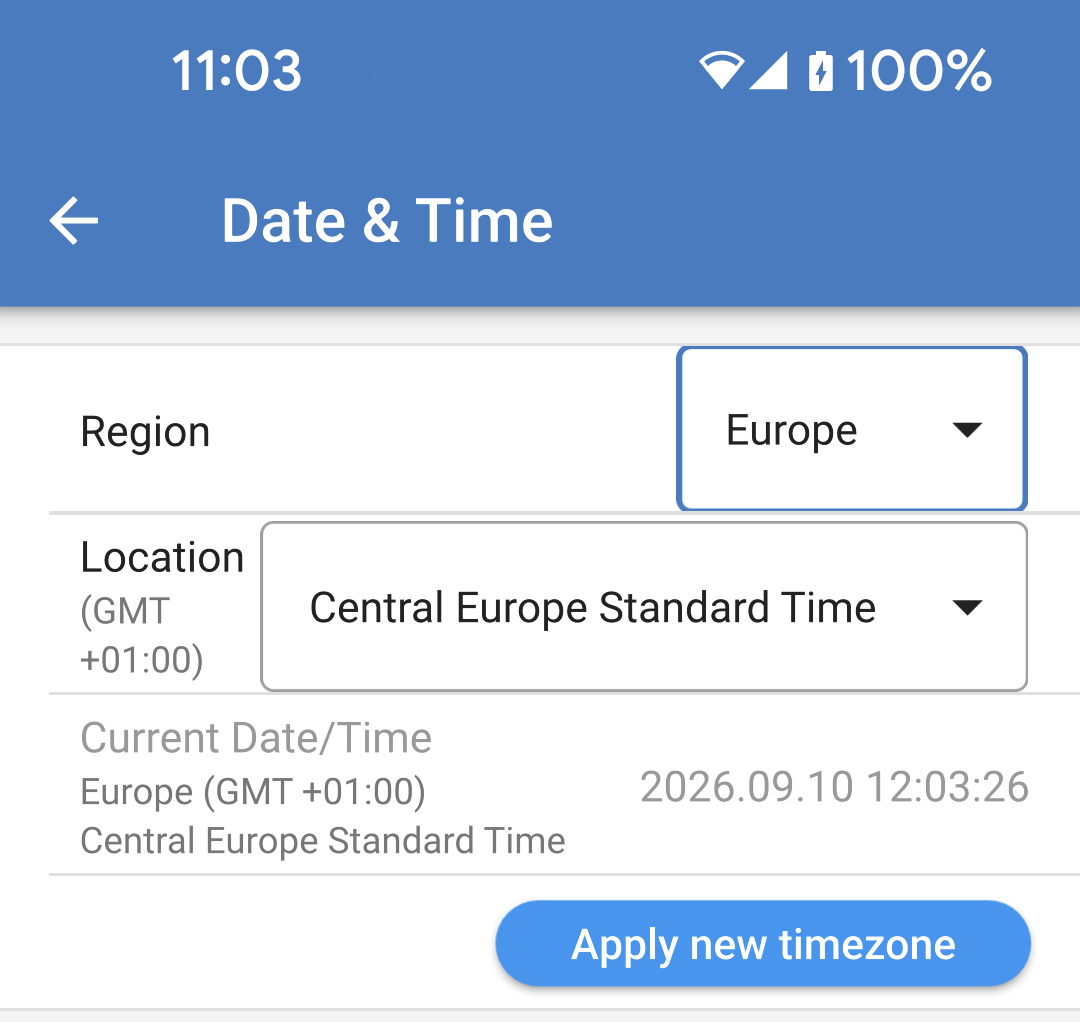
Date & Time The correct date and time is essential for scheduled charging to work correctly.
|
|
System reboot
|
|

5.5.7. Scheduler
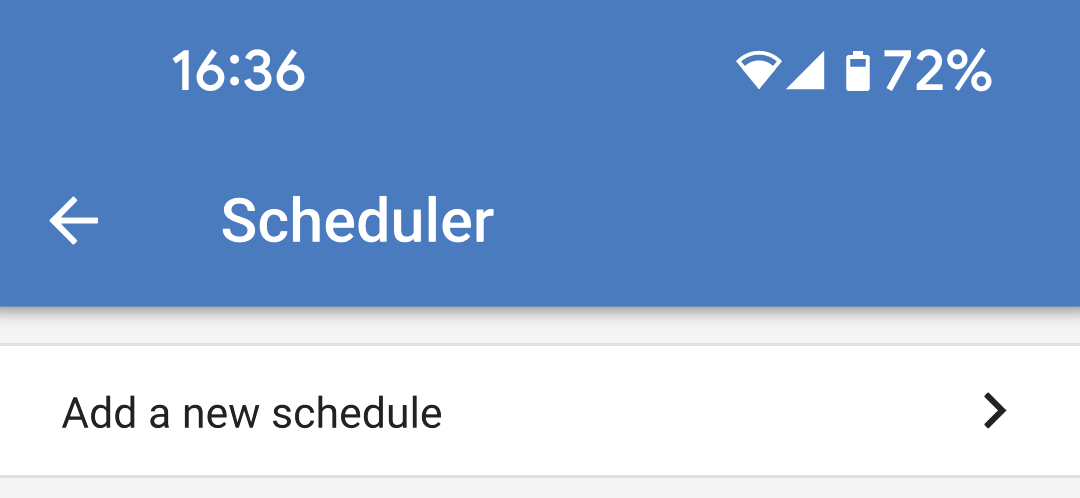
If the Charging Mode is set to "Scheduled" from the Overview page then the EV Charging Station will charge according to the schedules set in this section.
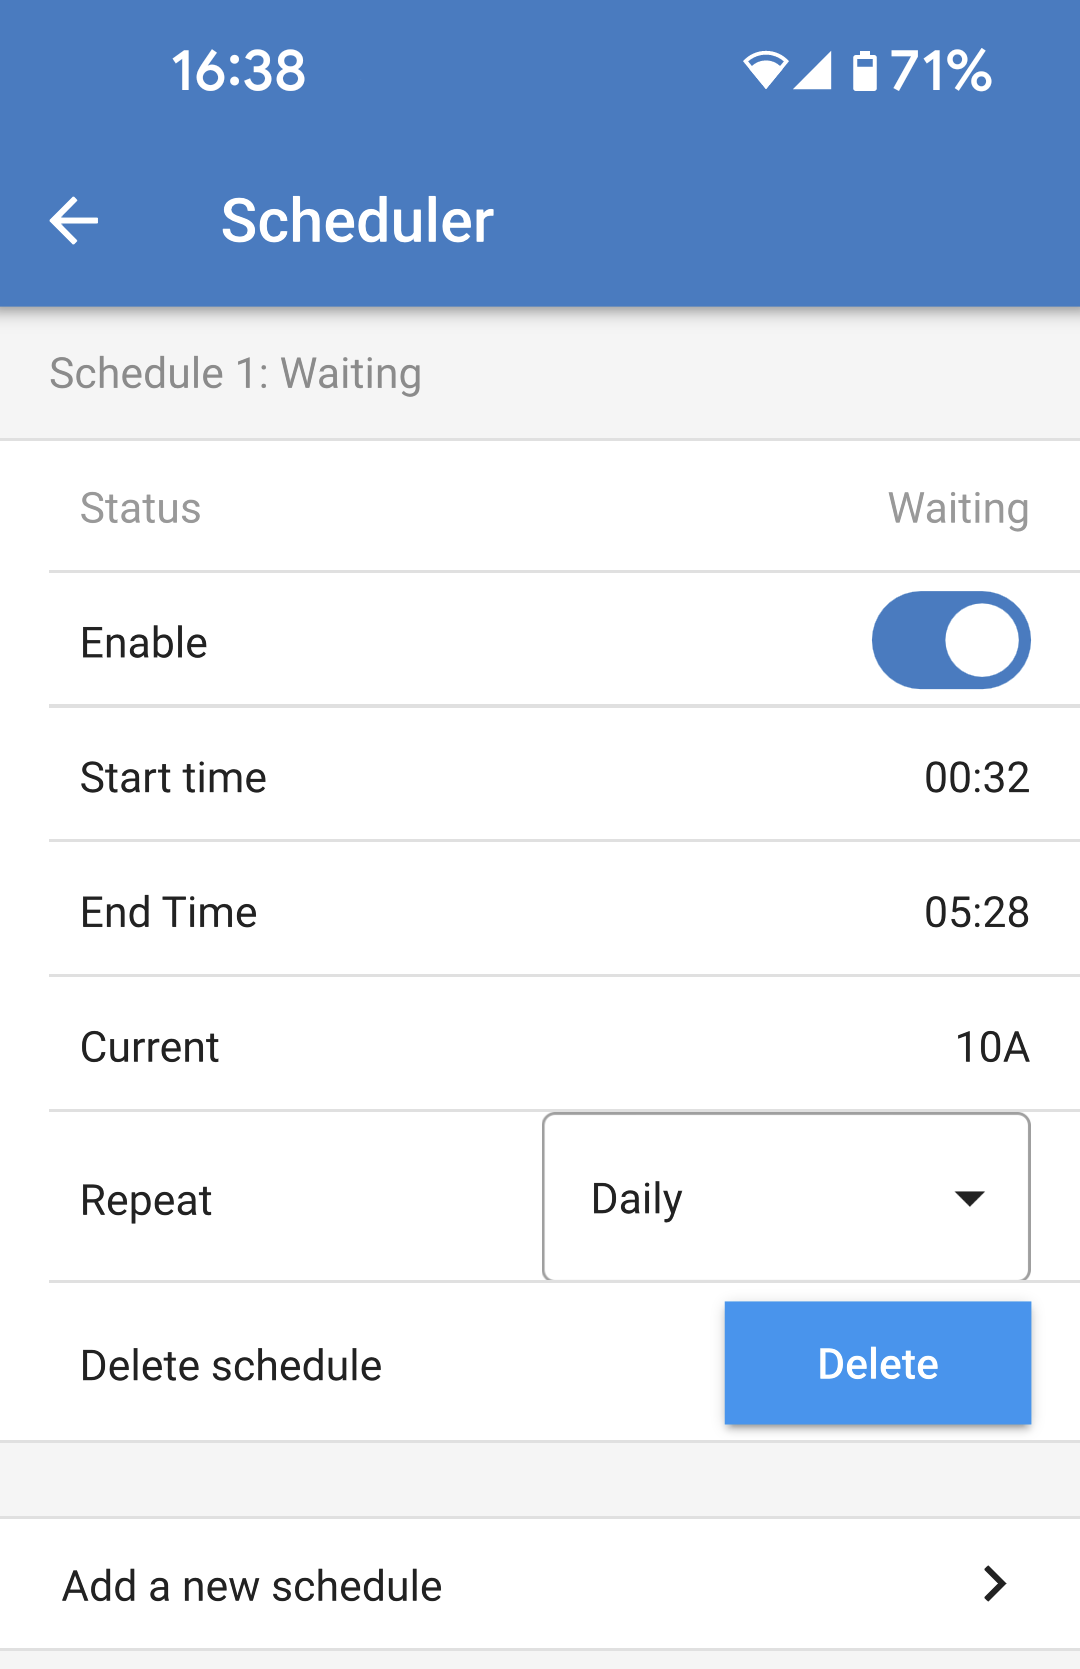
Multiple schedules can be created for different times of the day and / or days of the week.
|
|
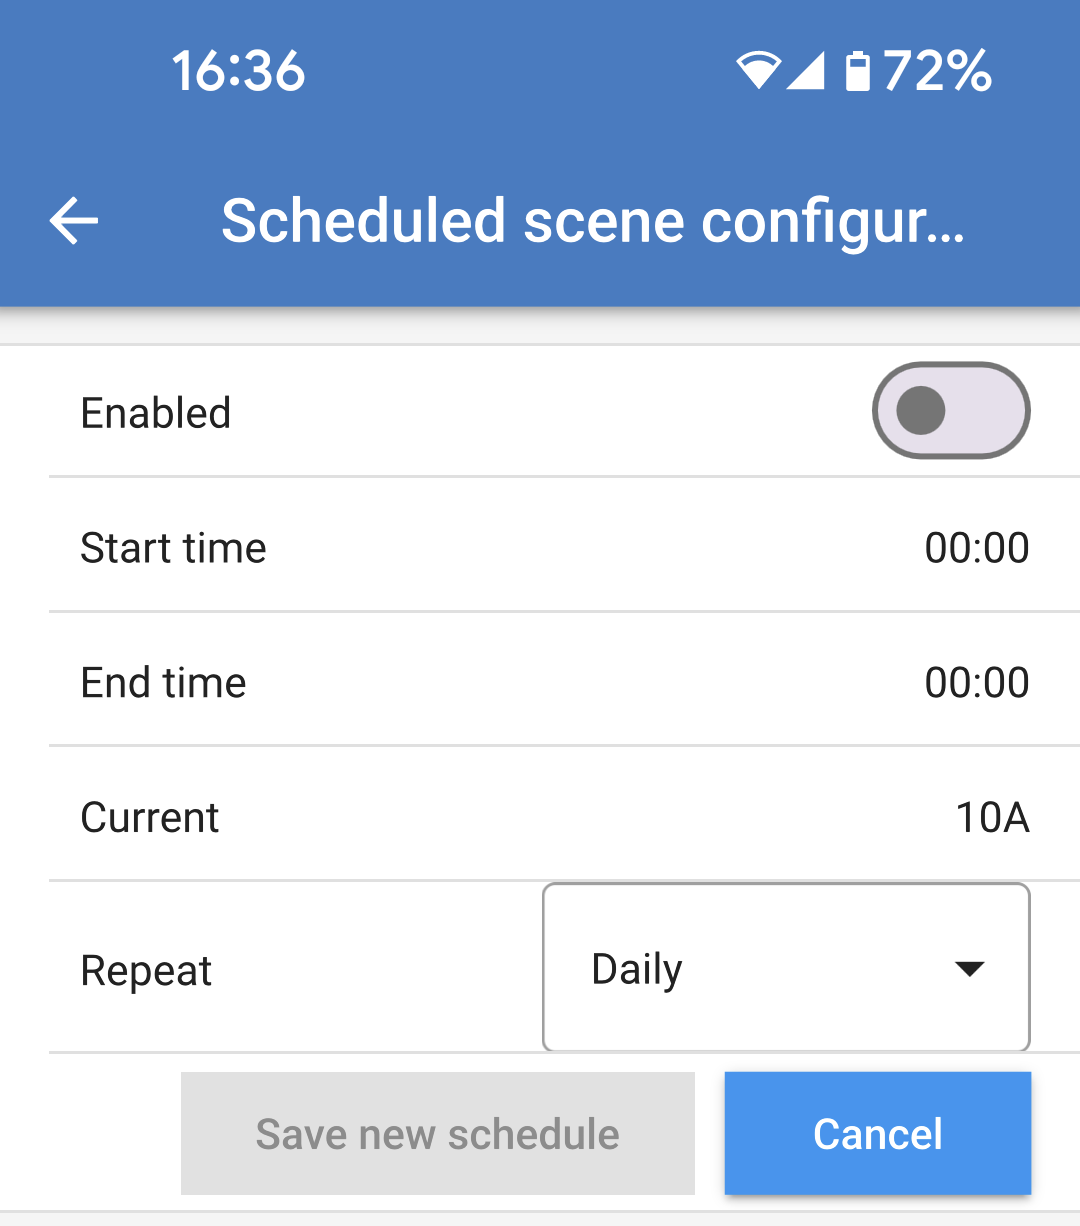
On the Scheduled scene configuration page you can adjust the following conditions. The time conditions are expresses in 24h format.
|
|
|
|
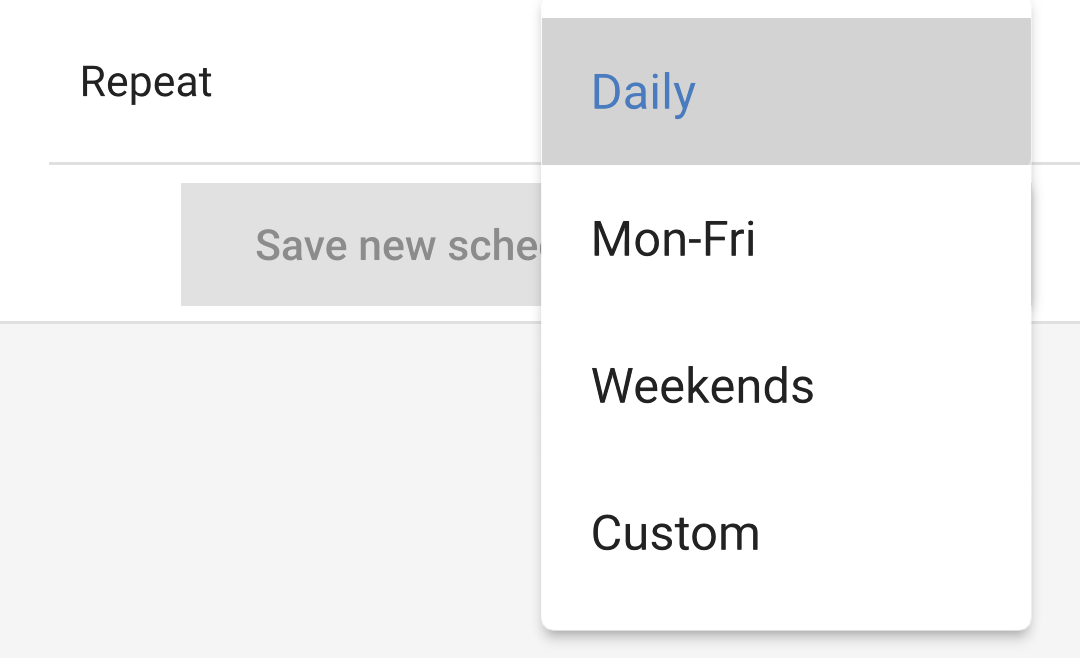
Once you have set your preferences then tap the "Save new schedule" button to add it to the scheduler or "Cancel" if you don't want to create the new schedule. |
|
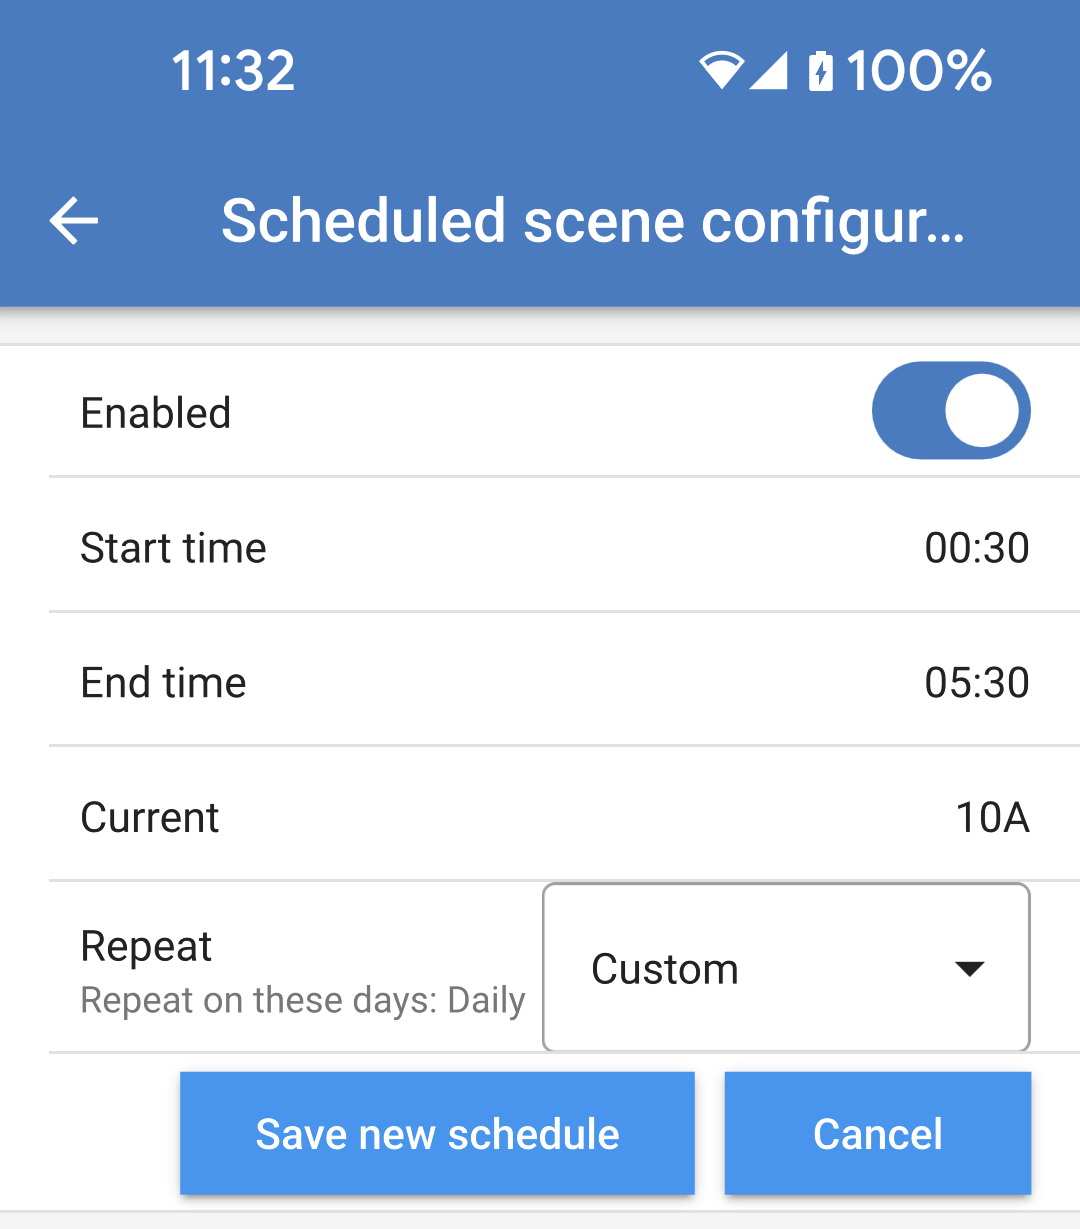
The newly created schedule will be added to the scheduler list. From here the individual schedules can be enabled or disabled, amended or deleted.
|
|
5.5.8. Light Ring
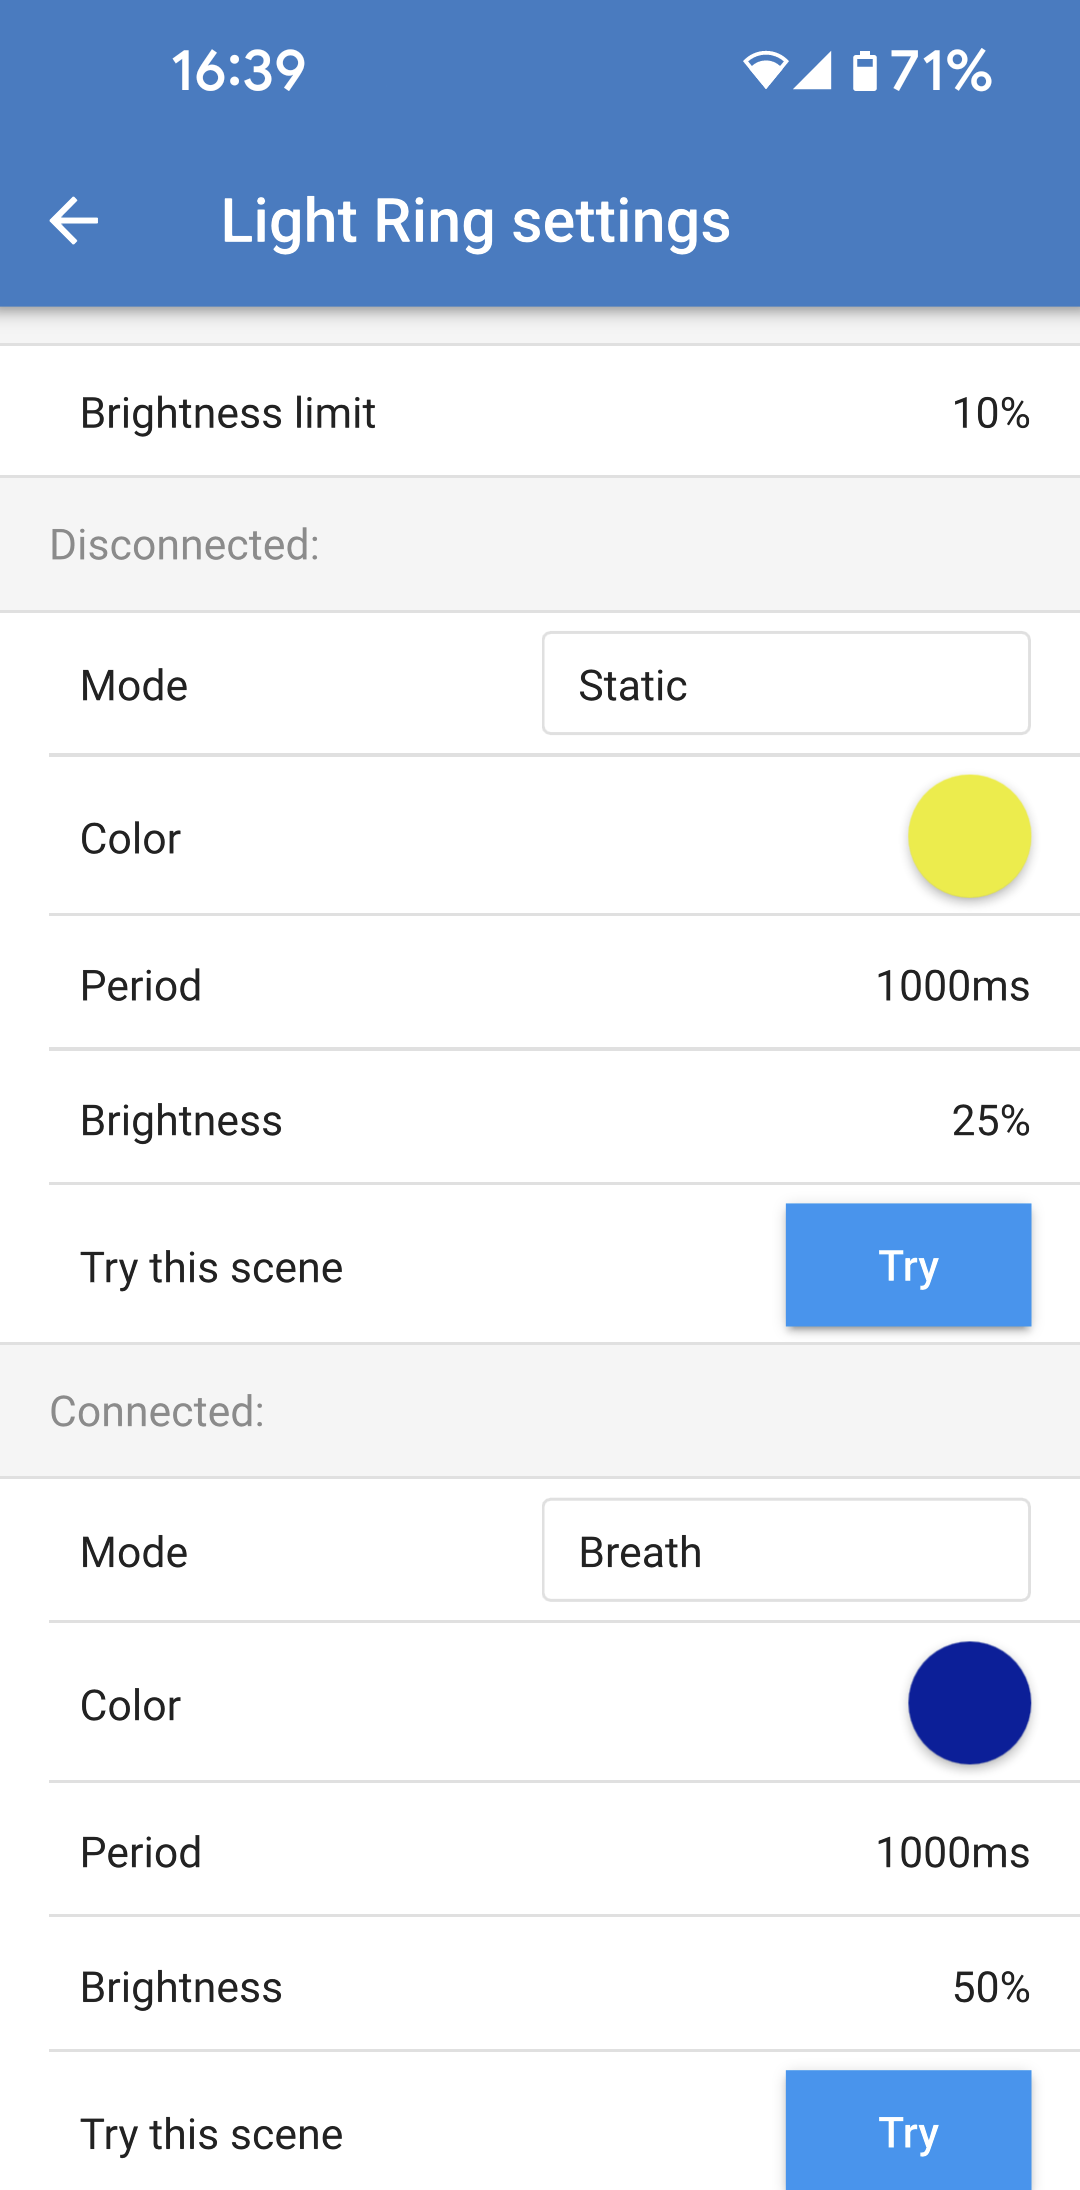
The light ring surrounding the charging cable socket on the front of the EV Charging Station shows what it is doing at a glance.
There are various lighting modes and brightness settings to choose from to represent the status of the EV Charging Station:
|
|
Light ring settings The light ring of the EV Charging Station can be customised for each of its status modes as listed above.
|
|
5.5.9. Access
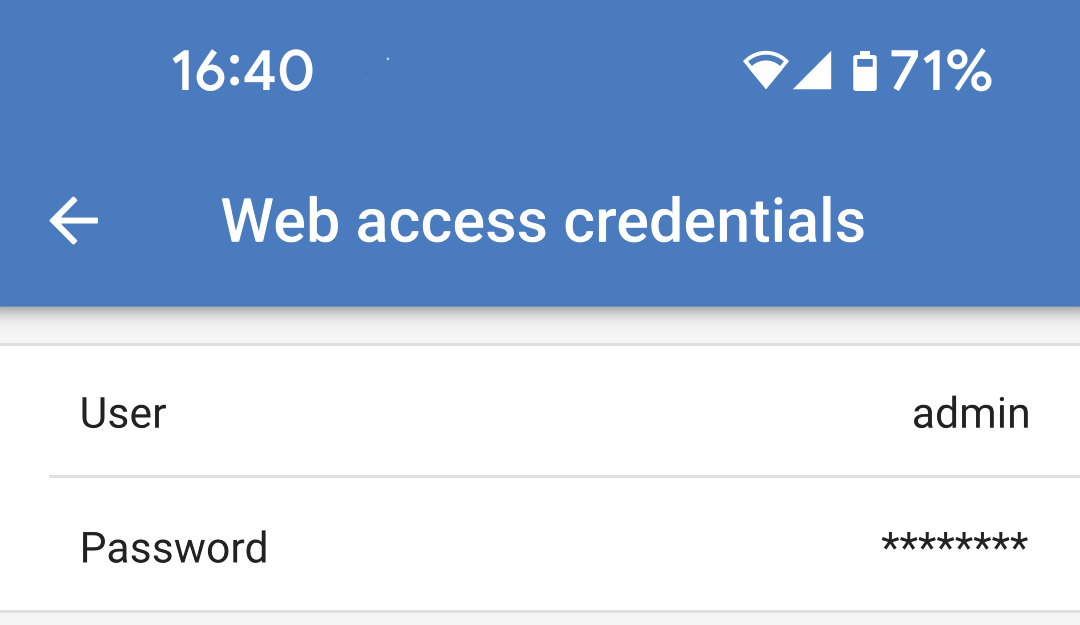
Web access credentials The Web access credentials page allows you to change the access credentials for the web page of the EV Charging Station. For security reasons it is strongly advised to change these credentials from their defaults.
|
|
5.5.10. Reset to defaults
It is possible to factory reset the EV Charging Station via VictronConnect. Note that this process will reset all settings to their default values and require the first setup (see the First use setup via VictronConnect chapter for details) to be performed again.
For devices shipped with firmware 1.23 or earlier, this will also disable Bluetooth. In order to enable Bluetooth for these devices, it is mandatory to first go through the First setup via Wifi access point procedure and then activate it via the Networks menu.
To get to the Reset to defaults option, tap the 3 vertical dots icon from the Settings page and tap on "Reset to defaults".
A "Restore device?" confirmation popup will appear. Tap "YES" to continue with restoring the device to factory defaults. |
|

5.6. Firmware updates
The EVCS firmware can be updated manually via the web interface or remotely via VRM: Remote firmware update.
The easiest way to update the EVCS firmware is through the VRM's Remote Firmware Update feature. You can perform the update automatically with a single button press or manually if preferred. Follow these step-by-step instructions to learn exactly how to do this. Please note that this requires a GX device connected to the VRM portal.
To update the firmware manually via the web interface, follow the steps below:
Download the latest firmware release from Victron Professional
Make sure you have the correct firmware file. For the EVCS model with a display, select the firmware file that contains "C025" in the file name. For the EVCS NS model, select the firmware file that contains "C026" in the file name.
Open the web interface
Click the Backup & FW tab
Click the Open button and browse to the location where the provided firmware file is stored.
Select the firmware file (*.evcsup)
Click Update to start the update process
After a successful update, the charging station will restart, and the main page will be displayed again. All previous settings will be retained.
5.7. Reset to factory defaults and password recovery
Note
Reset to factory defaults will reset all system settings to default values. The First setup must then be carried out again.
This can be avoided by performing a partial reset, which will reset only the Bluetooth PIN code and the admin password. However, this option is only available via the DEF button method.
In case the password is lost, the initial password can be recovered in different ways:
Reset to factory defaults from the web interface:
Click on the Settings button.
Click on the Backup & FW button.
Click on Reset to factory defaults.
Run the First use setup via WiFi access point again.
Reset to factory defaults via VictronConnect:
Open VictronConnect and tap on the EVCS from the My devices list.
Tap the cog wheel icon in the top right on the Status screen.
Tap the three vertical dots icon on the Settings page and choose Reset to defaults.
A warning will appear that all settings will be reset to factory defaults. Tap YES to reset to factory defaults.
Run the First use setup via VictronConnect again.
Partial and full reset to factory defaults using the DEF button inside the device:
Warning
The procedure described below should only be performed by qualified personnel as this process requires the EV Charging Station to be powered. Working under high voltage is very dangerous and can be fatal if used incorrectly.
Partial reset
A partial reset only resets the admin password and Bluetooth PIN code, all other settings are preserved.
Open the unit by removing the backing plate. Be careful not to touch the high-power parts inside the unit. Only the area around the DEF button is safe.
For a partial reset, press the DEF button (see the image in EV Charging Station setup web interface for its location) for more than 5 seconds but less than 15 seconds.
After releasing the DEF button, the RGB light ring starts blinking green rapidly to indicate that the partial reset is in progress.
Note that if your mobile device was successfully paired before resetting the PIN code, it is still possible to connect to the EVCS via VictronConnect as long as it is not unpaired. All other devices must be paired with the default PIN code as described in the VictronConnect VictronConnect setup, configuration and operation section.
If you were logged in to the web interface using a browser prior to the partial reset, the admin password reset for that connection will not take effect until you log out of the web interface. All other devices require the default password printed on the sticker inside the device. until a new password has been assigned; see Access menu for details.
Mount the backing plate onto the device and tighten the screws.
Assign a new admin password; see Access menu for details.
Full reset
Open the unit by removing the backing plate. Be careful not to touch the high-power parts inside the unit. Only the area around the DEF button is safe.
For a full reset, press the DEF button (see the image in EV Charging Station setup web interface for its location) for more than 15 seconds until the RGB light ring starts blinking blue rapidly to indicate that the full reset is in progress, then release the button.
Mount the backing plate onto the device and tighten the screws.
Run the First use setup via VictronConnect or First use setup via WiFi access point again.
5.8. Maintenance
The EV Charging Station does not require specific maintenance.