 Add this page to your book
  Remove this page from your book
  Manage book (
 Help
Help This is an old revision of the document!
Table of Contents
CCGX Introduction
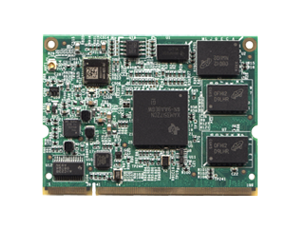
Hardware
The CCGX is based on the Technexxion board TAM-3517, which is using the Texas Instruments Sitara AM3517 ARM processor:
Software
Linux
CCGX image / distro is based on Poky.
Poky can be thought of as a reference distribution. It is maintained by an organisation called the Yocto Project and based on Open Embedded.
Taken directly from the Yocto Project website (www.yoctoproject.org): “…The Yocto Project™ is an open source collaboration project that provides templates, tools and methods to help you create custom Linux-based systems for embedded products regardless of the hardware architecture“. Some of their projects that are relevant to the CCGX are Poky and Bitbake.
Open Embedded is a build environment for embedded linux, and has all kinds of tools, mechanisms and recipes to build the Linux kernel and make a full embedded Linux rootfs. Maintained version are listed here, https://wiki.yoctoproject.org/wiki/Releases.
Angström, a well known linux distribution for embedded, is built using Open Embedded, and also related to Poky. Victron is not using Angström.
For more introduction, refer to the websites of Poky and Open Embedded. And this blog is also interesting: http://blogs.mentor.com/chrishallinan/blog/2012/04/13/yocto-versus-poky-versus-angstrom-etc/
Victron software
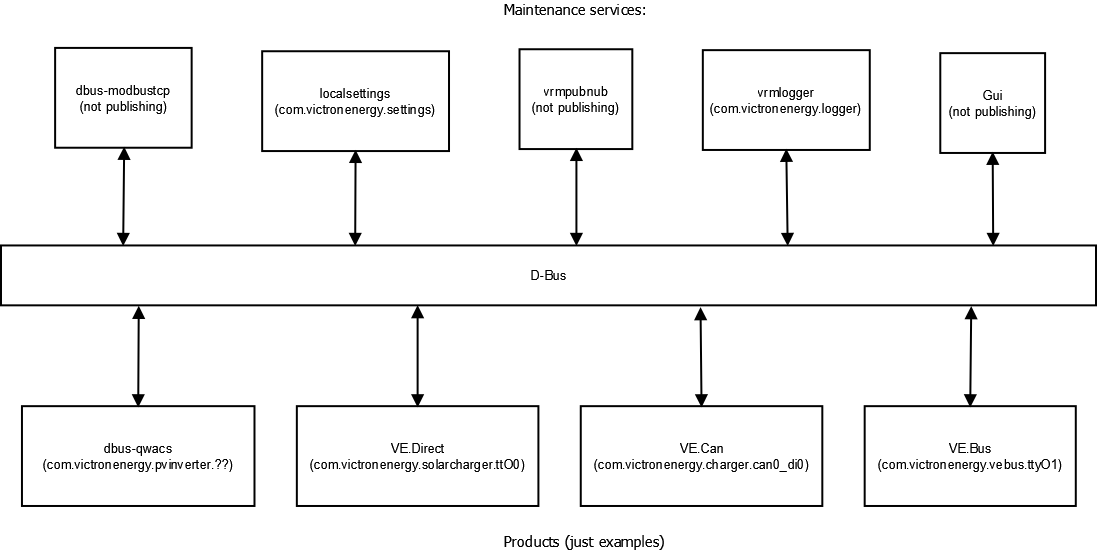
we are using a mixture of C, C++, QML (for the user interface) and Python. As a main data exchange, to share values such as voltages, as well as settings and other data, we use D-Bus. D-bus is for inter process communication, see google and the D-Bus page on wikipedia for more information. This diagram gives a good overview of the whole thing:
Product processes
Processes that interface to products, using the different protocols. These processes make the information available on the D-Bus.
- VE.Can to dbus
written in C, reads and writes to the VE.Can comm. port. - mk2dbus
written in C, reads and write to VE.Bus (Victron inverter/charger protocol). - VE.Direct to D-Bus
written in C, reads/writes to serial connected devices, such as the BMV and MPPT solar chargers. - gps_dbus
also written in C. Open source: https://github.com/victronenergy/dbus_gps. - dbus_qwacs
C++, using the QT library. Reads data from wireless AC sensors connected via an Ethernet-DECT gateway. Open source: https://github.com/victronenergy/dbus_qwacs - dbus-fronius
writeen in C++, communications to Fronius PV inverters via LAN/Ethernet. Open source: https://github.com/victronenergy/dbus-fronius
Other processes
- gui
Written in C++ and QML, uses QT. Takes care of the user interface: buttons and the display - vrmlogger
Written in Python, takes data from the dbus and submits it to the VRM Portal. https://vrm.victronenergy.com/ - localsettings
Written in Python, takes care of user settings. All other processes read and write their settings through this daemon via D-Bus. The daemon is an interface between D-Bus and the file /data/conf/settings.xml. Open source: https://github.com/victronenergy/localsettings. - dbus_modbustcp
Written in C++, uses QT. Modbustcp server that can be used to access data of all products connected to the CCGX. See our Data communication whitepaper for more information. Open source: https://github.com/victronenergy/dbus_modbustcp - dbus-systemcalc-py
Written in Python, publish PV totals and other system readings on D-Bus. The overviews on the CCGX get their information from this service (com.victronenergy.system). Open source: https://github.com/victronenergy/dbus-systemcalc-py
Source code
As visible in above project list, part of the sources is already available. All that is open source is available on https://github.com/victronenergy/. The rest is still on Victrons internal git servers, and where possible slowly being moved to github.
Plans currently being worked on
- Have a local version of https://vrm.victronenergy.com including database run on the CCGX itself, using php/hiawatha and sqlite.
- Secure VNC (http://www.victronenergy.com/live/ccgx:ccgx_vnc), and make it useable remotely when the CCGX is behind a firewall.
Future plans
Functionality wise, the plans are (in random order):
- Make support for more types of sensors (temp sensors etc)
- Be able to use BMV's to read current from for example a dc wind generator, and show on overview and VRM portal
- Make more of the project open source
- Further mature alarms, and add SMS and email notifications
- Make it usable as a UPS-replacement. local website, emailalerts, battery minutes remaining, etc.
- Add SNMP (UPS-MIB)
Connecting
Connecting via SSH:
You need to enable the remote support feature in the menu to turn the ssh server on. After logging in you can, in case you don't want the ccgx to build and maintain a reverse ssh tunnel into our support server, disable that service (service/ssh-tunnel)
Connecting on the console:
Console is connected to the VE.Direct 1 port on the back, 115k2 / 8N1. Note that a normal VE.Direct to USB interface cable won't work, since you need to power the VE.Direct port on the CCGX from the outside. A small mod can be made to the interface cable. Note that you need to enable the console functionality on the port, since normally it is taken by the VE.Direct process. TODO add how to do that.
Other tips
- to make a screenshot, first press and hold the down button, and then press the up button. The screenshot will be saved to /opt/color-control/gui/. It will overwrite the previous one.
DISQUS
~~DISQUS~~