6. Setup
6.1. Setup using the charger
The charge mode and charge current limit most appropriate for the battery type and capacity can be selected using the MODE button on the Smart IP43 Charger.
To setup using the charger:
Connect the Smart IP43 Charger AC power cable to a mains power outlet; after a short delay all LEDs will illuminate briefly, then the LEDs indicating the current charge mode and charge state will illuminate.
Press (and release) the MODE button on the Smart IP43 Charger to cycle through and select the most appropriate integrated charge mode (Normal, Normal + Recondition, High, High + Recondition or Li-ion).
Ensure that recondition stage is only enabled when required, as unnecessary or overuse will reduce battery life.
The LED beside the currently selected charge mode (NORMAL / HIGH / LI-ION) will be illuminated, as well as the RECONDITION LED if enabled.

If the maximum rated charge current is excessive, enable low current mode (charge current limited to 50% of the maximum rated charge current). To enable (or disable) low current mode depress and hold down the MODE button on the Smart IP43 Charger for for 3 seconds; when enabled the LOW LED will blink.
All settings are stored and will not be lost when the charger is disconnected from mains power or the battery.
Notice
To ensure proper charging, battery longevity and safe operation it is important to select a charge mode appropriate for the battery type and capacity being charged; refer to the 'Operation > Charge modes' section and the battery manufacturer’s recommendations for more information.
6.2. Setup using VictronConnect
The charge mode and charge current limit most appropriate for the battery type and capacity can also be selected using a Bluetooth enabled device (mobile phone or tablet) with the VictronConnect app.
For further information about the VictonConnect app refer to the VictronConnect manual.
To setup using Bluetooth:
Download and install the VictronConnect app onto the Bluetooth enabled device (mobile phone or tablet).
The VictronConnect app can be downloaded from the following locations:
Android - Google Play Store
iOS/Mac - Apple App Store
Windows and other - Victron Energy website > Downloads > Software
Enable Bluetooth on the Bluetooth enabled device (mobile phone or tablet) if not already enabled, but do not attempt to pair with the Smart IP43 Charger.
Connect the Smart IP43 Charger AC power cable to a mains power outlet; after a short delay all LEDs will illuminate briefly, then the LEDs indicating the current charge mode and charge state will illuminate.
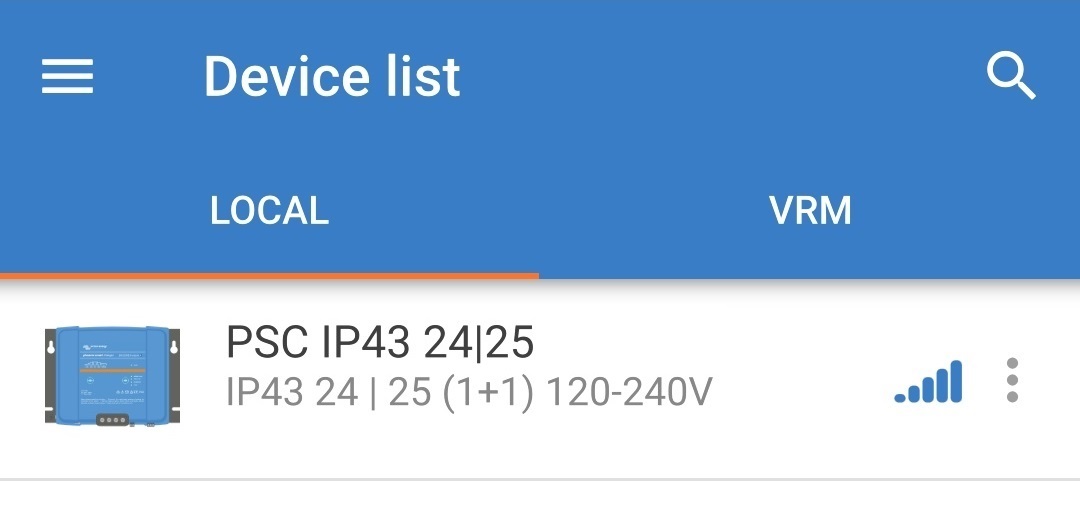
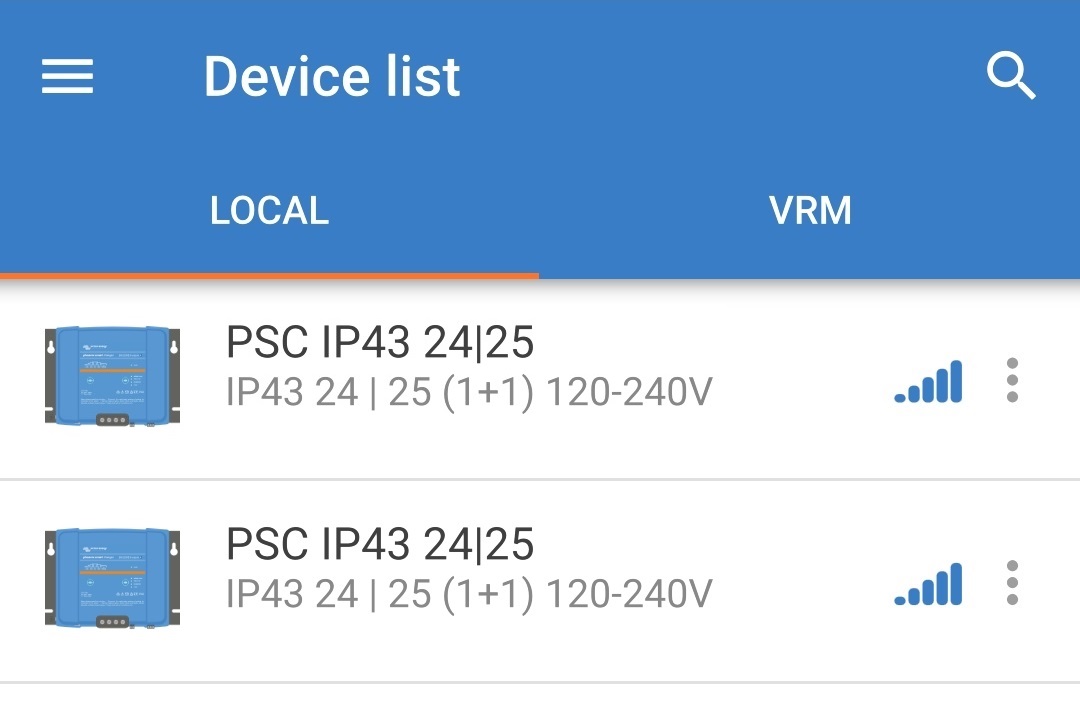
Open the VictronConnect app and locate the Smart IP43 Charger in the Device list Local page, under Other devices.
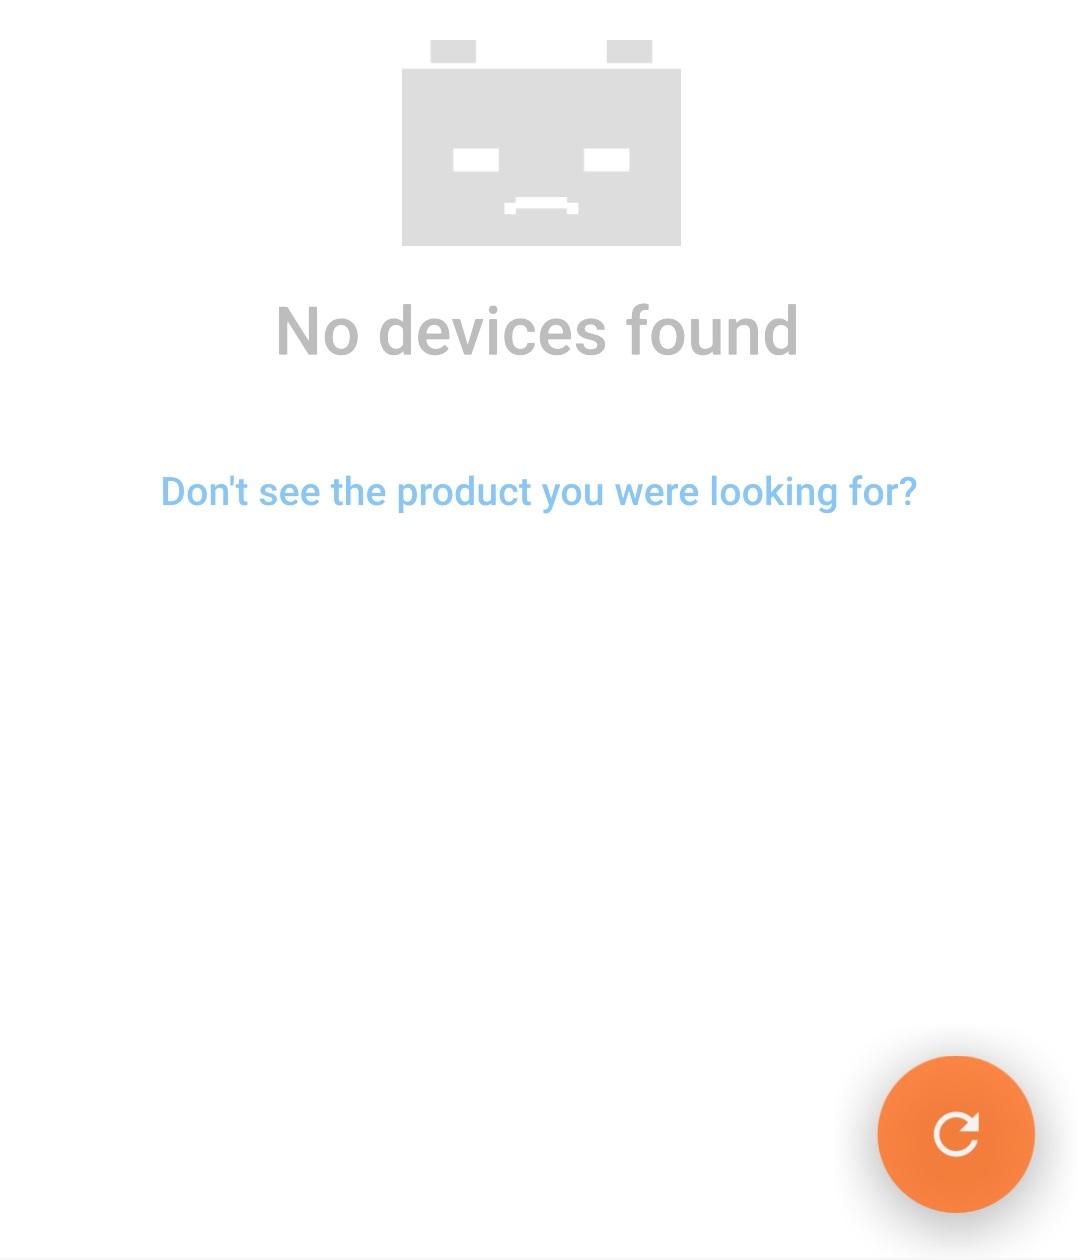
In case the Smart IP43 Charger does not automatically appear, ensure that the mobile phone or tablet has Bluetooth enabled and is within close range, then perform a manual scan for devices by selecting the Scan button (round orange button with circular arrow) in the bottom right corner.
Select the Smart IP43 Charger from the Device list Local page, under Other devices.
VictronConnect will attempt to establish a Bluetooth connection with the Smart IP43 Charger and display the connection progress in the Connecting pop-up dialog box.
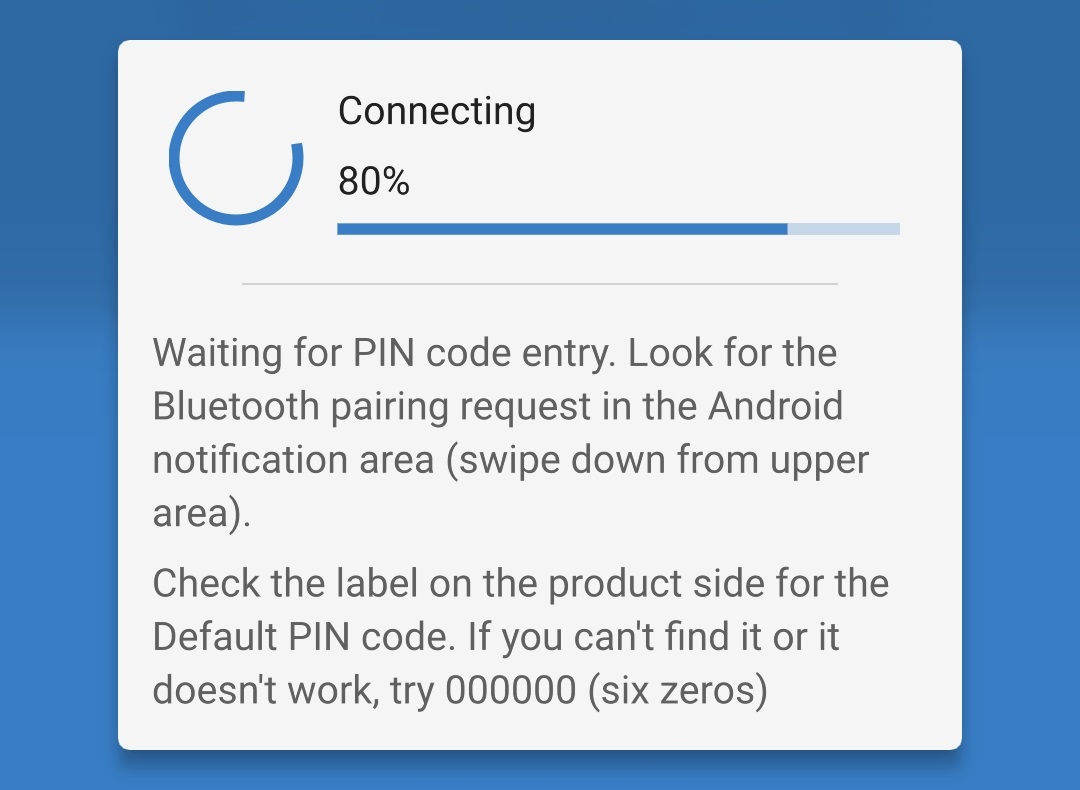
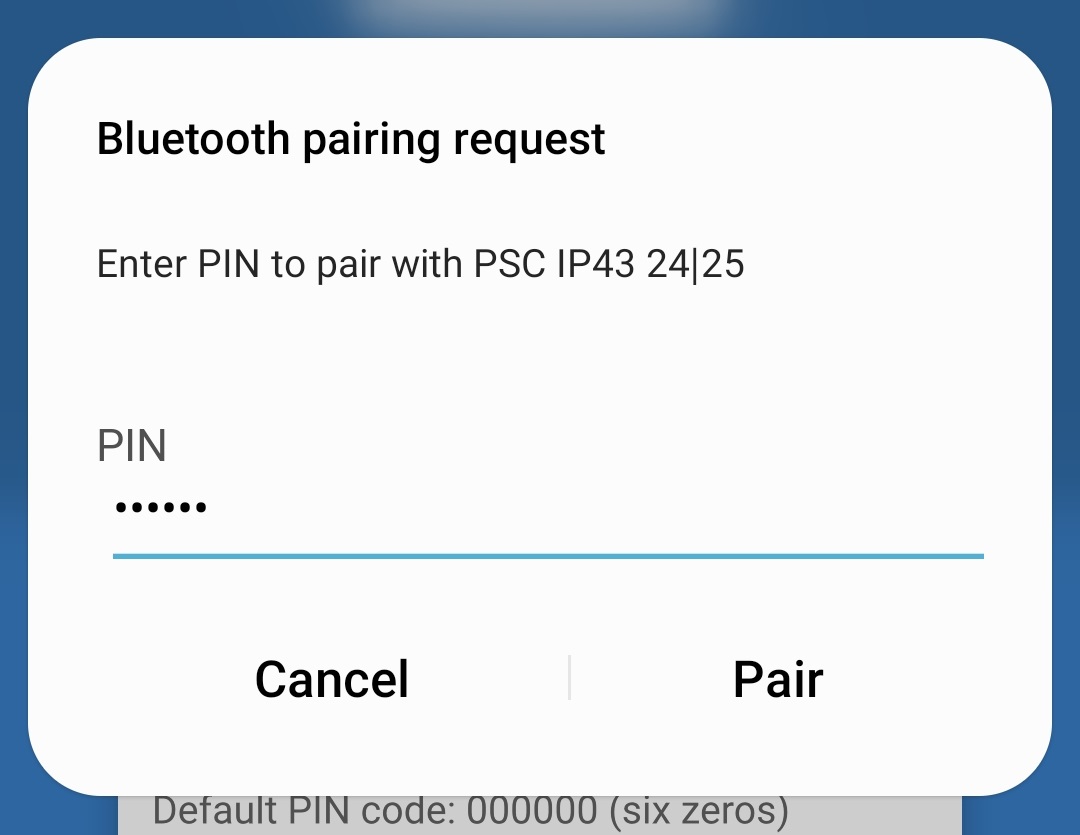
When attempting to establish a Bluetooth connection with a new/unpaired device, the Bluetooth pairing request pop-up dialog box will appear after a short delay; enter the default PIN code stated on a label located on the side of the charger (or try 000000 if there is no default PIN code label), then select Pair.
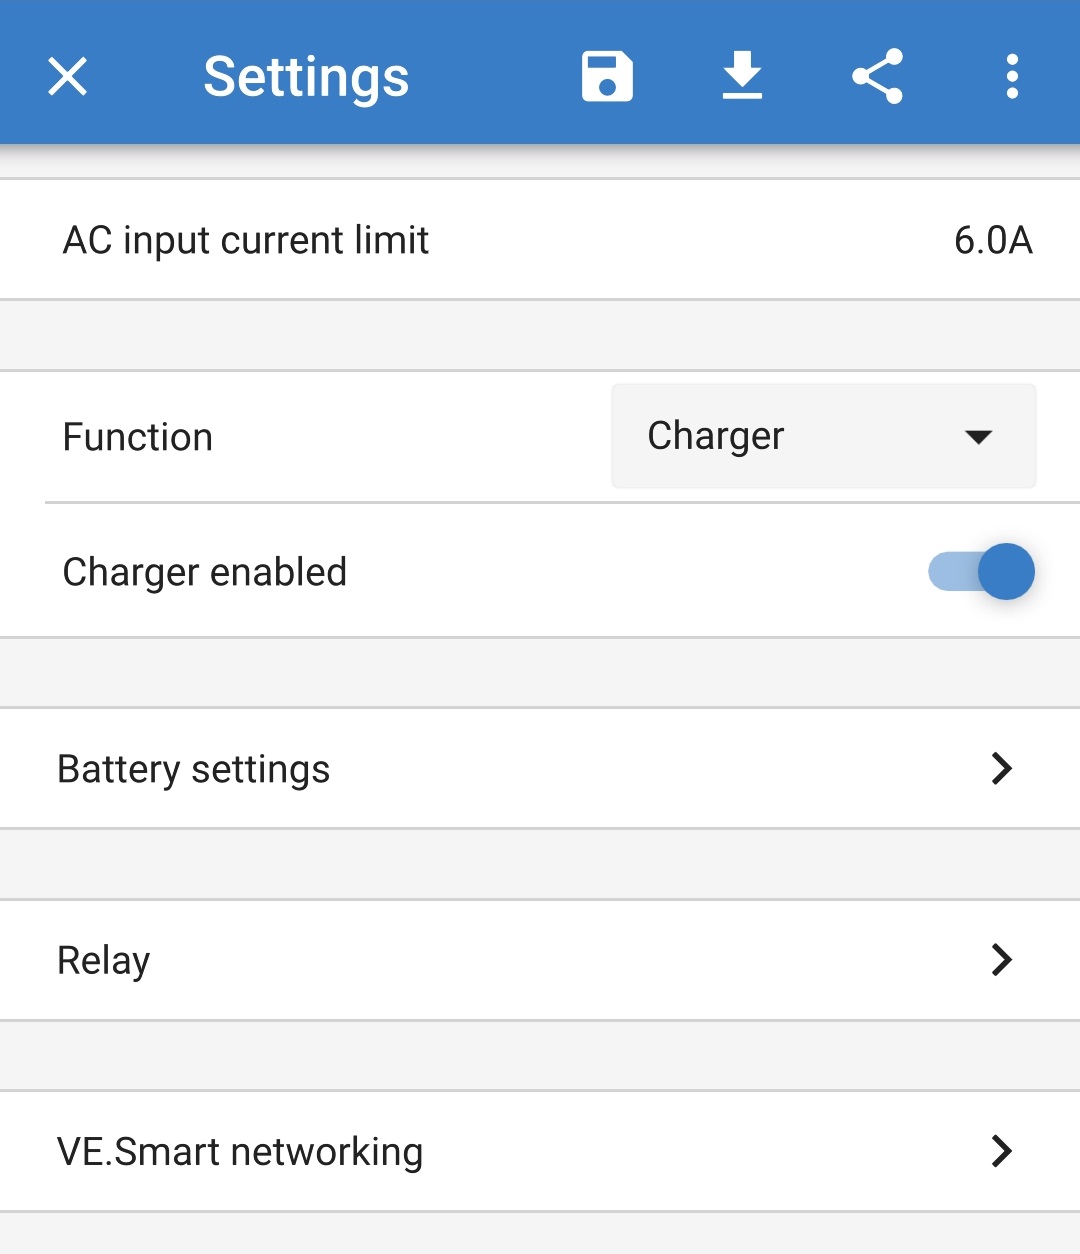
Select the Settings icon (gear in the top right corner) to access the Settings page.

Select Battery settings to access the Battery settings menu.

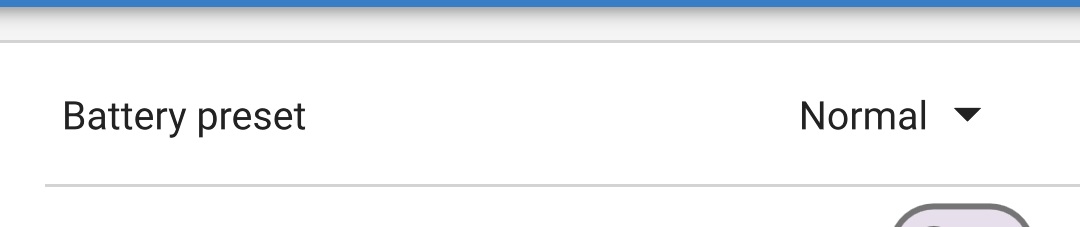
Expand the Battery preset drop-down menu, then select Built-in preset or alternatively Select preset for more specialised battery types.
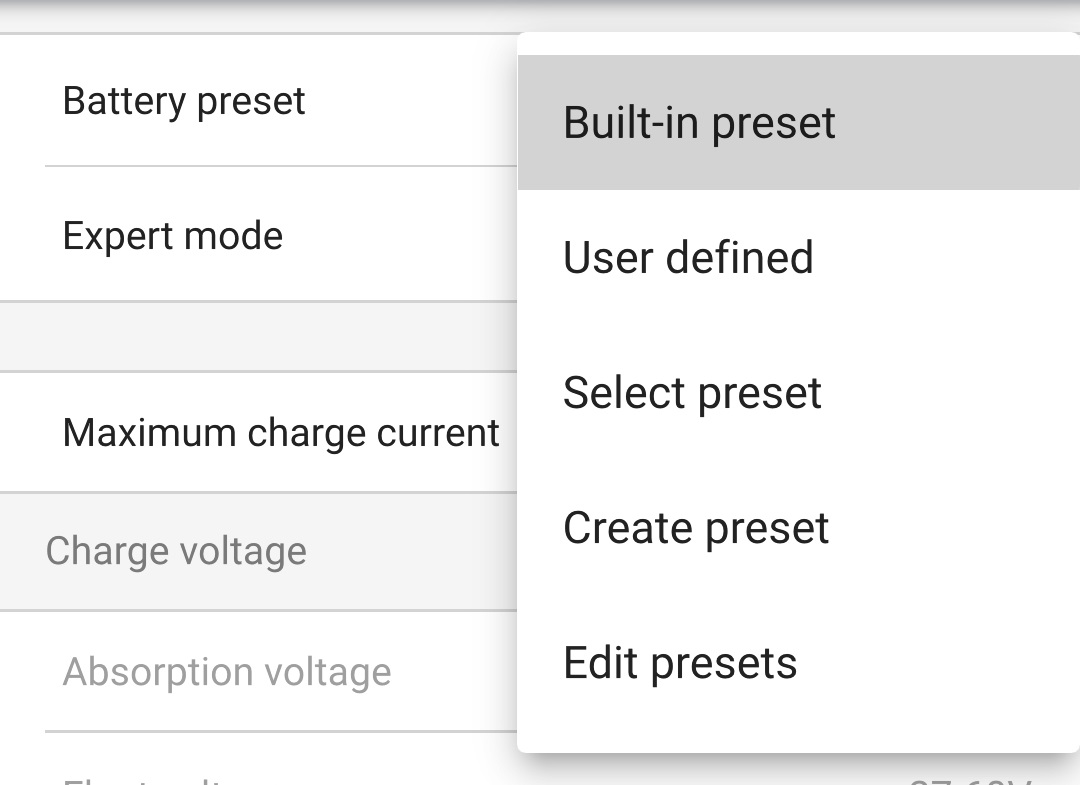
Select the most appropriate integrated charge mode (Normal, Normal + Recondition, High, High + Recondition or Li-ion) from the Built-in presets menu, then select OK.
Ensure that recondition stage is only enabled when required, as unnecessary or overuse will reduce battery life.

If the maximum rated charge current is excessive, enable low current mode (charge current limited to 50% of the maximum rated charge current) or minimum current mode (charge current limited to 25% of the maximum rated charge current). To enable (or disable) low current mode:
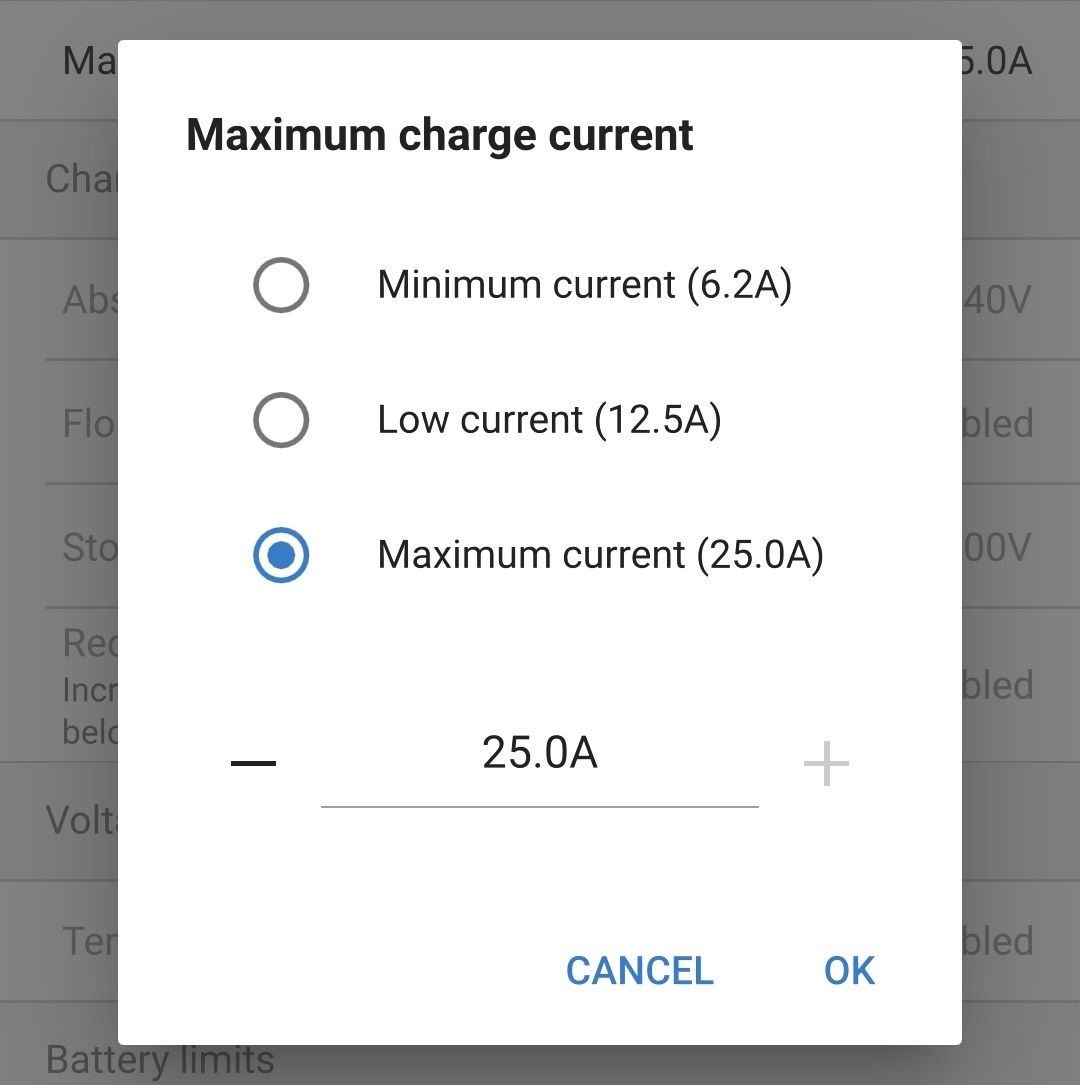
Select Maximum charge current to access the Maximum charge current pop-up dialog box.

Select the most appropriate maximum charge current from the preset options (Minimum / Low / Maximum), or specify an alternative current (between the minimum and maximum limits) using the numeric input controls near the bottom.
Lock Mode Button - When enabled, the mode button is locked and cannot change the charger’s configuration. However, the following functions still work:
Restart charge cycle to Bulk
Reset Bluetooth
When locked, pressing or holding the button will cause all LEDs to flash (except the fault LED) to indicate the lock is active.
All settings are stored and will not be lost when the charger is disconnected from mains power or the battery.
Notice
To ensure proper charging, battery longevity and safe operation it is important to select a charge mode appropriate for the battery type and capacity being charged; refer to the 'Operation > Charge modes' section and the battery manufacturers recommendations for more information.
6.3. Bluetooth
6.3.1. Changing the PIN code
To prevent unauthorised Bluetooth connections, it is highly recommended to change the default PIN code to a unique PIN code that that offers a greater level of security.
The Bluetooth PIN code can be changed using a Bluetooth enabled device (mobile phone or tablet) with the VictronConnect app.
To change the Bluetooth PIN code:
Connect the Smart IP43 Charger AC power cable to a mains power outlet; after a short delay all LEDs will illuminate briefly, then the LEDs indicating the current charge mode and charge state will illuminate.
Using a Bluetooth enabled device (mobile phone or tablet), open the VictronConnect app and locate the Smart IP43 Charger in the Device list Local page, then connect to the device (the default PIN code is stated on a label located on the side of the charger, or try 000000 if there is no label).
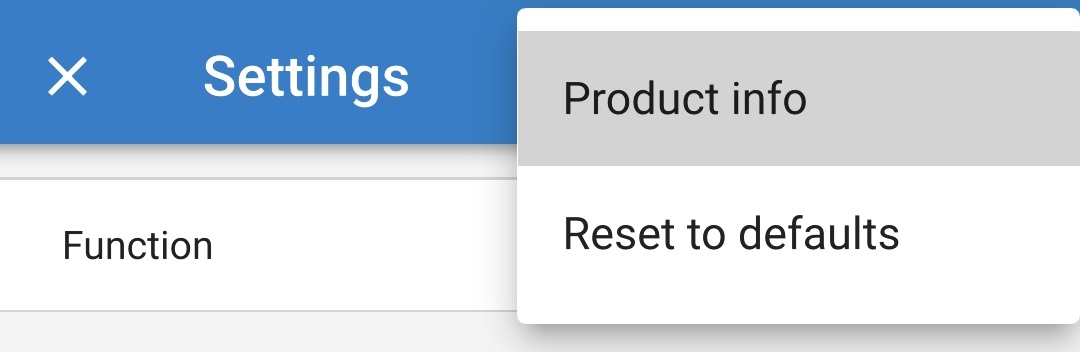
Select the Settings icon (gear in the top right corner) to access the Settings page.
Select the Device options icon (three vertical dots in the top right corner) to access the Device options dropdown menu.

Select Product info from the dropdown menu to access the Product info page.
Select CHANGE in the Pin code field to open the Change PIN code pop-up dialog box.

Enter the current PIN code and the desired new PIN code (twice), then select OK; avoid using a simple PIN code that is easy for someone else to guess, such as 123456.
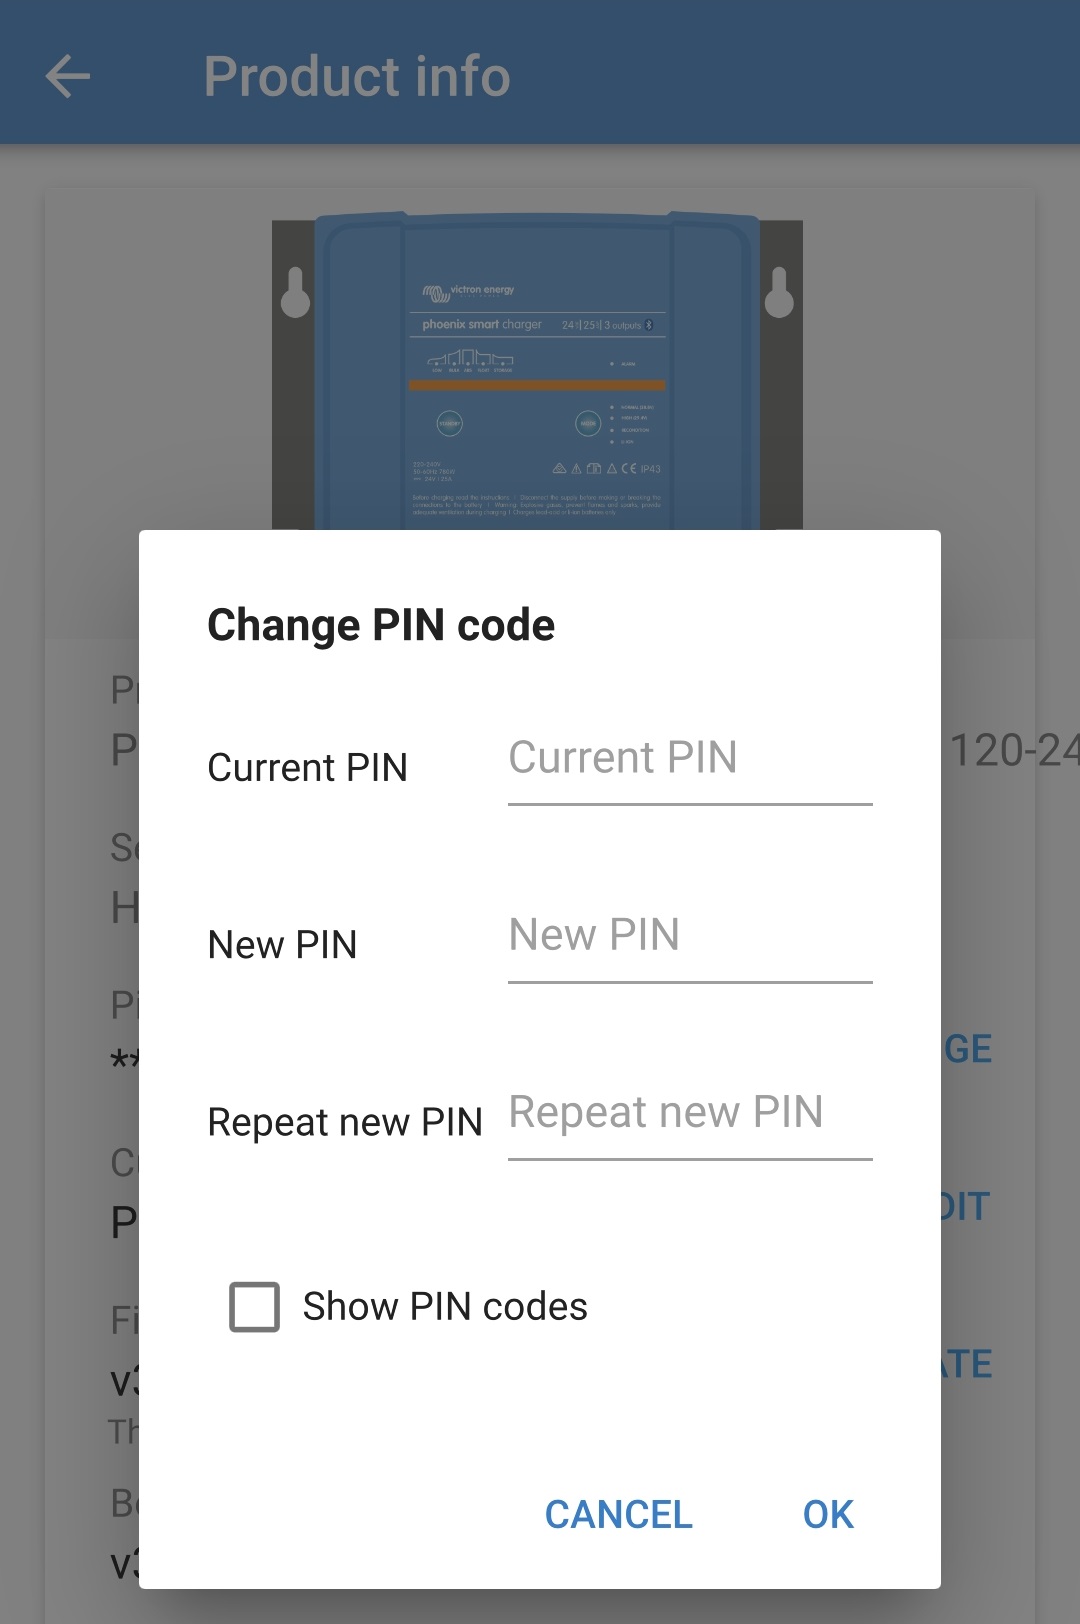
After a short delay a pop-up dialog box will appear confirming that the Bluetooth PIN code has been successfully changed.
The Bluetooth PIN code has now been changed to the new PIN code.
Notice
During this procedure:
The Bluetooth PIN code is changed to the new PIN code
Bluetooth pairing information is not cleared
Accordingly Bluetooth pairing with the device (mobile phone or tablet) used to change the PIN code is unaffected, however it is necessary to unpair any other devices (mobile phones or tablets) previously paired with the Smart IP43 Charger and establish a new Bluetooth pairing.
6.3.2. Resetting the PIN code
If the PIN code is forgotten/lost or does not work, it can be reset to 000000 (not the default PIN code stated on the label) using the MODE button on the charger or a Bluetooth enabled device (mobile phone or tablet) with the VictronConnect app.
To reset the Bluetooth PIN code:
Connect the Smart IP43 Charger AC power cable to a mains power outlet; after a short delay all LEDs will illuminate briefly, then the LEDs indicating the current charge mode and charge state will illuminate.
Depress and hold down the MODE button on the Smart IP43 Charger for 10 seconds.
After 10 seconds have elapsed all charge mode LEDs will blink twice to indicate that the Bluetooth PIN code has been successfully reset.
The Bluetooth PIN code has now been reset to 000000.
Notice
During this procedure:
The Bluetooth PIN code is reset to 000000 (not the default PIN code stated on the label)
Bluetooth pairing information is cleared
Accordingly it is necessary to unpair all devices (mobile phones or tablets) previously paired with the Smart IP43 Charger and establish a new Bluetooth pairing.
To reset the Bluetooth PIN code:
Locate the PUK code stated on a label located on the side of the charger and record it for use later.
Connect the Smart IP43 Charger AC power cable to a mains power outlet; after a short delay all LEDs will illuminate briefly, then the LEDs indicating the current charge mode and charge state will illuminate.
Using a Bluetooth enabled device (mobile phone or tablet), open the VictronConnect app and locate the Smart IP43 Charger in the Device list Local page.
Select the Device options icon (three vertical dots on the right side of the description) to access the dropdown menu.
Select Reset PIN code from the dropdown menu to open the Reset PIN code pop-up dialog box.
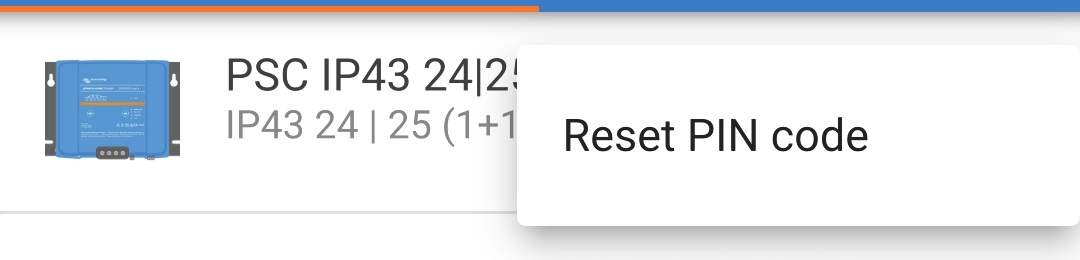
Enter the PUK code (recorded earlier) and select OK.
A pop-up dialog box with the text "Busy" will be displayed while the Bluetooth PIN code is being reset.
After a short delay a pop-up dialog box will appear confirming that the Bluetooth PIN code has been successfully reset; select OK to exit into the VictronConnect Device list LOCAL page.
The Bluetooth PIN code has now been reset to 000000.
Notice
During this procedure:
The Bluetooth PIN code is reset to 000000 (not the default PIN code stated on the label)
Bluetooth pairing information is not cleared
Accordingly Bluetooth pairing with the device (mobile phone or tablet) used to reset the PIN code is unaffected, however it is necessary to unpair any other devices (mobile phones or tablets) previously paired with the Smart IP43 Charger and establish a new Bluetooth pairing.
6.3.3. Disabling Bluetooth
If required, Bluetooth communication can be totally disabled using a Bluetooth enabled device (mobile phone or tablet) with the VictronConnect app.
Typically, there is no need to disable Bluetooth since unauthorised access is protected with a PIN code, but certain situations may warrant it for an even higher level of security or in highly specialised installations where the Bluetooth radio frequency is undesirable.
To disable Bluetooth:
Connect the Smart IP43 Charger AC power cable to a mains power outlet; after a short delay all LEDs will illuminate briefly, then the LEDs indicating the current charge mode and charge state will illuminate.
Using a Bluetooth enabled device (mobile phone or tablet), open the VictronConnect app and locate the Smart IP43 Charger in the Device list Local page, then connect to the device (the default PIN code is stated on a label located on the side of the charger, or try 000000 if there is no label).
Select the Settings icon (gear in the top right corner) to access the Settings page.
Select the Device options icon (three vertical dots in the top right corner) to access the Device options dropdown menu.
Select Product info from the dropdown menu to access the Product info page.
Select DISABLE in the Bluetooth field to open the Disable Bluetooth pop-up dialog box.
Read the warning message, then tick the checkbox and select OK to proceed.
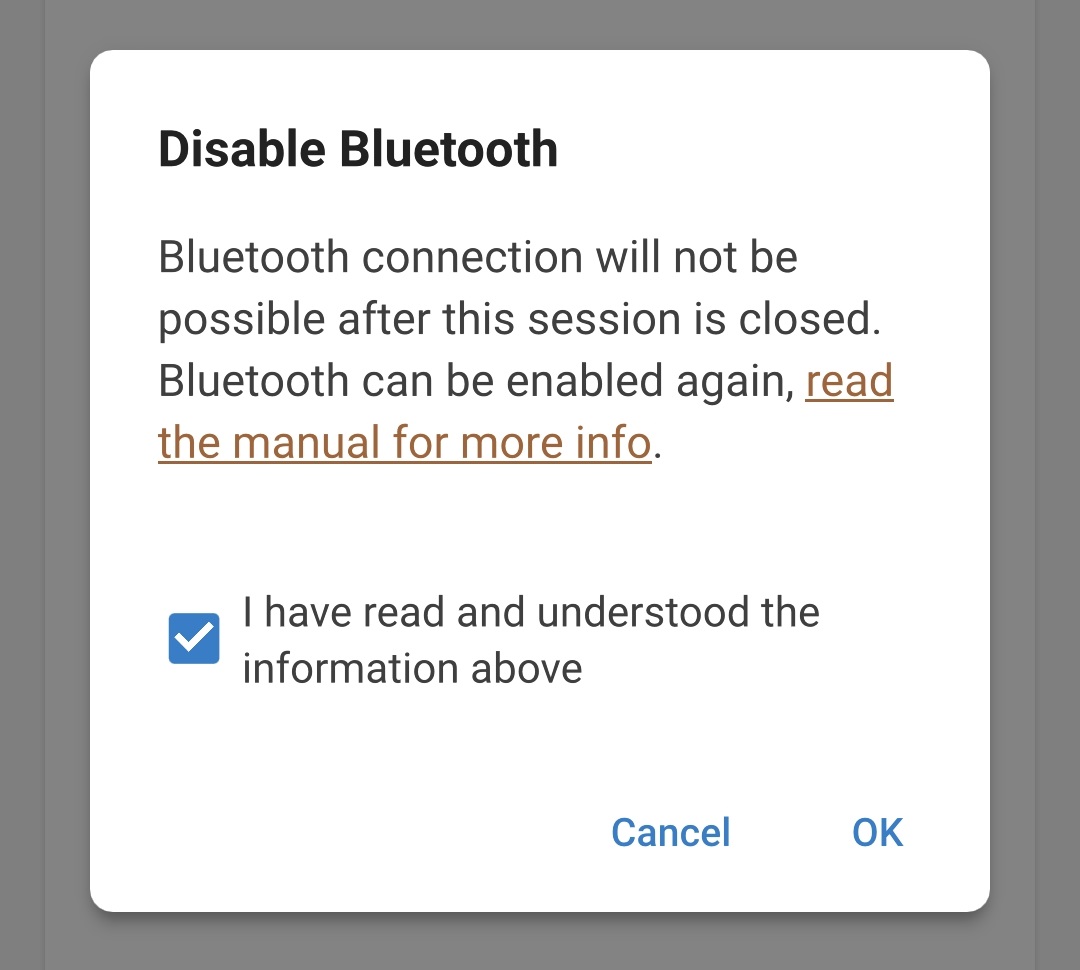
End the current Bluetooth session by exiting into the VictronConnect Device list Local page, a final pop-up dialog box will appear when attempting to exit. Read the warning message, then select OK to proceed.
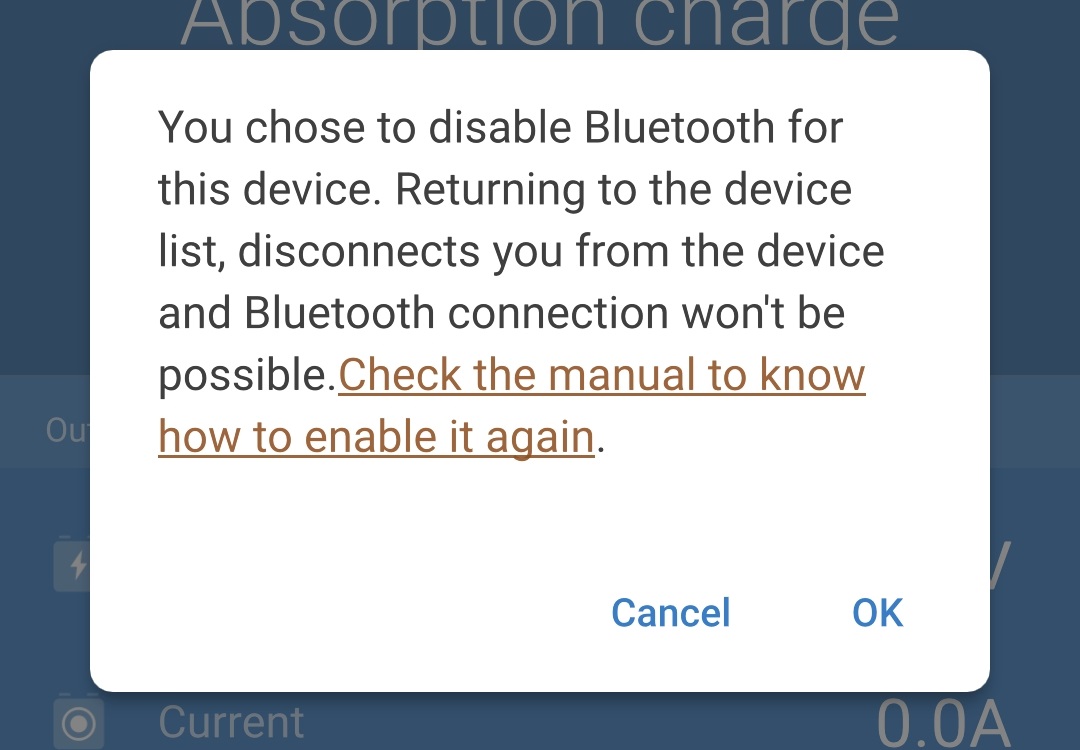
Bluetooth operation has now been disabled, but can be re-enabled again.
6.3.4. Re-enabling Bluetooth
Bluetooth communication can be re-enabled using the MODE button on the charger.
To re-enable Bluetooth:
Connect the Smart IP43 Charger AC power cable to a mains power outlet; after a short delay all LEDs will illuminate briefly, then the LEDs indicating the current charge mode and charge state will illuminate.
Depress and hold down the MODE button on the Smart IP43 Charger for 10 seconds.
After 10 seconds have elapsed all charge mode LEDs will blink twice to indicate that Bluetooth operation has been successfully enabled.
Bluetooth operation has now been re-enabled.
Notice
During this procedure:
Bluetooth operation is re-enabled
The Bluetooth PIN code is reset to 000000 (not the default PIN code stated on the label)
Bluetooth pairing information is cleared
Accordingly it is necessary to unpair all devices (mobile phones or tablets) previously paired with the Smart IP43 Charger and establish a new Bluetooth pairing.
6.4. VE.Smart Networking
The Smart IP43 Charger range feature VE.Smart networking capability, which enables Bluetooth communication between compatible Victron products to optimise charger operation and battery performance/life; refer to the 'Operation > VE.Smart Networking' section for more information.
VE.Smart networking needs to be enabled and configured using a Bluetooth enabled device (mobile phone or tablet) with the VictronConnect app.
6.4.1. Voltage, temperature and current sense
To setup a VE.Smart Network with Volt-Sense / Temp-Sense / Current-Sense:
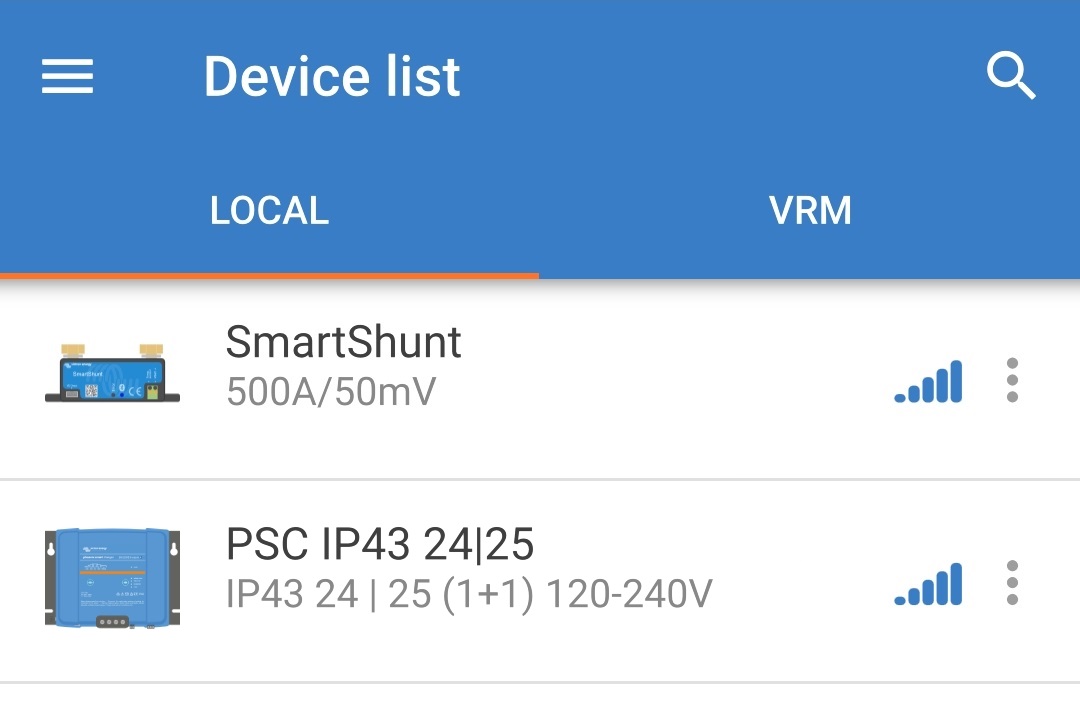
Using a Bluetooth enabled device (mobile phone or tablet), open the VictronConnect app and locate the battery monitor (BMV, SmartShunt, Smart Battery Sense or VE.Bus Smart Dongle) in the Device list Local page, then connect to the device (the default PIN code is stated on a label located on the battery monitor, or try 000000 if there is no label).
Select the Settings icon (gear in the top right corner) to access the Settings page.

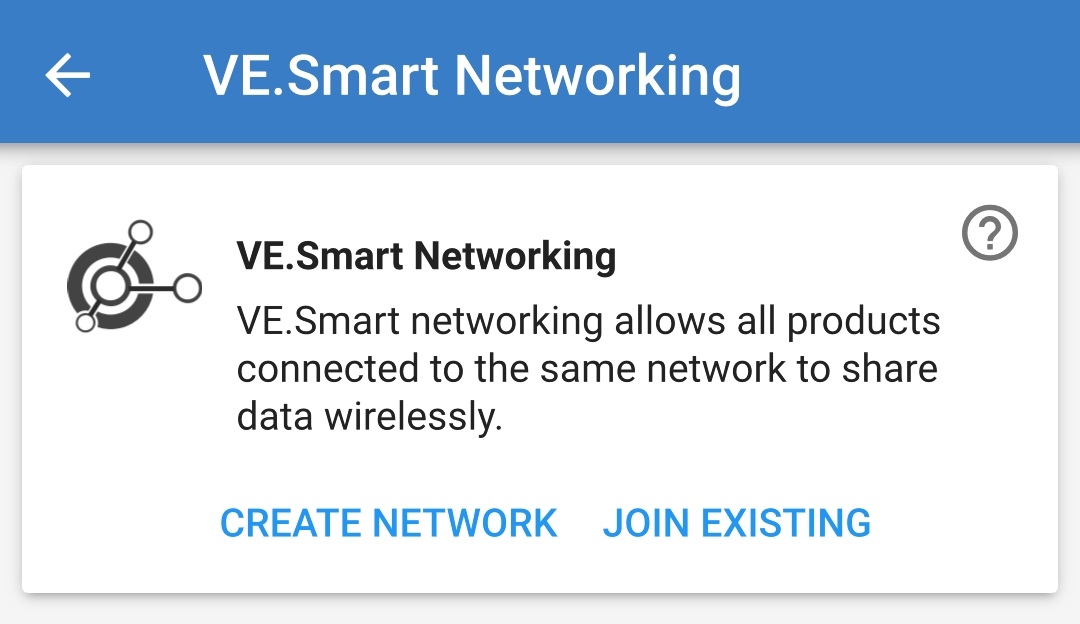
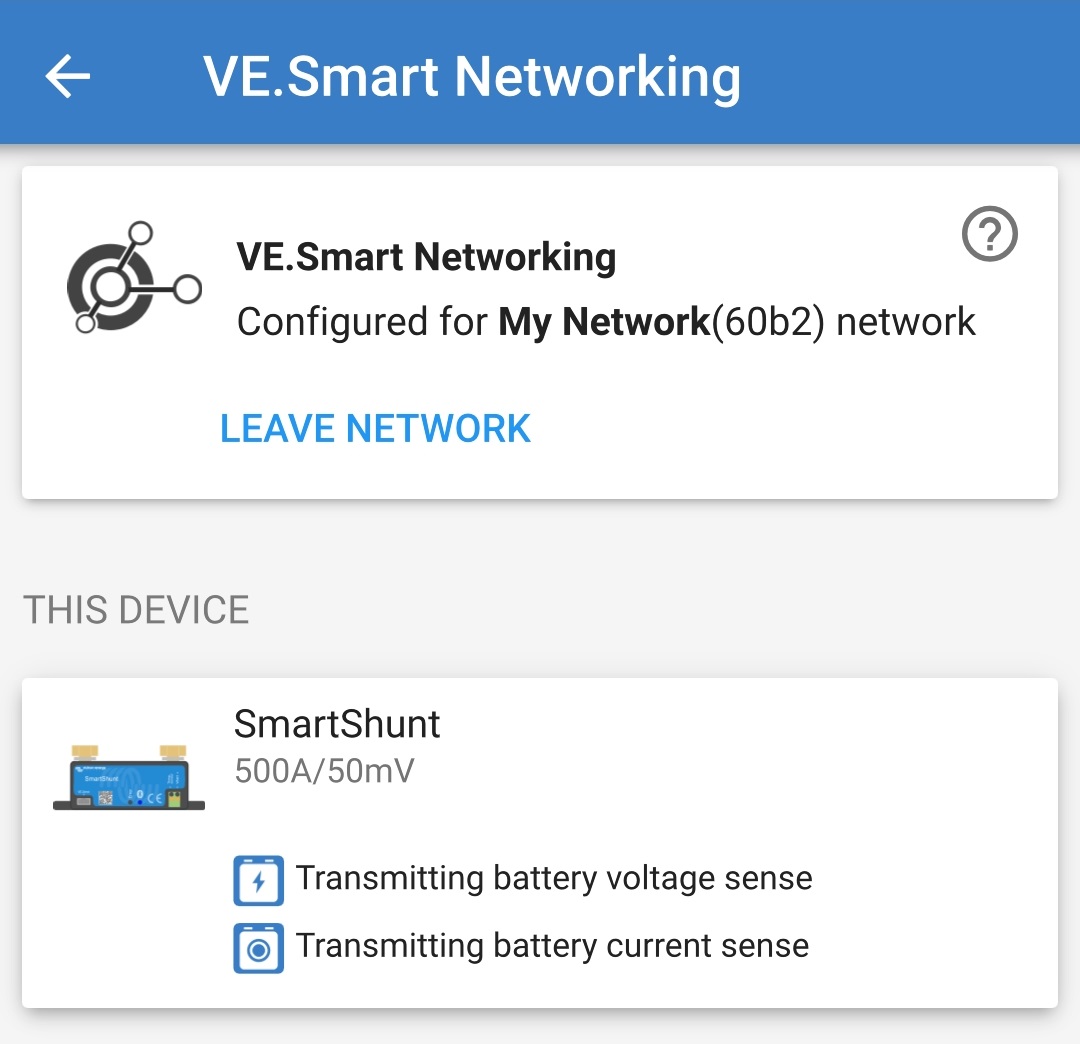
Select VE.Smart networking to access the VE.Smart networking page.

Select CREATE NETWORK (or JOIN NETWORK if a VE.Smart network has already been created).
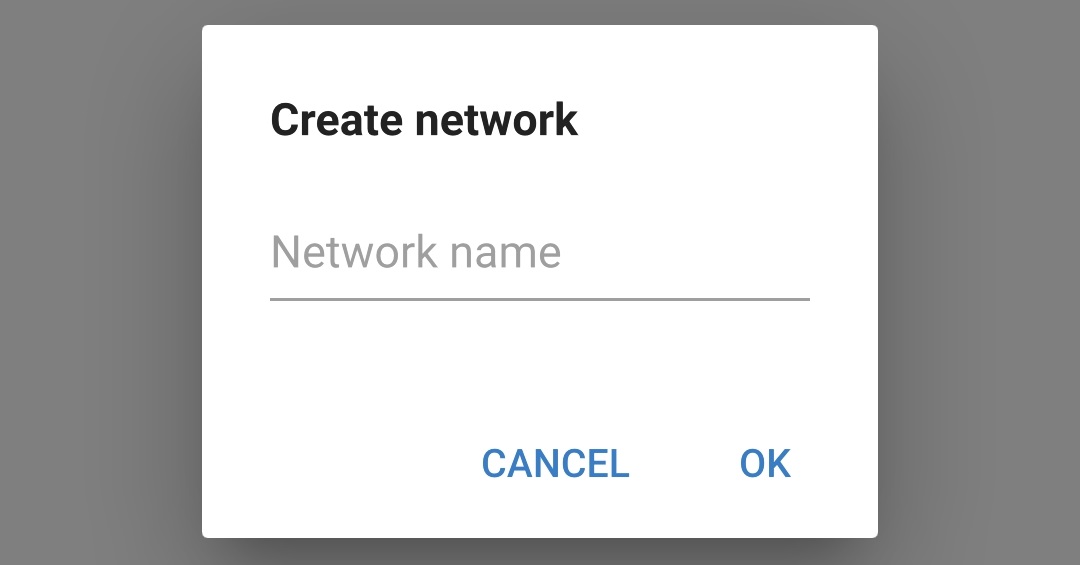
Enter a name to identify the VE.Smart network and then select OK.
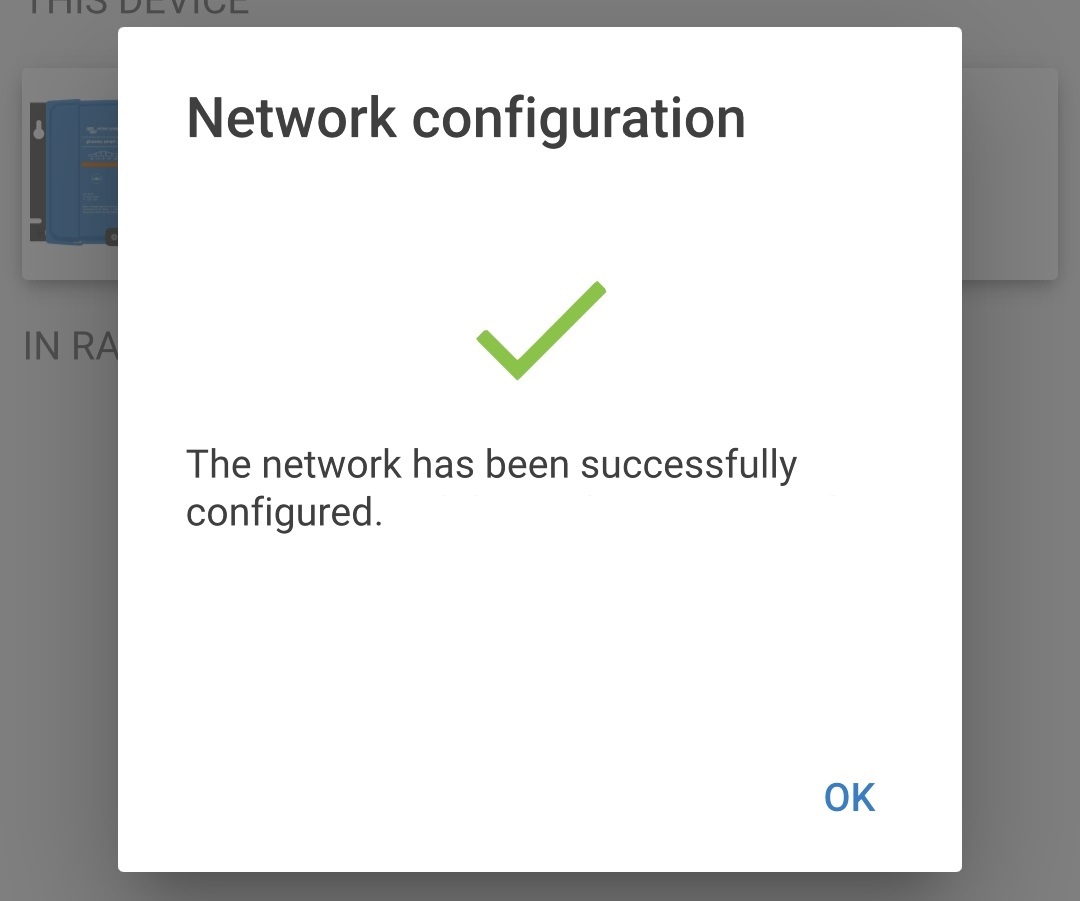
After a short delay a pop-up dialog box will appear confirming that the network has been successfully configured; select OK to close the dialog box.
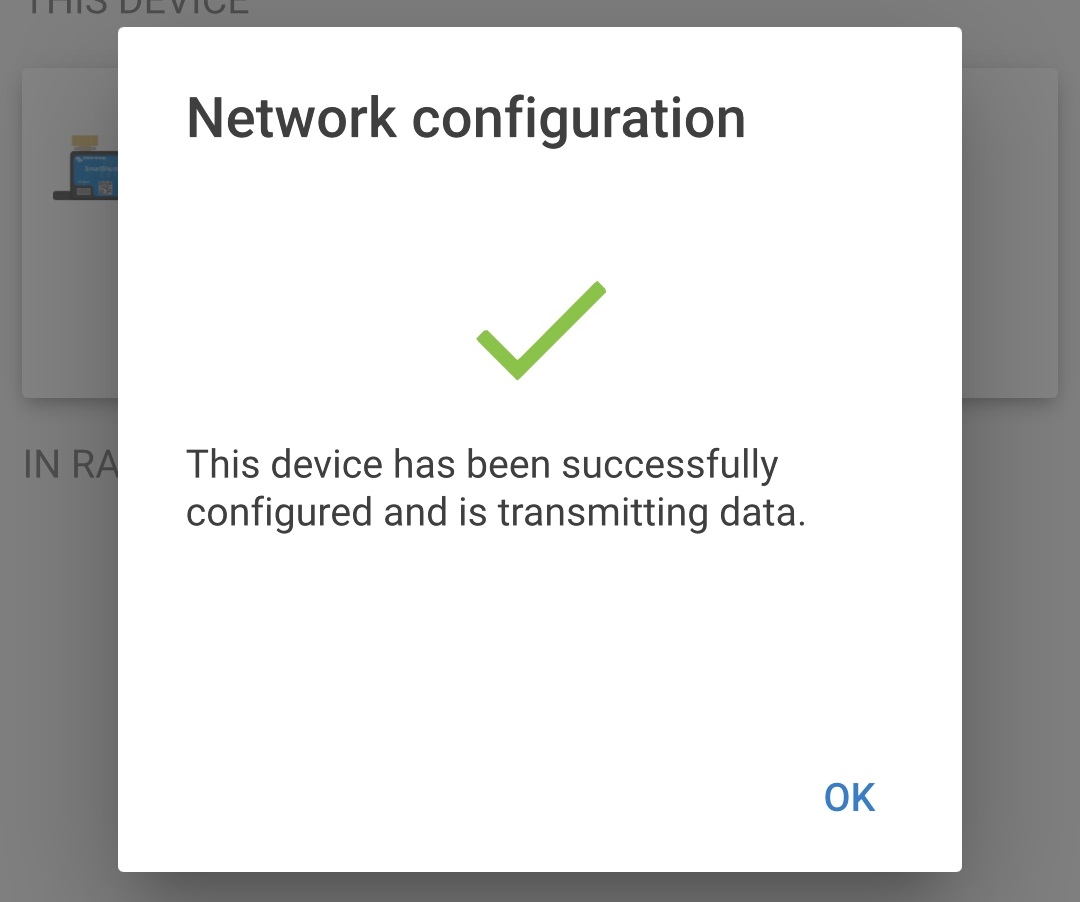
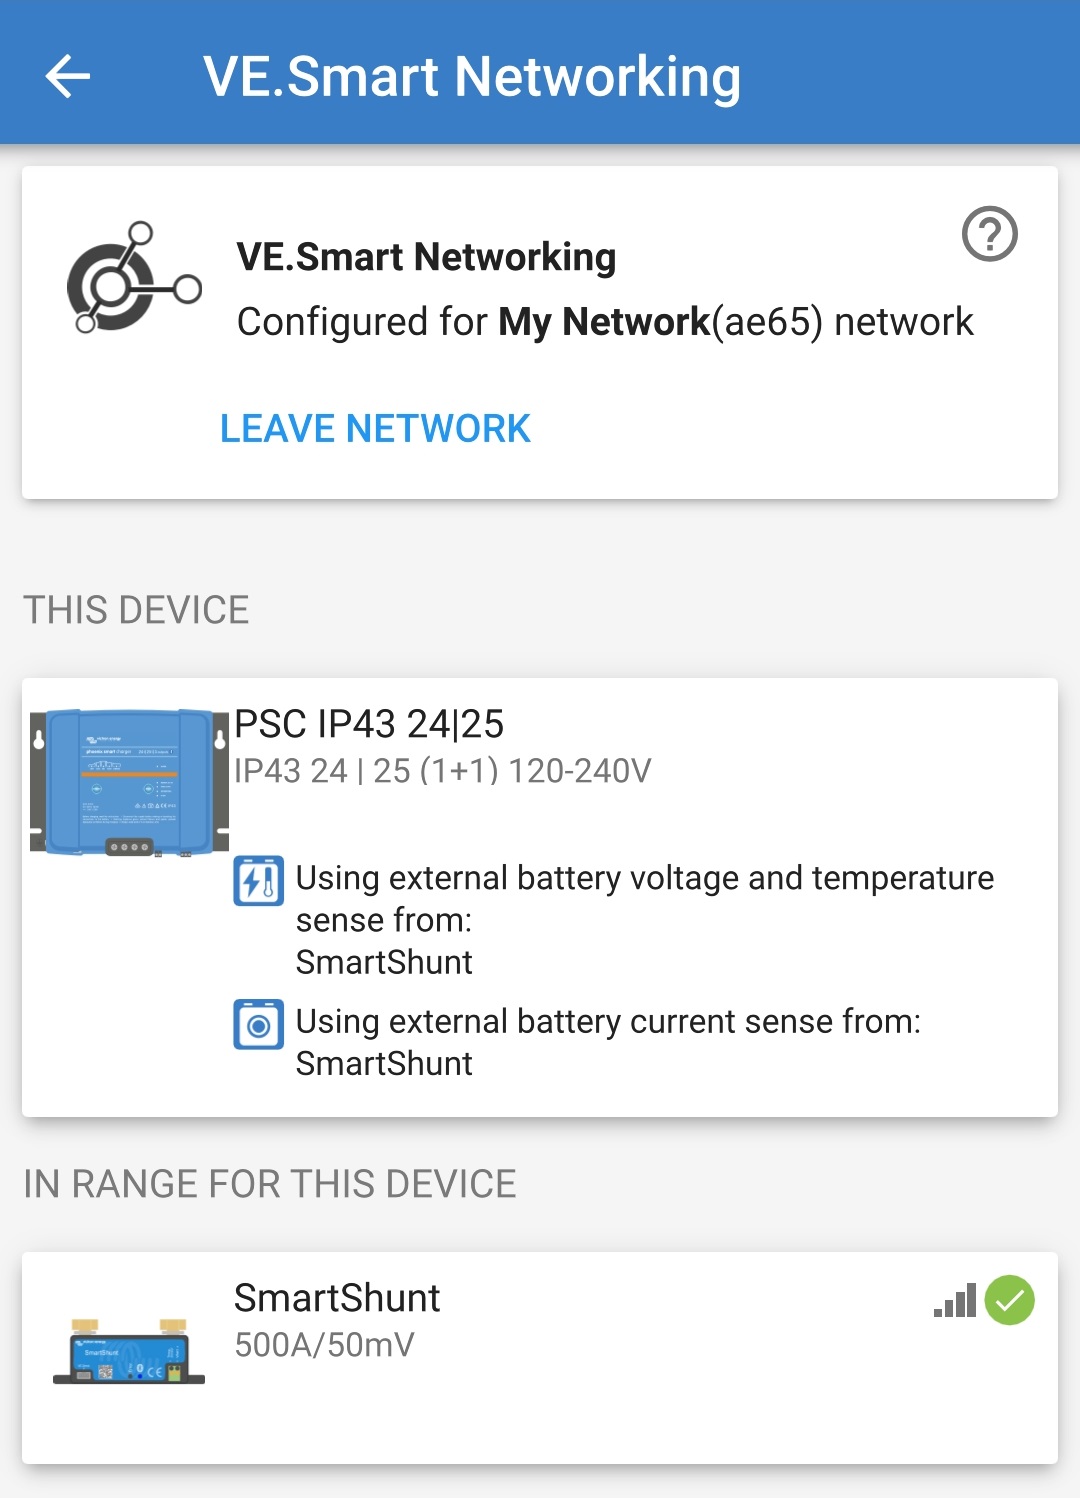
The VE.Smart network configuration details are displayed within the the VE.Smart networking page.
End the current Bluetooth session by exiting into the VictronConnect Device list Local page.
Connect the Smart IP43 Charger AC power cable to a mains power outlet; after a short delay all LEDs will illuminate briefly, then the LEDs indicating the current charge mode and charge state will illuminate.
Using a Bluetooth enabled device (mobile phone or tablet), open the VictronConnect app and locate the Smart IP43 Charger (or other VE.Smart networking compatible charger) in the Device list Local page, then connect to the device (the default PIN code is stated on a label located on the side of the charger, or try 000000 if there is no label).
Select the Settings icon (gear in the top right corner) to access the Settings page.
Select VE.Smart networking to access the VE.Smart networking page.
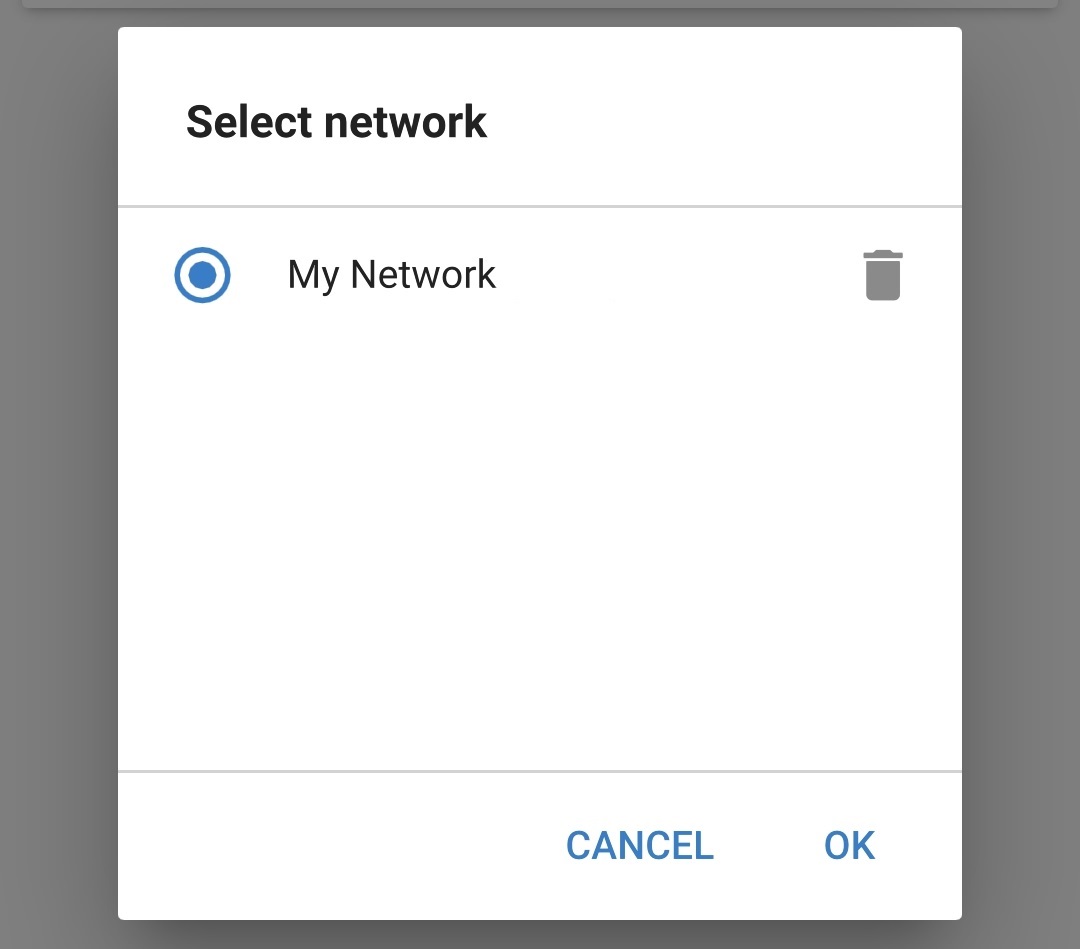
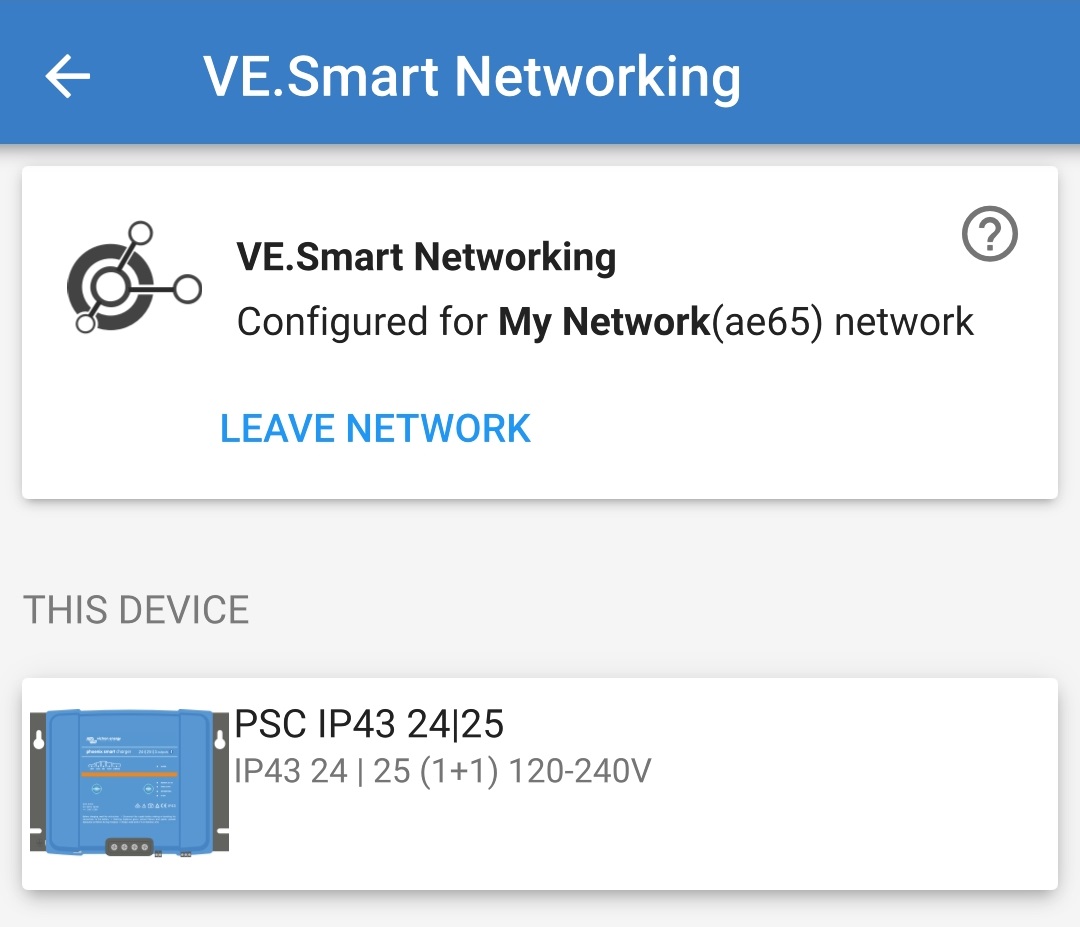
Select JOIN EXISTING.
Select the existing VE.Smart network you want to join, then select OK.
After a short delay a pop-up dialog box will appear confirming that the network has been successfully configured; select OK to close the dialog box.
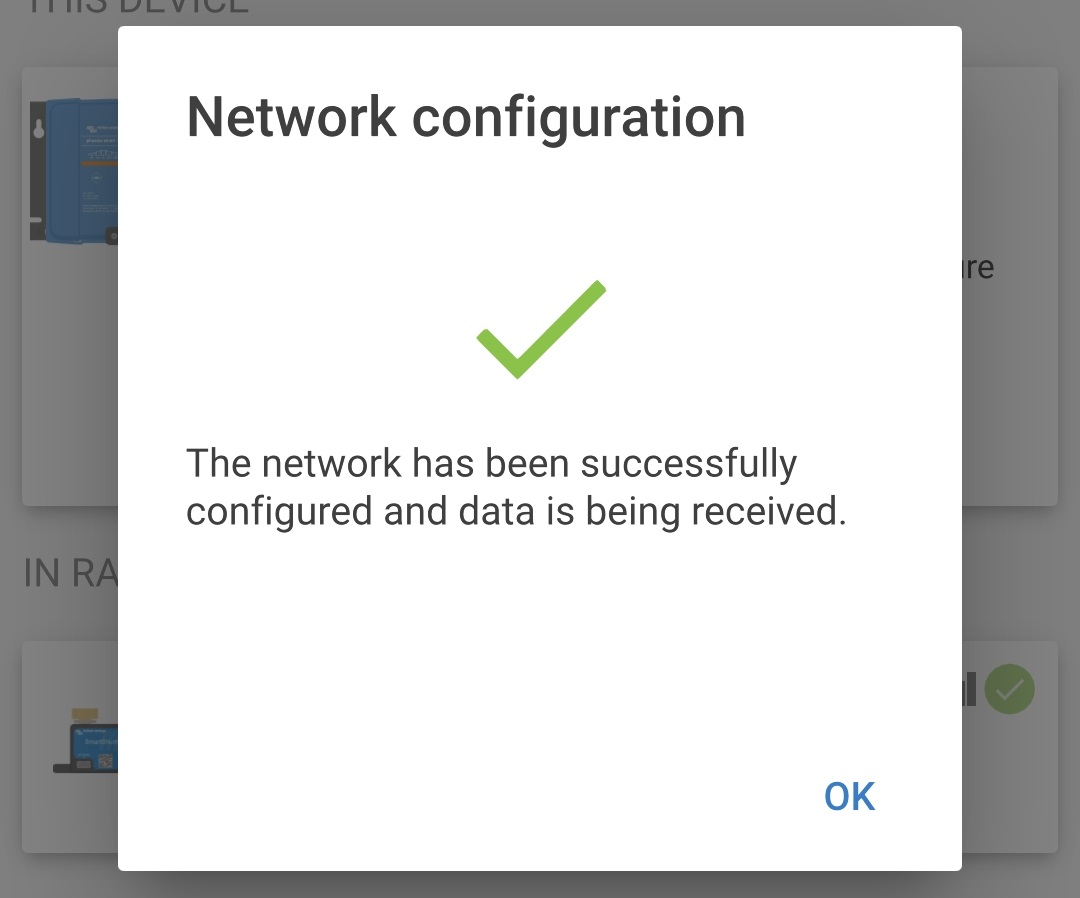
The VE.Smart network configuration details are displayed within the the VE.Smart networking page.
For systems with additional VE.Smart networking compatible chargers connected to the same battery / battery bank, repeat steps 8 to 16 above to include each remaining charger into the common VE.Smart network.
VE.Smart networking has now been configured; when VE.Smart networking is enabled:
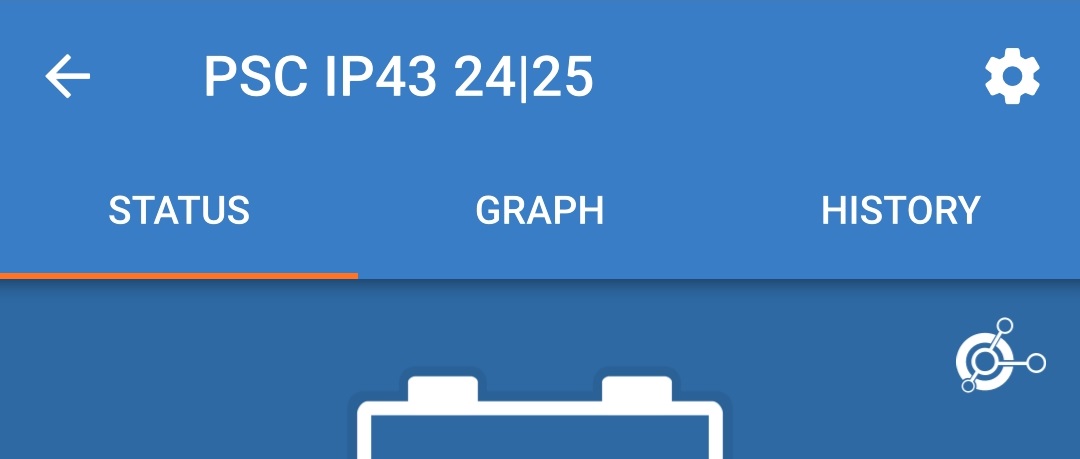
The VE.Smart network symbol will appear in the top right corner of the Status screen (of all devices within the VE.Smart network).
The active charge state LED on the charger (BULK, ABS, FLOAT and STORAGE) will blink (turn off) momentarily every 4 seconds.

Notice
Multiple chargers in a common VE.Smart network must all have the same charge settings, since the master can change dynamically.
6.4.2. Synchronised charging
To setup a VE.Smart Network with Synchronised charging:
Connect all Smart IP43 Charger AC power cables to a mains power outlet; after a short delay all LEDs will illuminate briefly, then the LEDs indicating the current charge mode and charge state will illuminate.
Using a Bluetooth enabled device (mobile phone or tablet), open the VictronConnect app and locate the first Smart IP43 Charger in the Device list Local page, then connect to the device the default PIN code is stated on a label located on the side of the charger, or try 000000 if there is no label).
Select the Settings icon (gear in the top right corner) to access the Settings page.
Select VE.Smart networking to access the VE.Smart networking page.
Select CREATE NETWORK (or JOIN NETWORK if a VE.Smart network has already been created).
Enter a name to identify the VE.Smart network and select OK.
After a short delay a pop-up dialog box will appear confirming that the network has been successfully configured; select OK to close the dialog box.
The VE.Smart network configuration details are displayed within the the VE.Smart networking page.
End the current Bluetooth session by exiting into the VictronConnect Device list Local page.
Using a Bluetooth enabled device (mobile phone or tablet), open the VictronConnect app and locate the subsequent Smart IP43 Charger (or other VE.Smart networking compatible charger) in the Device list Local page, then connect to the device (the default PIN code is stated on a label located on the side of the charger, or try 000000 if there is no label).
Select the Settings icon (gear in the top right corner) to access the Settings page.
Select VE.Smart networking to access the VE.Smart networking page.
Select JOIN EXISTING.
Select the existing VE.Smart network you want to join, then select OK.
After a short delay a pop-up dialog box will appear confirming that the network has been successfully configured; select OK to close the dialog box.
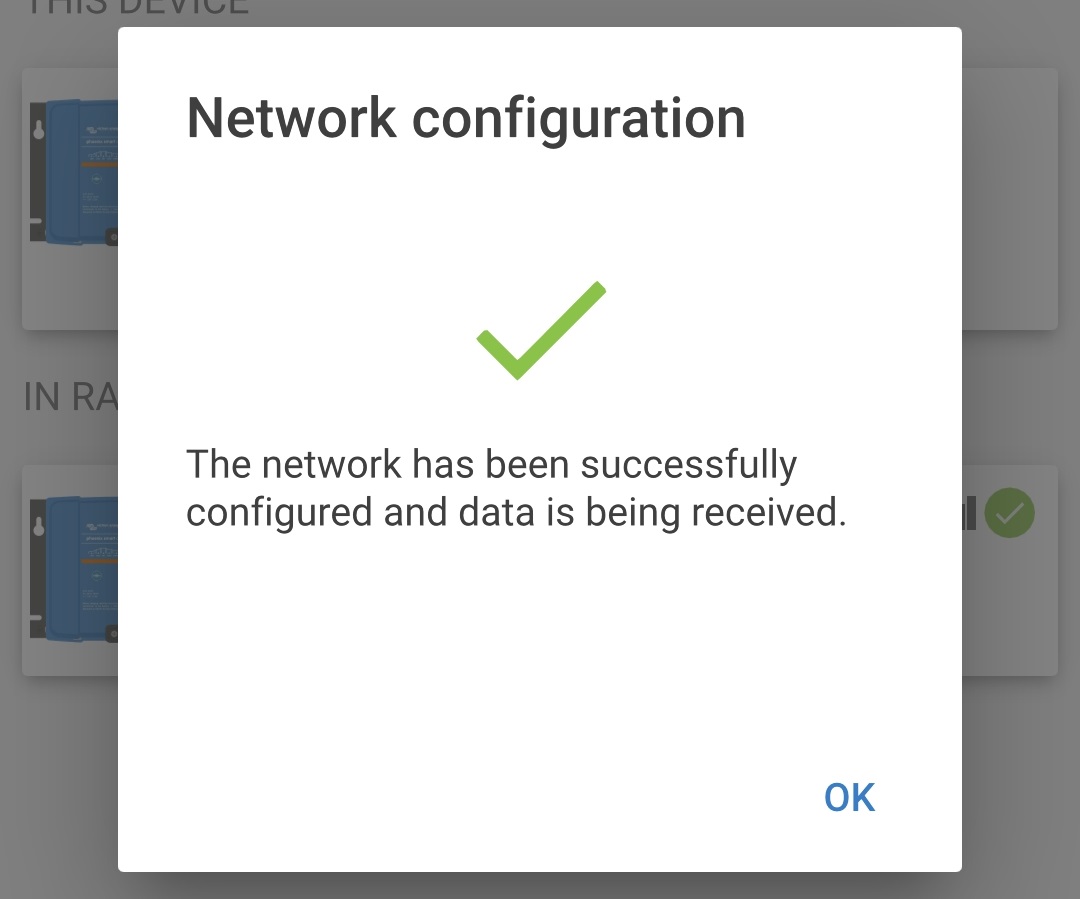
The VE.Smart network configuration details are displayed within the the VE.Smart networking page.
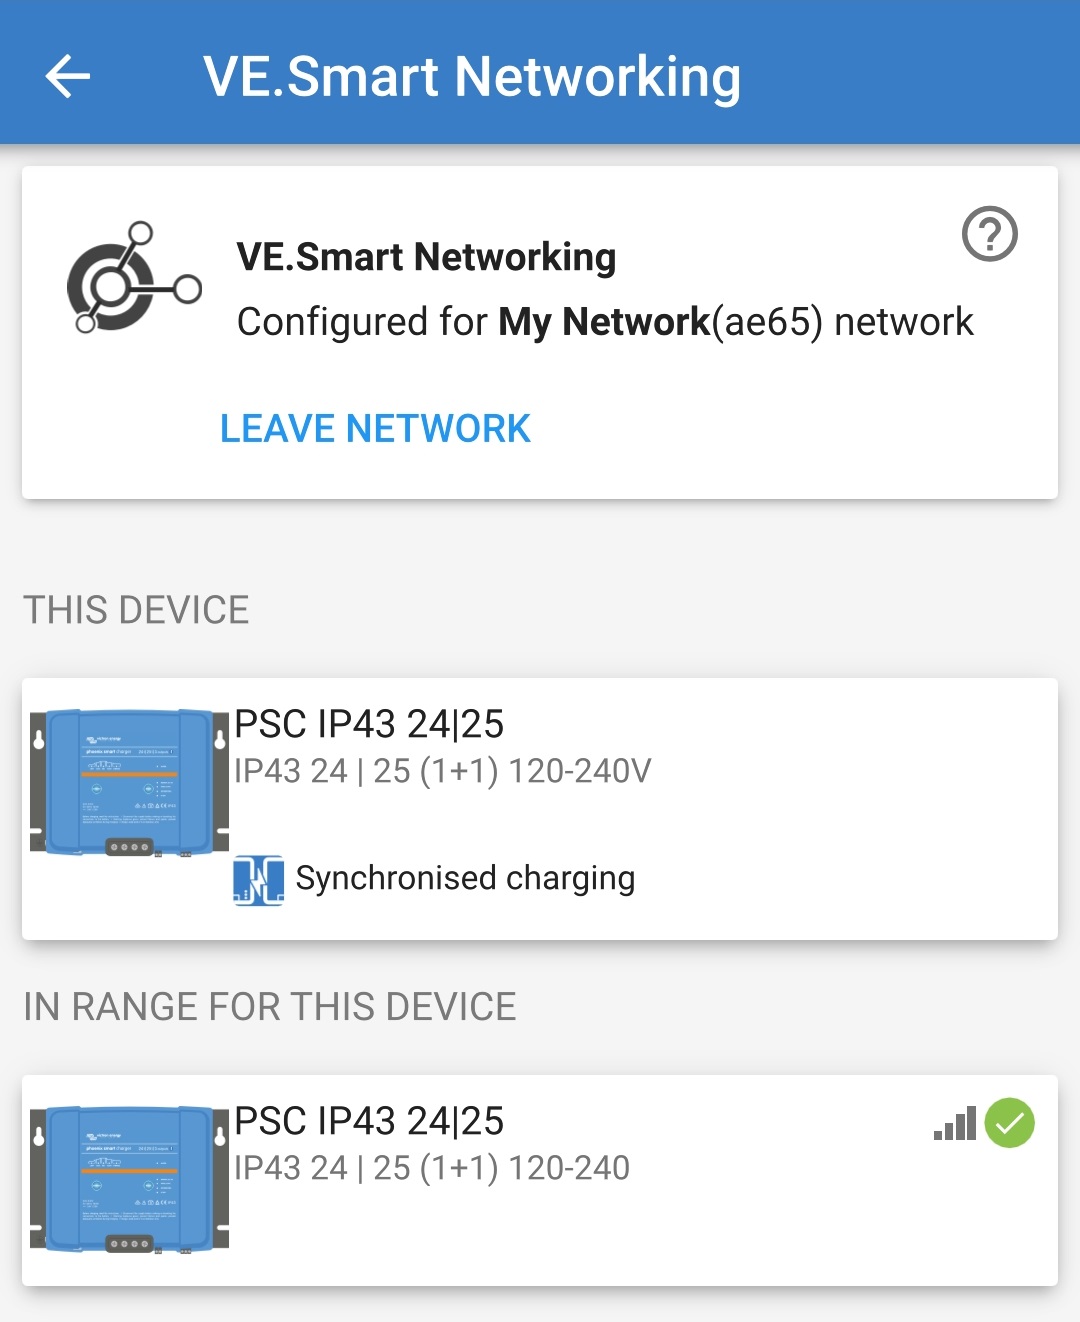
For systems with additional VE.Smart networking compatible chargers connected to the same battery / battery bank, repeat steps 9 to 17 to include each remaining charger into the common VE.Smart network.
VE.Smart networking has now been configured; when VE.Smart networking is enabled:
The VE.Smart network symbol will appear in the top right corner of the STATUS screen (of all devices within the VE.Smart network).
The active charge state LED on the charger (BULK, ABS, FLOAT and STORAGE) will blink (turn off) momentarily every 4 seconds.
Notice
Multiple chargers in a common VE.Smart network must all have the same charge settings, since the master can change dynamically.
6.5. Reset to defaults
If required, all Smart IP43 Charger settings can be reset/restored to factory defaults using a Bluetooth enabled device (mobile phone or tablet) with the VictronConnect app.
Note this operation does not reset any Bluetooth related settings, such as the Bluetooth PIN code or pairing information.
To reset all settings to factory defaults:
Connect the Smart IP43 Charger AC power cable to a mains power outlet; after a short delay all LEDs will illuminate briefly, then the LEDs indicating the current charge mode and charge state will illuminate.
Using a Bluetooth enabled device (mobile phone or tablet), open the VictronConnect app and locate the Smart IP43 Charger in the Device list Local page, then connect to the device (the default PIN code is stated on a label located on the side of the charger, or try 000000 if there is no label).
Select the Settings icon (gear in the top right corner) to access the Settings page.
Select the Device options icon (three vertical dots in the top right corner) to access the Device options dropdown menu.
Select Reset to defaults from the dropdown menu to open the Restore device pop-up dialog box.
Read the warning message, then select Yes to proceed.
All settings have now been reset/restored to factory defaults.