Does your BMV state of charge (SOC) synchronise too early or not detect a full charge?
If so it is worth noting there are various settings for differing batteries and systems, to ensure your BMV works correctly.
The default setup and settings are applicable for most situations, however the instructional video below shows you how to optimise the BMV-700 series synchronisation parameters for varying scenarios, to ensure the battery SOC read-out functions correctly.
BMV-700 series models
There are 3 model variants within the BMV series range: BMV-700 & BMV-702 (6.5- 95 VDC supply voltage range) and the BMV-700HS (60– 385 VDC supply voltage range). The principal function of the BMV series is to follow and indicate the state-of-charge of a battery. For the additional functionality that the BMV-702 provides, namely starter battery or temperature or mid-point voltage monitoring, please see the quick install guide.
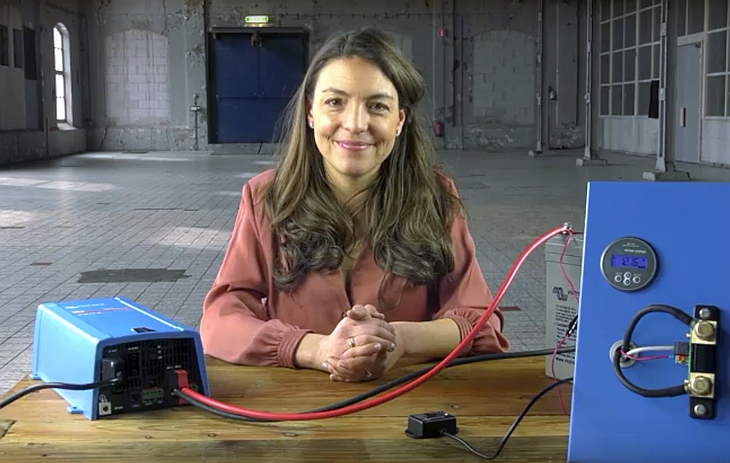
The video below gives clear instructions to ensure the BMV-700 series battery monitor synchronisation parameters are optimised.
How to optimise the BMV-700 series sync parameters
Video text transcript
Hi there and welcome to this video showing how to optimise the BMV synchronisation parameters. In this video I will explain how the BMV knows when the battery is fully charged, and how you can optimise the related parameters.
In most installations, entering the battery capacity is sufficient. The BMV will automatically detect the system voltage and adapt its settings accordingly. But in some installations, for example with solar chargers, or lithium batteries, it is necessary to make some changes.
For a reliable readout, the state of charge as displayed by the battery monitor has to be synchronised regularly with the true state of charge of the battery. This is accomplished by fully charging the battery. The BMV will detect this full charge, and automatically reset the state of charge to 100%.
There are three parameters that define this full charge detection. Setting these parameters too wide causes the BMV to jump to 100% SOC too soon, which causes the BMV to exaggerate the remaining capacity at any given time. Conversely, setting these parameters too narrow causes the BMV to no longer detect a full charge, which is an even worse situation. Without regular synchronisation therefore, the SOC reading would drift and become unreliable.
How does the BMV know when the battery is fully charged?
The BMV resets to “fully charged” when the voltage reading exceeds the Charged voltage parameter and, simultaneously, the charge current is below the Tail current parameter, for a particular time. This time is called the Charged detection time.
We will use the Bluetooth dongle to configure the BMV.
Insert the dongle into the BMV.
Switch on Bluetooth on your phone.
Open VictronConnect and select the BMV.
On your smartphone, go to settings by clicking the gearwheel at the right top of the screen. We’ve already configured the battery capacity.
Now let’s walk through the sync settings.
We recommend to set the Charged voltage 0.3V below the end of charge voltage of the charger. Typically the float voltage.
The battery used in this example requires a float voltage of 13.8 Volt. Therefore we set the charged voltage to 13.5 Volt.
Installing a solar system? In solar systems or other applications with fluctuating charge currents, the ‘charged’ voltage should be set only slightly below the absorption charge voltage (for example: 14.1V in case of 14.4V absorption voltage). This will prevent the BMV from switching prematurely to 100% state of charge.
The Tail current is expressed as a percentage of the battery capacity. When the charge current has dropped below this setting, the battery is considered as fully charged. The default setting is 4%, which is fine for most systems, including ours.
The charged detection time is the time during which the previous two parameters must be met in order to consider the battery as fully charged.
The default setting is 3 minutes, which is also fine for most systems.
We recommend to keep this value at 1.25 for lead acid batteries. And set it to 1.05 for Li-ion batteries. A value of 1.00 disables the Peukert compensation.
The Charge Efficiency Factor compensates for the Ah losses during charging. 100% means no loss. We recommend to leave this setting at its default, 95%, for lead batteries. And set it to 99% for lithium batteries.
Make sure your battery is fully charged at least twice a month, which ensures the BMV can synchronise and show the correct state of charge.
Thank you for watching this video.
Conclusion
Thanks to Marianka Pranger for organising this and Claire for narrating the video.
If you have any particular instructional videos that you’d like to see made, please leave a comment in Disqus below or email Marianka directly at: mpranger@victronenergy.com
Additional videos in the instructional video series can be found at:
https://www.victronenergy.com/blog/category/instructional-videos/
John Rushworth


